# Autoresponder
An autoresponder is an automated system that sends predefined emails based on specific triggers, such as newsletter openings, link clicks, form submissions, or user registrations. It streamlines communication by providing instant responses, nurturing leads, and delivering timely, personalized messages without manual effort.
# Create Newsletter Autoresponders
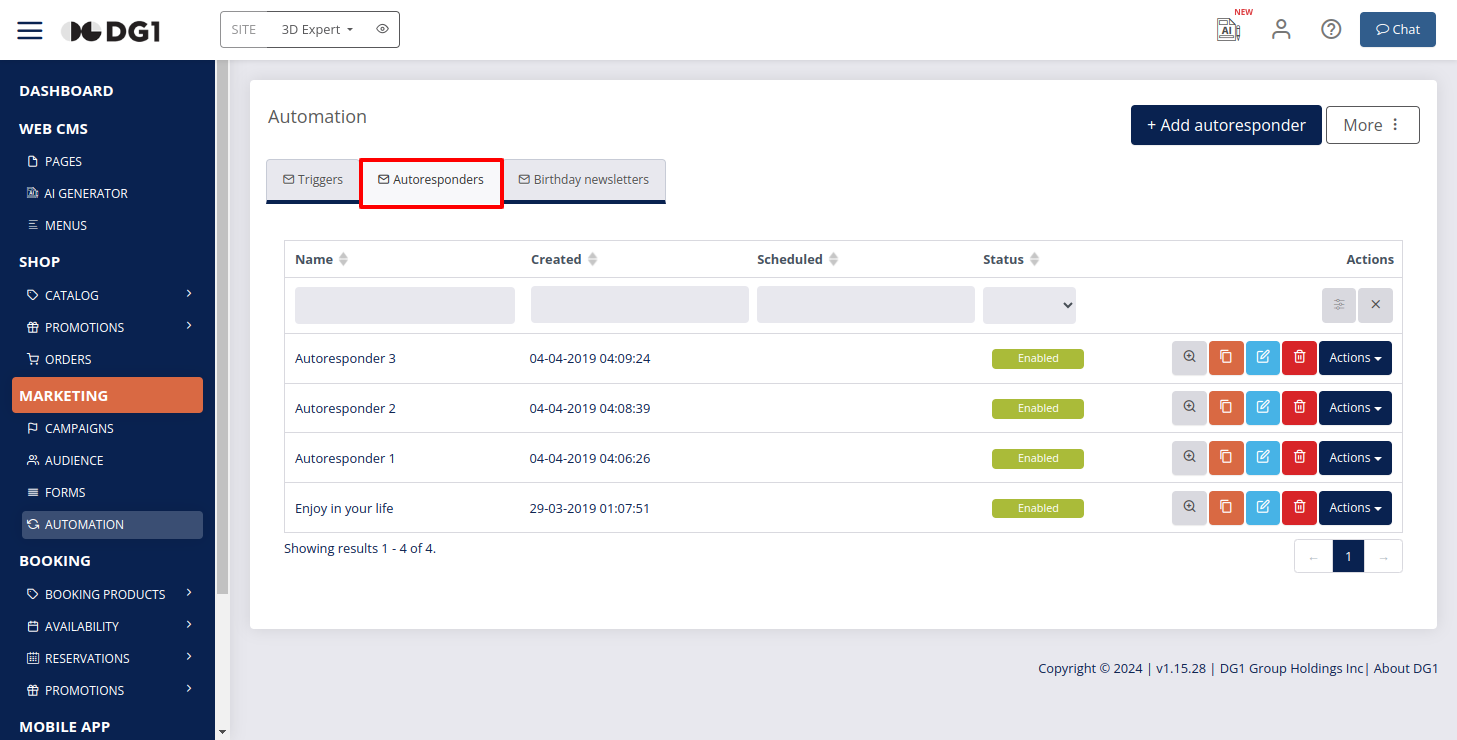
- Go to the Automation page under the Marketing section in the sidebar menu and select the Autoresponders tab.
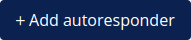
- Click +Add autoresponder
 .
.
Enter the following details to create a new autoresponder:
- Name – Enter a name for the autoresponder.
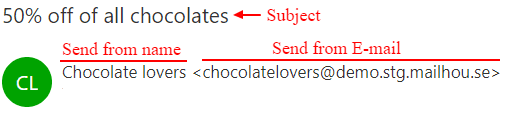
- Subject – This is the email subject line that recipients will see. Since many recipients decide whether to open an email based on the subject line, it’s important to craft a compelling one to encourage engagement.
- Send from name – Enter the sender's name for the autoresponder email. Example: Chocolate lovers.
- Reply-To Email – We recommend keeping the default email. If you want to receive replies, enter a valid email address.
- Mailing lists – The default mailing list will be pre-selected. To add more, click the gray field next to the default one and select from the dropdown. Only customers in the selected list(s) will receive the autoresponder.
- Description (optional) – Provide additional details if needed.
- Language – Choose a language (e.g., English).
- Newsletter template – Select a template of your choice.
To enter the content editor, click Edit newsletter content
 .
.
This brings you to the most important part of creating a autoresponder – preparing the content. Use the drag-and-drop sections to build your newsletter. Learn more about the email builder here (opens new window).
Recommendation
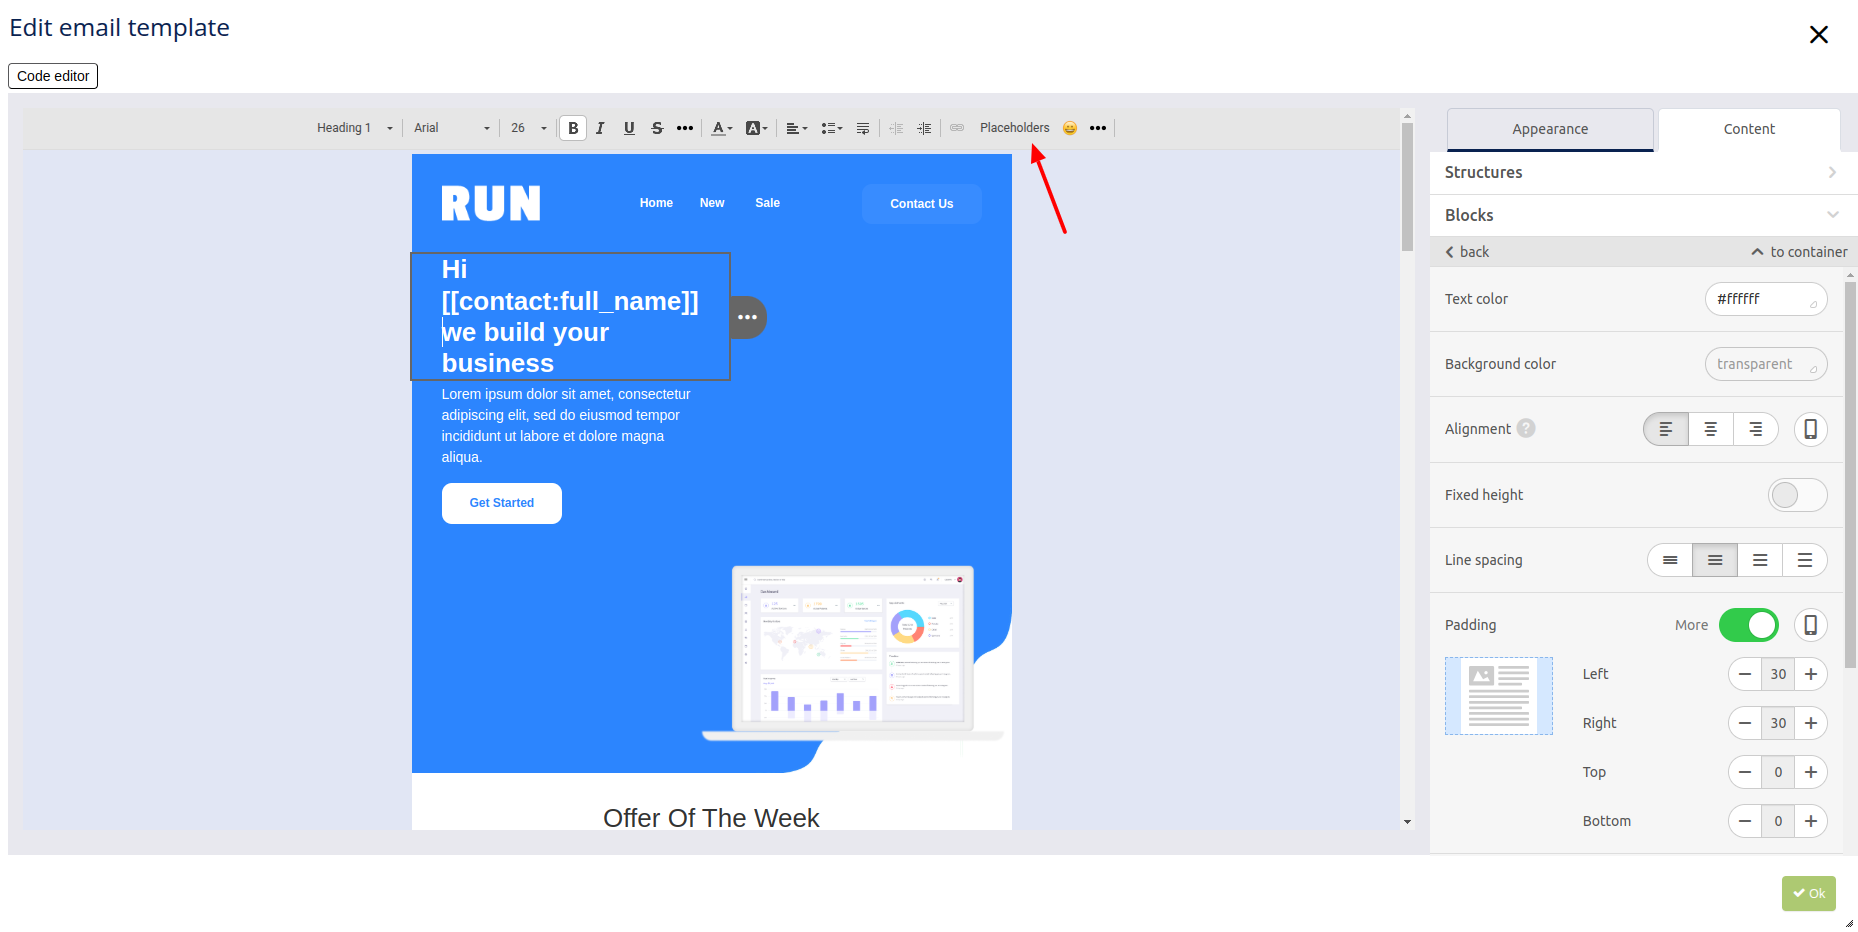
Personalization is a powerful tool to make your clients feel valued. Address recipients by their first name and include details relevant to their interests. A simple Dear Sarah can significantly increase open rates.
To personalize content, click Placeholders ![]() , select an attribute, and structure your text around it. You can choose from multiple customer placeholders and customer attribute placeholders, but make sure these attributes have been imported beforehand.
, select an attribute, and structure your text around it. You can choose from multiple customer placeholders and customer attribute placeholders, but make sure these attributes have been imported beforehand.
- Once you’ve finished editing your newsletter, click OK
 .
. - Click Next
 to move on to the final step – Triggers.
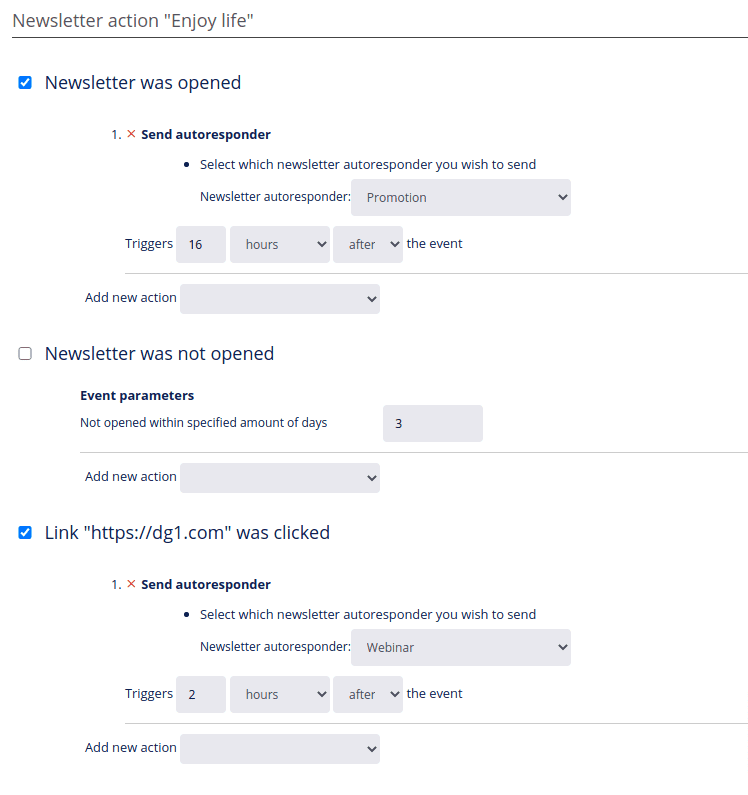
 - If you have an Autoresponder ready, you can select one or more trigger options:
- If the newsletter was read.
- If the newsletter was not read.
- If a link was clicked. (only available if links were included in the newsletter)
 8. To finalize and save your autoresponder campaign, click Finish
 ![]() .
.