# Quick campaigns
After becoming familiar with all marketing tools in your DG1 platform we would like to introduce you to the quickest way of creating a full marketing campaign.A tool that will help you create a campaign with several channels Newsletter, Message, Call list and direct mail all in one.
# In this section
# Create Quick campaign
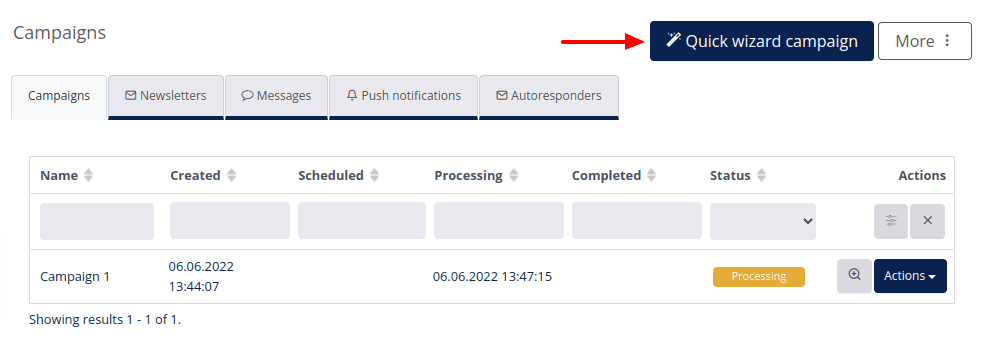
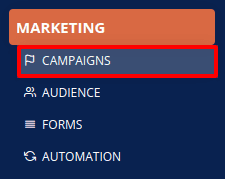
- Go to Marketing section of DG1 and click Campaigns.
- Click the Quick wizard campaign
 to create a quick campaign.

The moment you click Quick campaign you enter a Wizard which will guide you through all the steps of creating a great multichannel campaign.
- Enter details about Quick campaign:
- Name your campaign. Example: White chocolate promo Okt.
- Choose your Mailing lists. A Default mailing list is already chosen. If you want to get rid of it click the “x”. To select multiple mailing lists click in the window and choose mailing lists.
- Select Segments.
Note
By adding segments, you will narrow down your mailing lists contacts to only those contacts who match contacts in your segments. This is fantastic when you wish to focus on only certain people with certain interests. Example: White chocolate and nuts lovers.
- Choose the Language of the campaign. Example: English.
- OPTIONAL: Under Advanced settings schedule the processing of your campaign if you wish to activate the campaign on a certain date and at a specific time.
- Click Next
 .
.
At this stage your campaign has already been saved to the campaign list.
Note
If you ever leave or exit this campaign, you will not be able to finish it in the quick campaign wizard. You will have to go and finish up and activate each marketing tool separately.
- Click Finish
 .
.
# Quick campaign - Newsletter
If you do not wish to add Newsletter to your campaign, click Skip ![]() .
.
First step:
- Write a Subject. Example: Get your favorite white chocolate 50% off.
- Write a Summary. Example: We have a super high-value offer today to save 50% off White Chocolate. This offer will be valid only until the end of the month!
- Choose a Newsletter template. Example: Craft Fresh Blue.
- Click Next
 .
.
Second step:
- Create your own newsletter content (Add photos, links and texts to your likings).
Text alternative for email clients which struggle to open HTML content will be created automatically. - Click Next
 .
.
Note
To find out more on how to create a newsletter please go to Marketing newsletter manual.
# Quick campaign - Message
If you do not wish to add Message to your campaign click Skip ![]() .
.
- Create a text Message for your customers.
Tip: To make messages more personal add Customer data/attributes. Example: First name.
- After you add your text and customer data then also add the Unsubscribe link.
Note
To find out more on how to create a message, go and check Marketing message manual.
Click Finish ![]() .
.
# Activate and process Campaign
Your Campaign has been added to the list of campaigns and the Status is Initialized. Before you activate this campaign you can still View ![]() it, Edit
it, Edit ![]() it or Delete
it or Delete ![]() it .
it .
- Go to Marketing section of DG1 and click Campaigns.

- Click Actions and Activate campaign.

- Check the information and click OK.
The campaign will change status from Initialized to Pending. When the status is Pending you still have time to re-think about your campaign and change details about each and every segment of the campaign. For example you can do that by going to Newsletters, finding your campaign and Edit the Newsletter. To Edit ![]() and change channels Messages just do the same.
and change channels Messages just do the same.
Warning
If you have scheduled your campaign in advance do not go to further steps of processing it, because the scheduled campaign will process itself. In the end, the status will be changed to Completed.
- If you want to process Campaign go to Actions and click Process Now.

- Confirm it with OK.
You can View ![]() your Campaign and see the Costs, Statistics or other information for each channel.
your Campaign and see the Costs, Statistics or other information for each channel.
# Archive option
Once the campaign is processed you can not delete it anymore, but you can Archive ![]() it . After your Campaign is saved in the Archive, you will not be able to retrieve it.
it . After your Campaign is saved in the Archive, you will not be able to retrieve it.
To archive Campaign click Actions and select Archive. Confirm it with OK.

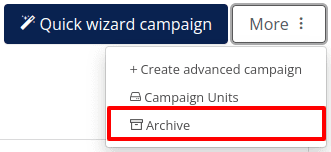
To check the archived Campaign, go to Archive and select Campaigns.

Archiving is recommended to clean the current list of your campaigns and separate the ones that are currently in action with those that are already completed.