# Payment methods
When setting up your online shop you have to set up payment methods.
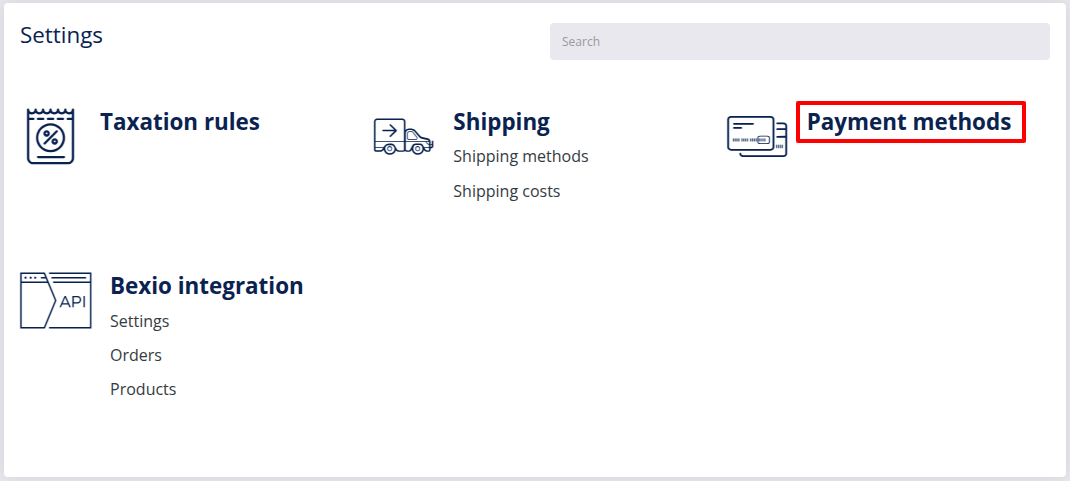
Go to the Settings page in your DG1 admin panel and click Payment methods.
Click Add
 .
.
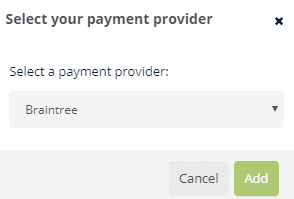
Select a payment method and click Add
 .
.
Note
Keep in mind that you can only select one payment method at a time.
If you want to have the possibility of paying with credit cards in your online shop, you can choose between different payment providers, such as Billplz, Braintree, Stripe and Payrexx, or choose alternative payment methods such as PayPal or Coinbase.
At the links provided below, you can get all the information for setting up account with each payment service provider:
- Billplz at www.billplz.com (opens new window)
- Braintree at www.braintreepayments.com (opens new window)
- Stripe at www.stripe.com (opens new window)
- PayPal at www.paypal.com (opens new window)
- Payrexx at www.payrexx.com (opens new window)
- Coinbase at commerce.coinbase.com (opens new window)
- Datatrans at www.datatrans.ch (opens new window)
Note
Before publishing your site, be sure to check if you are using production credentials for payment methods like PayPal, Stripe or Braintree.
- Payment provider image
Each payment provider can be represented with an image in the front end, which helps your customers recognize available payment methods. To add an image to your current payment method, click Select image , choose a file from your file selector or simply upload the image to the system and click Select & close
  .
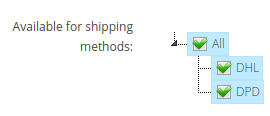
. - Limit payment methods based on selected shipping method
You can limit each payment method so that it is only available for specific shipping methods. By default the payment method is available for all the shipping methods that you’ve added to the system. To limit a payment method, uncheck the specific shipping methods and leave the check mark only with those shipping methods that you wish to connect to the current payment method
Note
When you have multiple sites, you need to add payment methods for each site individually.
# In this section
# Setting up Billplz
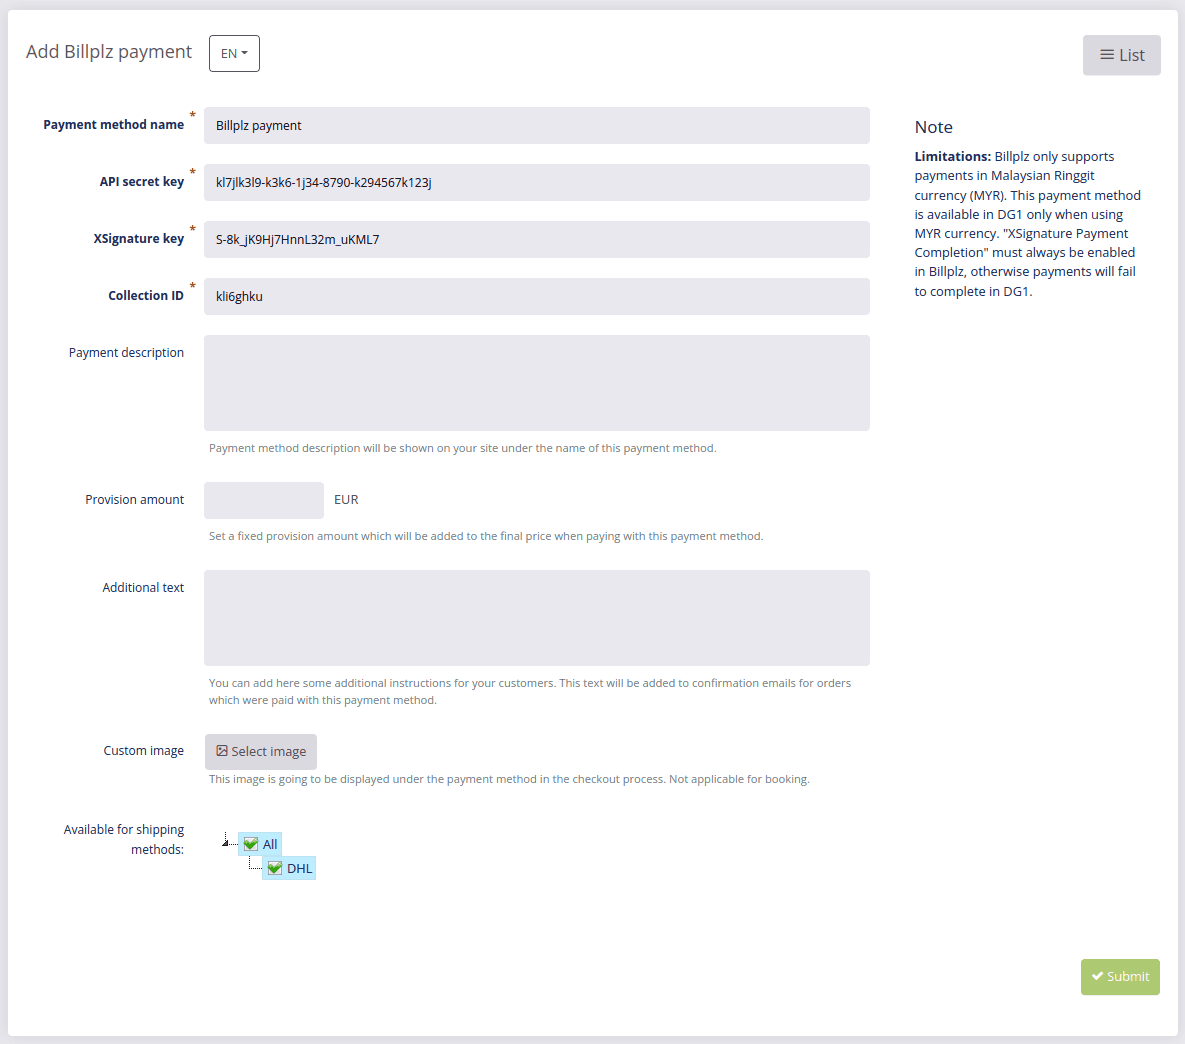
- To add Billplz as your payment method, you will need to choose the Payment method name and fill out the following form:
Once you have your Billplz profile, you must copy/paste the following information into the above form:
- API secret key
- XSignature key
- Collection ID
Here are short instructions on where to access them:
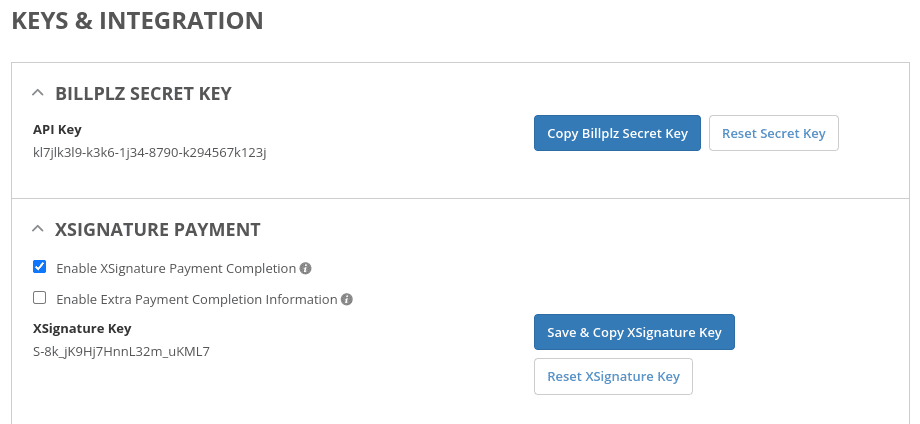
- Open your Billplz profile, access to your Billplz Account Settings
- Under Keys & Integration you can find API secret key and XSignature key
- Click on to Copy Billplz Secret Key button and Copy XSignature Key button
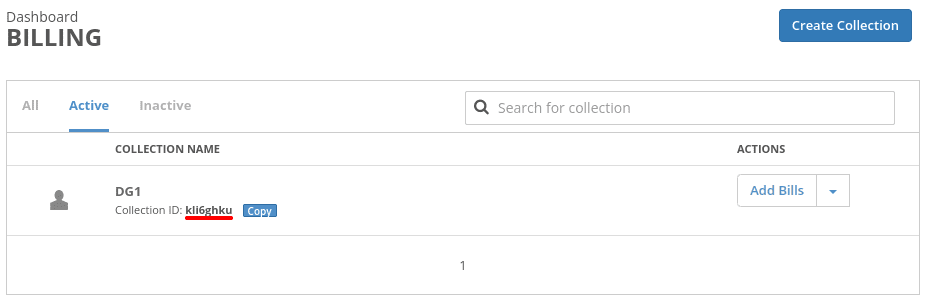
- To obtain the data needed for the Collection ID field, go to the Billing/Payment Form/Payout API section.
- Click on the Copy button and paste it into your platform
- Add any additional settings to the payment method and click Submit
 .
.
Important
Billplz only supports payments in Malaysian Ringgit currency (MYR). This payment method is available in DG1 only when using MYR currency. "XSignature Payment Completion" must always be enabled in Billplz, otherwise payments will fail to complete in DG1.
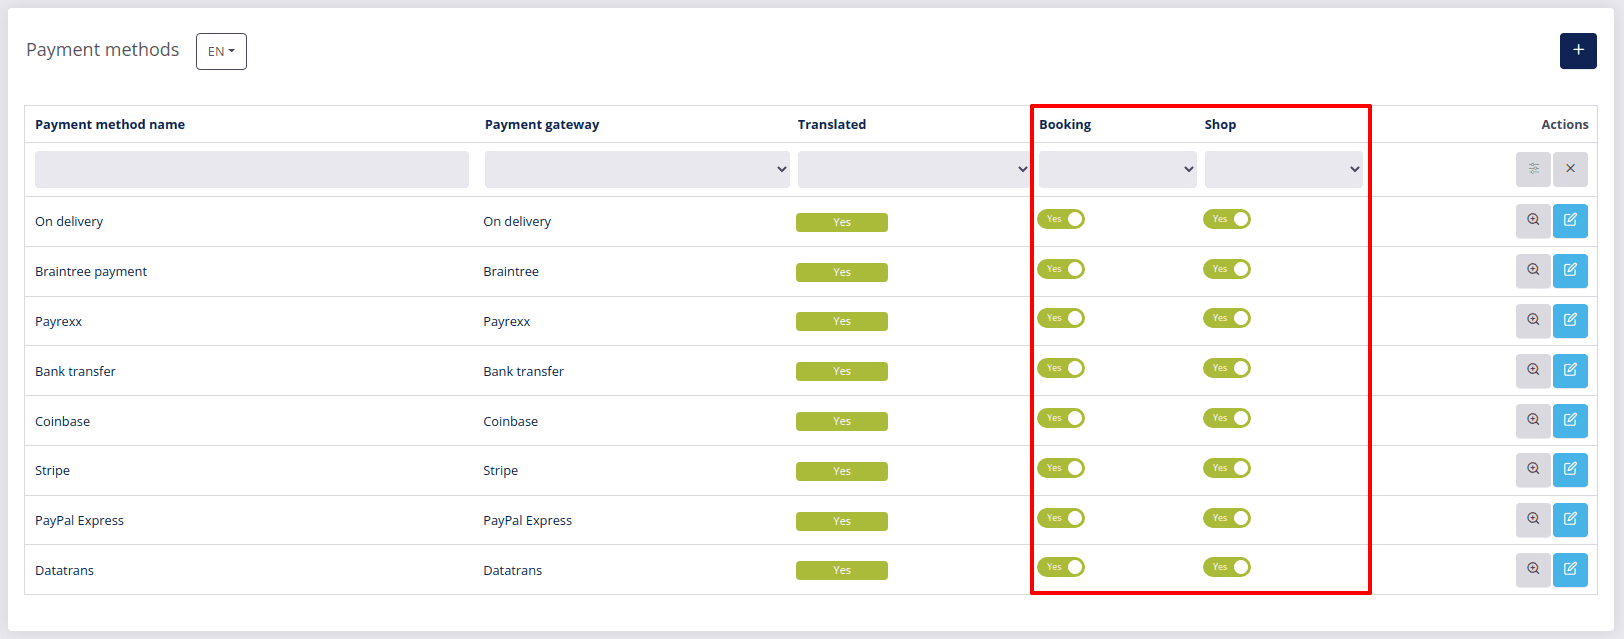
On the Payment methods page you can Edit ![]() details about all your payment methods and confirm any changes you’ve made by clicking Submit
details about all your payment methods and confirm any changes you’ve made by clicking Submit ![]() .
.
This is where you can also disable/enable the payment method by clicking yes or no in the list of payment methods. You can do this separately for Shop and Booking.
# Setting up Braintree
- To add Braintree as your payment method, you will need to choose the Payment method name and fill out the following form:
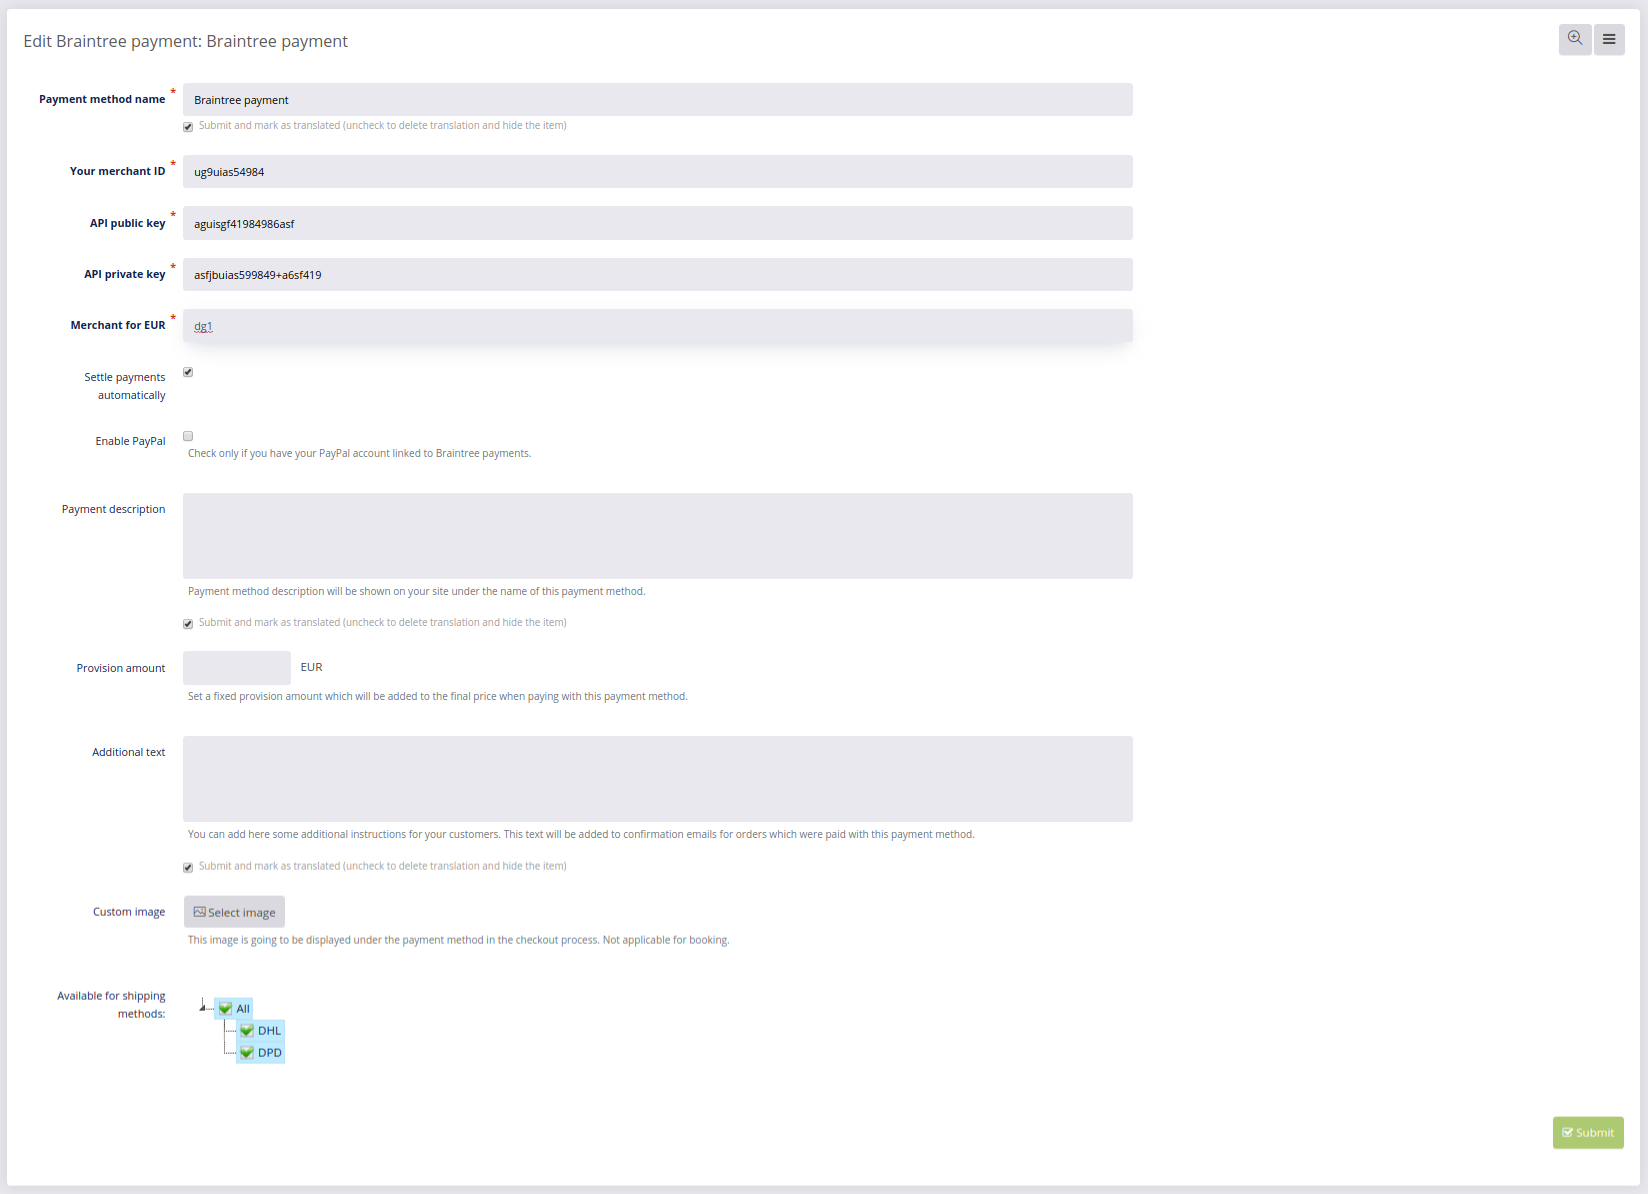
- Once you have your Braintree profile, you must copy/paste the following information into the above form:
- Payment method name
- Your merchant ID
- API public key
- API private key
- Merchant for your shop’s currency
Here are short instructions on where to access them:
- Open your Braintree profile, click the Cogwheel and select API.
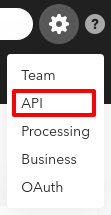
- Click View on the API Keys page, where you can find the following information:
- API Public key (Public key)
- API Private Key (Private key)
- Merchant ID

- To obtain the data needed for the Merchant for your shop’s currency field, click the Cogwheel in your Braintree profile and select Business.
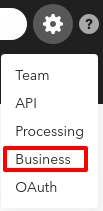
This is where you will find the Merchant Accounts from where you can copy a Merchant Account ID into your Merchant for your shop’s currency field.
- Optional:
- You can check Settle payments automatically. This means the payments will happen automatically, otherwise the payments will have to be settled manually in Orders section.
- You can set Provision amount. Example: 30 cents.
- Add any additional settings to the payment method and click Submit .
Important
Before publishing your site (going live), be sure to check if you are using production credentials for Braintree.
On the Payment methods page you can Edit ![]() details about all your payment methods and confirm any changes you’ve made by clicking Submit
details about all your payment methods and confirm any changes you’ve made by clicking Submit ![]() .
.
This is where you can also disable/enable the payment method by clicking yes or no in the list of payment methods. You can do this separately for Shop and Booking.
# Setting up Stripe
- To add Stripe as your payment method, you will need to choose the Payment method name and fill out the following form:
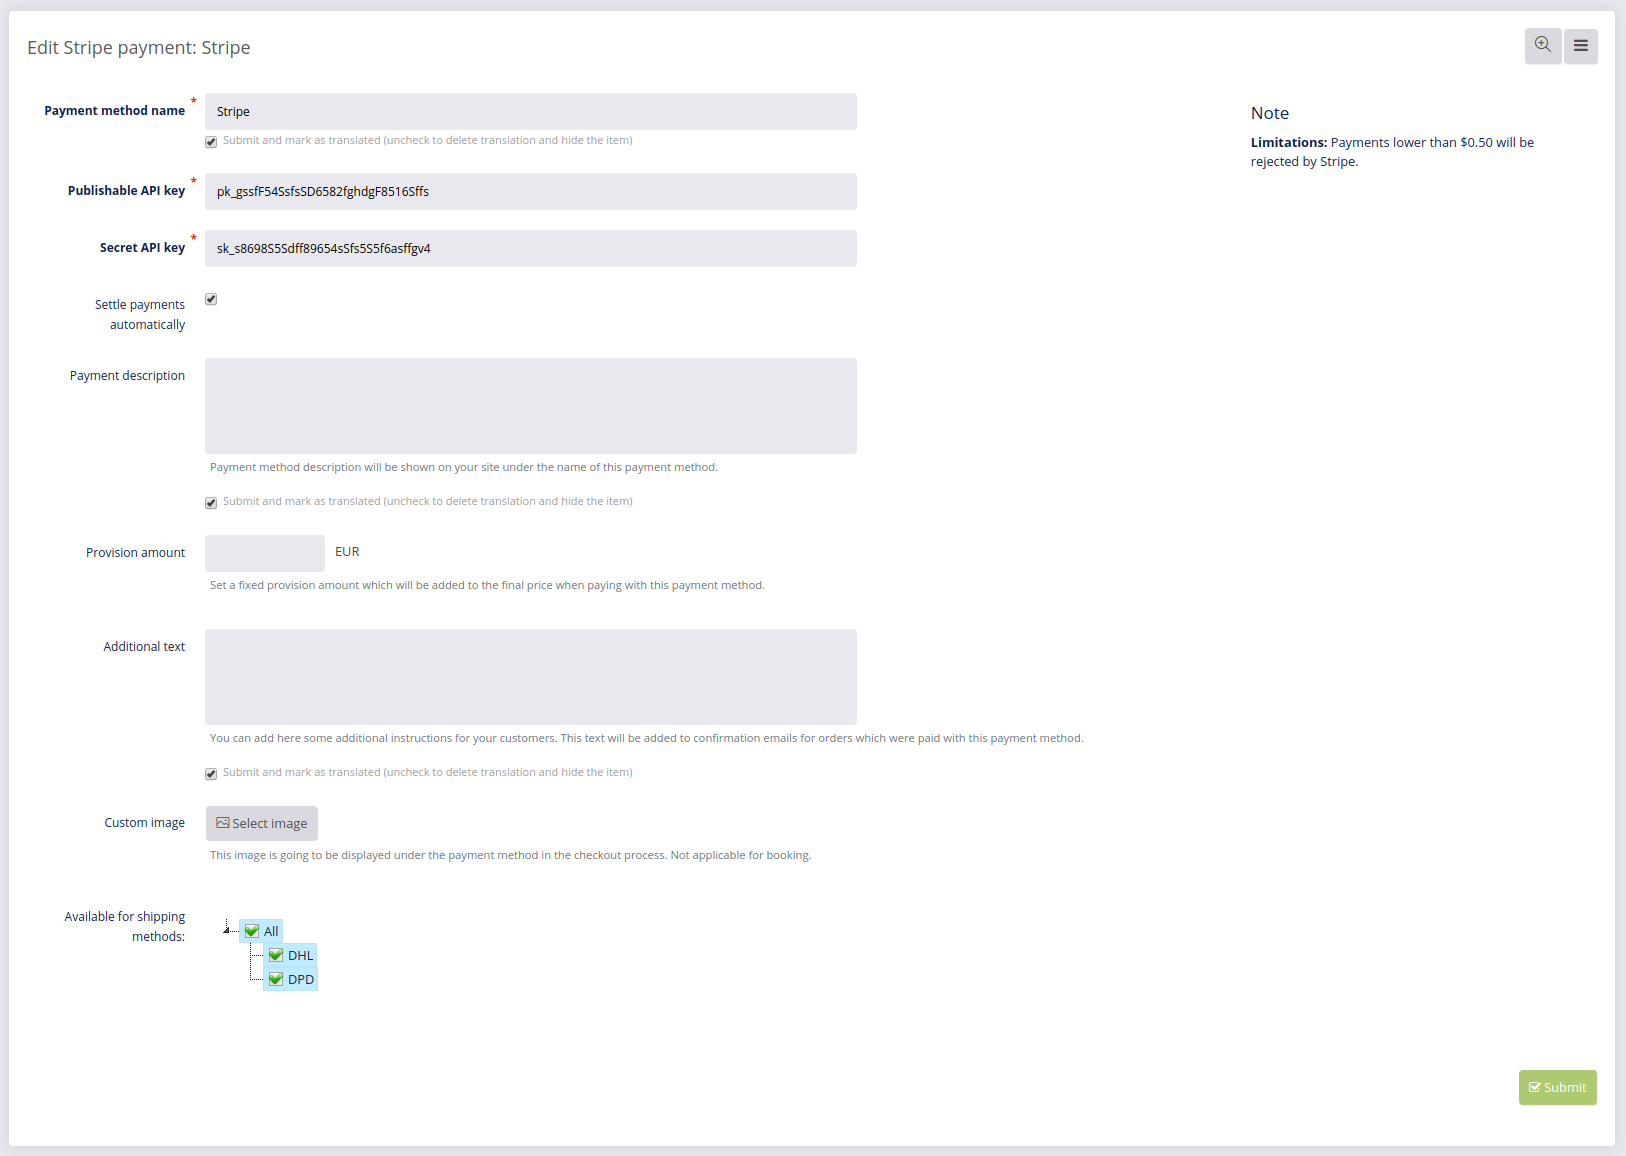
- Once you’ve registered with Stripe.com, access your Stripe account and go to Developers and select API keys (left menu), where you can find the following keys you need to enter into the above form:
- Publishable key
- Secret key

- Optional:
- You can check Settle payments automatically. This means the payments will happen automatically, otherwise the payments will have to be settled manually in Orders section.
- Add any additional settings to the payment method and click Submit Submit .
Important
Before publishing your site (going live), be sure to check if you are using production credentials for Stripe.
On the Payment methods page you can Edit ![]() details about all your payment methods and confirm any changes you’ve made by clicking Submit
details about all your payment methods and confirm any changes you’ve made by clicking Submit ![]() .
.
This is where you can also disable/enable the payment method by clicking yes or no in the list of payment methods. You can do this separately for Shop and Booking.
# Setting up Stripe Checkout
- To add Stripe Checkout as your payment method, you will need to choose the Payment method name and fill out the following form:
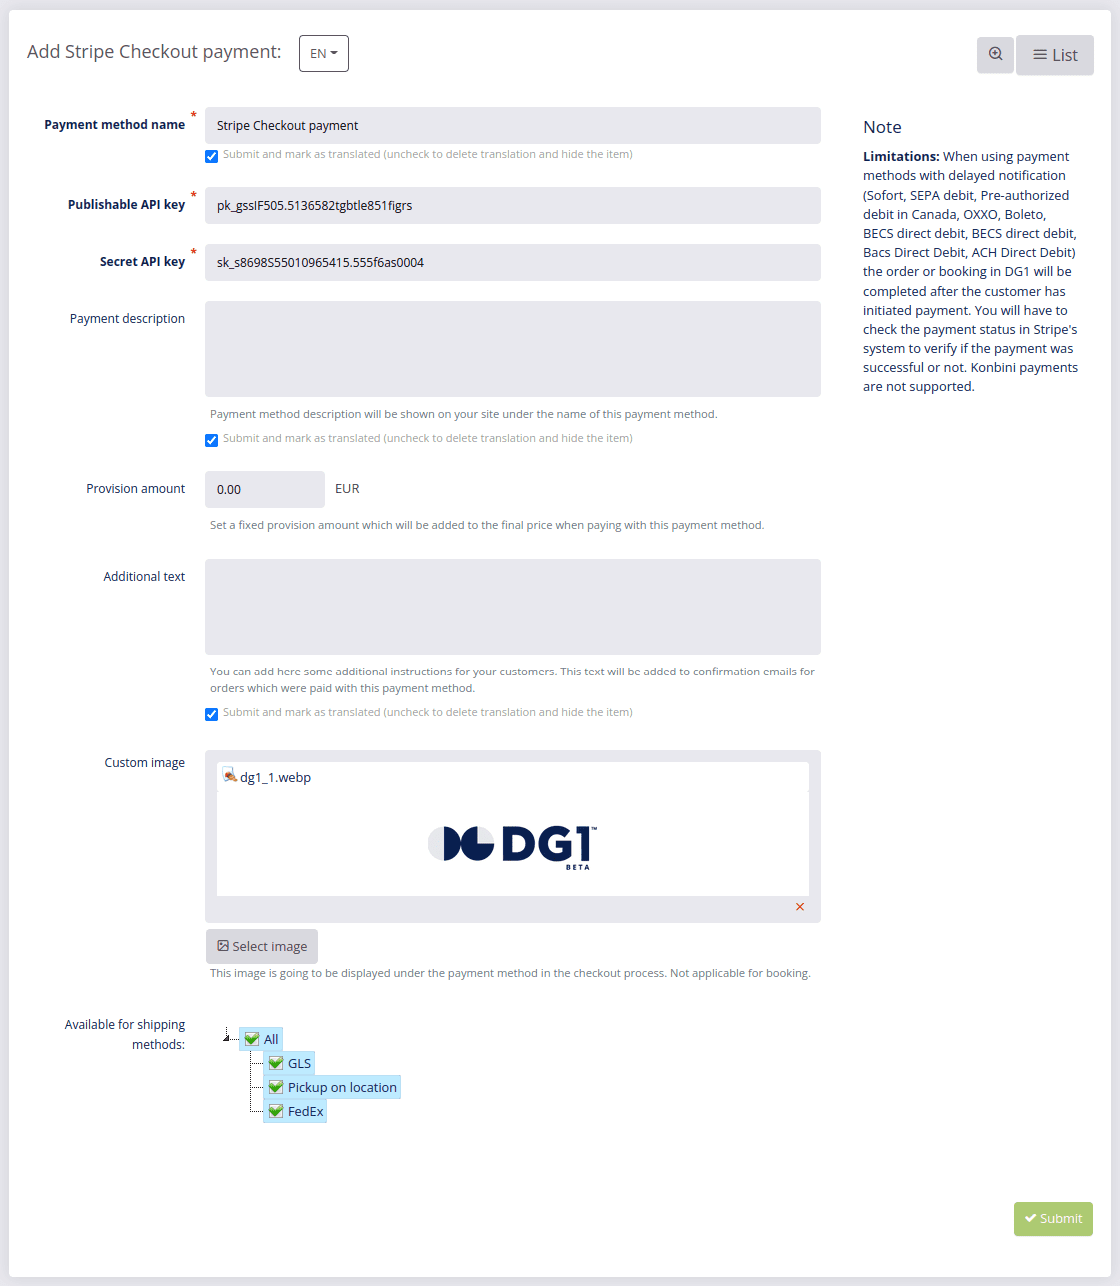
- Once you’ve registered with Stripe.com, access your Stripe account and go to Developers and select API keys (left menu), where you can find the following keys you need to enter into the above form:
- Publishable key
- Secret key
- Add any additional settings to the payment method and click Submit Submit .
Important
Before publishing your site (going live), be sure to check if you are using production credentials for Stripe.
Limitations: When using payment methods with delayed notification (Sofort, SEPA debit, Pre-authorized debit in Canada, OXXO, Boleto, BECS direct debit, BECS direct debit, Bacs Direct Debit, ACH Direct Debit) the order or booking in DG1 will be completed after the customer has initiated payment. You will have to check the payment status in Stripe's system to verify if the payment was successful or not. Konbini payments are not supported.
On the Payment methods page you can Edit ![]() details about all your payment methods and confirm any changes you’ve made by clicking Submit
details about all your payment methods and confirm any changes you’ve made by clicking Submit ![]() .
.
This is where you can also disable/enable the payment method by clicking yes or no in the list of payment methods. You can do this separately for Shop and Booking.
# Setting up Bank Transfer
- To add Bank Transfer as your payment method, you will need to choose the Payment method name and fill out the following form:
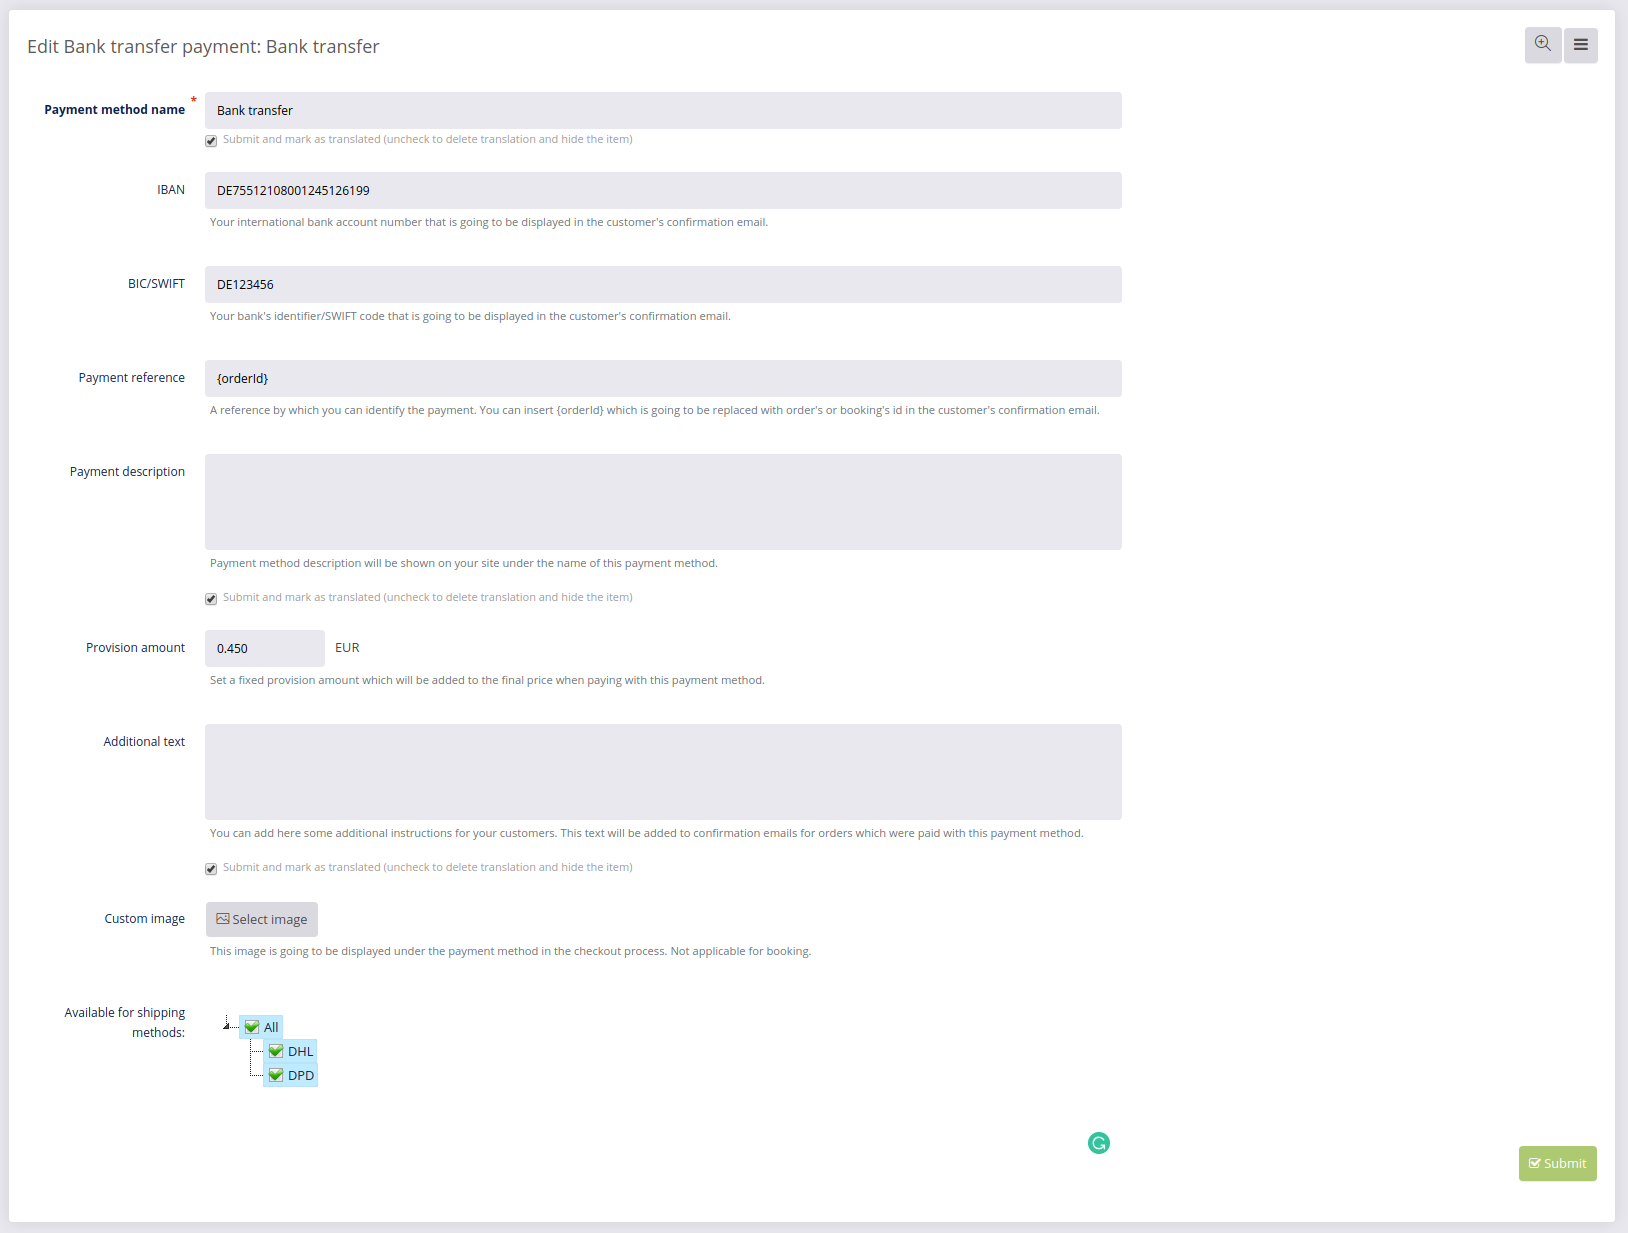
The following informations are mandatory:
- Payment method name (mandatory)
- IBAN (your International Bank Account Number) which is going to be displayed in the customer’s confirmation email.
- BIC/SWIFT (your bank’s identifier/SWIFT) code that is going to be displayed in the customer’s confirmation email.
- Payment reference - we suggest you insert your {orderId} which is going to be replaced by order id in the customer’s confirmation email.
Note
With this payment method we strongly advise you to use the Additional text field and provide your customers with payment instructions. You should also include information on the payment deadline or when the payment must be received.
- Add any additional settings to the payment method and click Submit .
On the Payment methods page you can Edit ![]() details about all your payment methods and confirm any changes you’ve made by clicking Submit
details about all your payment methods and confirm any changes you’ve made by clicking Submit ![]() .
.
This is where you can also disable/enable the payment method by clicking yes or no in the list of payment methods. You can do this separately for Shop and Booking.
# Setting up iPay88
- To add iPay88 as your payment method, you will need to choose the Payment method name and fill out the following form:

Once you have your iPay88 Payment Gateway, you must copy/paste the following information from the iPay88 email into the above form:
- Merchant code
- Merchant key
To get an iPay88 Payment Gateway, please refer to blog: How to Apply for Payment Gateway with iPay88? (opens new window)
Optionally, you can also provide the following information:
- Payment description: If you want, you can add a short payment method description, which will be shown on the front end under the name of your iPay88 payment method.
- You can also set the Provision amount, which will be added to the total price, for example 30 cents.
- Add any additional settings to the payment method and click Submit .
On the Payment methods page you can Edit ![]() details about all your payment methods and confirm any changes you’ve made by clicking Submit
details about all your payment methods and confirm any changes you’ve made by clicking Submit ![]() .
.
This is where you can also disable/enable the payment method by clicking yes or no in the list of payment methods. You can do this separately for Shop and Booking.
# Setting up PayPal Express
- To add PayPal Express as your payment method, you will need to choose the Payment method name and fill out the following form:
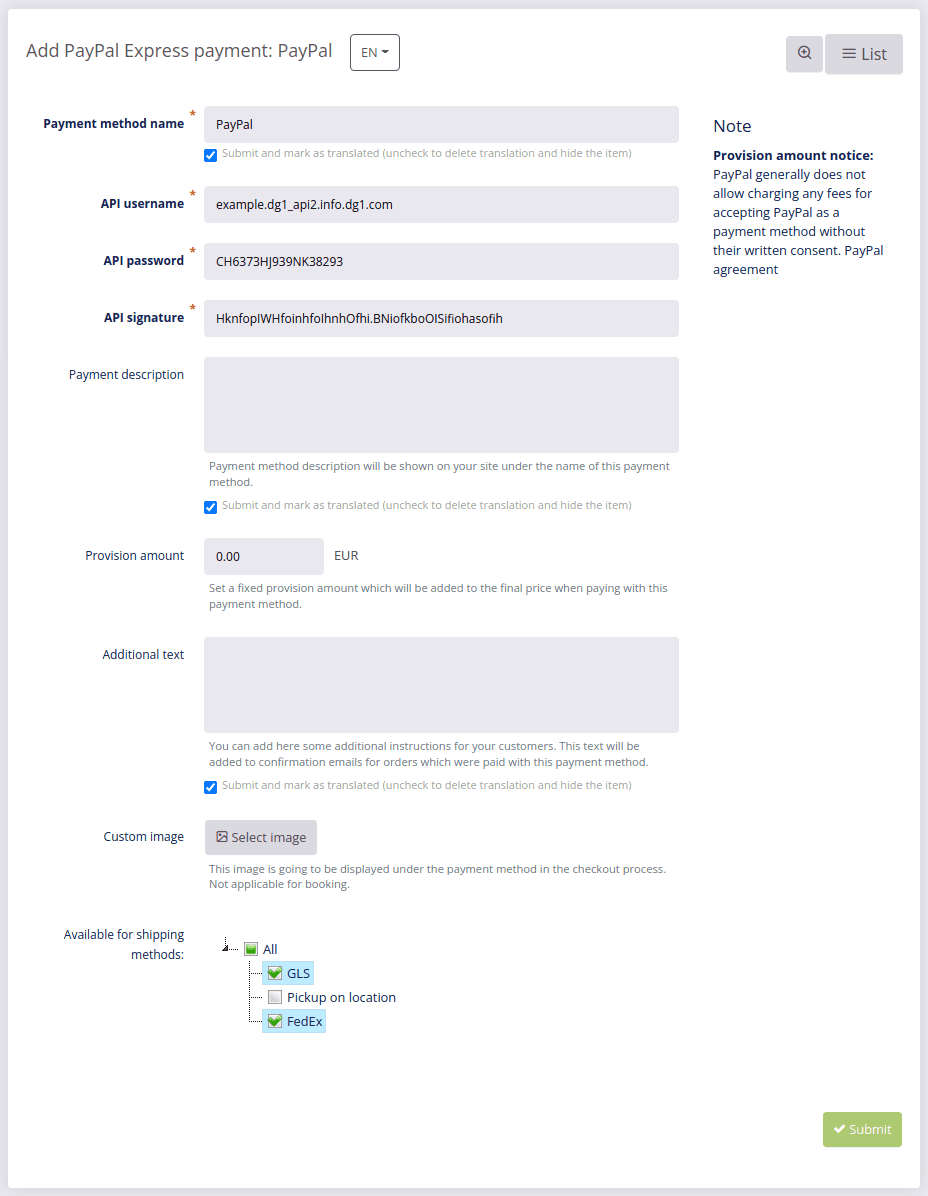
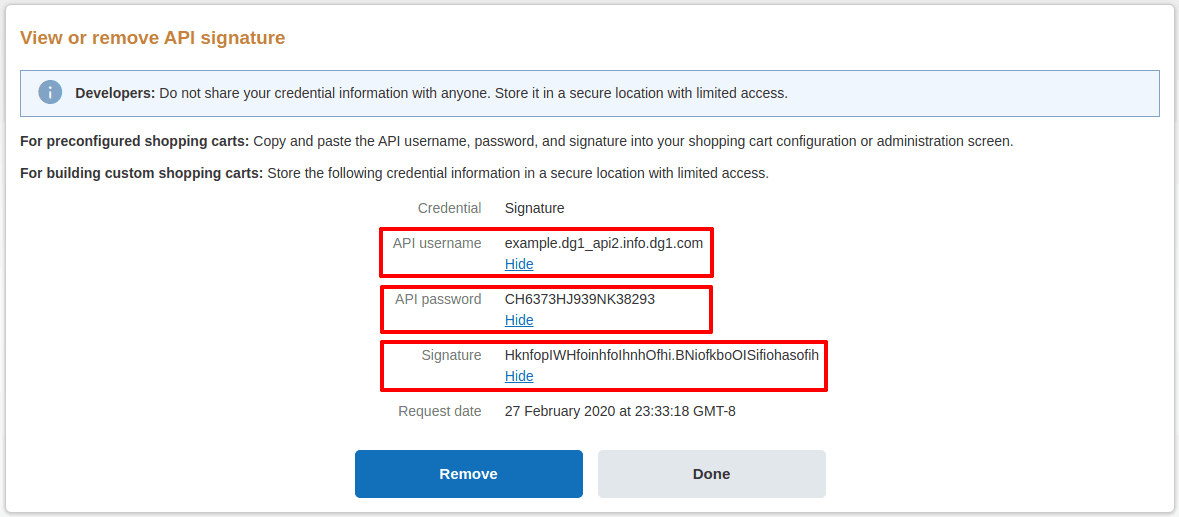
Once you’ve registered with PayPal, you have to create a new API signature (opens new window) and enter the following API credentials into the above form:
- API username
- API password
- API signature
The following figure shows a page with an example of API signature credentials:
Optionally, you can also provide the following information:
- Payment description: If you want, you can add a short payment method description, which will be shown on the front end under the name of your PayPal payment method.
- You can also set the Provision amount, which will be added to the total price, for example 30 cents.
Note
PayPal generally does not allow charging any fees for accepting PayPal as a payment method without their written consent (see PayPal user agreement (opens new window)).
- Additional text: Should you like to provide your customers with additional instructions in the order confirmation emails, you can use this field.
- Custom image: You can set a custom image for this payment method to make it easier for your customers to recognize it on your site.
- Add any additional settings to the payment method and click Submit .
Important
Before publishing your site (going live), be sure to check if you are using production credentials for PayPal.
On the Payment methods page you can Edit ![]() details about all your payment methods and confirm any changes you’ve made by clicking Submit
details about all your payment methods and confirm any changes you’ve made by clicking Submit ![]() .
.
This is where you can also disable/enable the payment method by clicking yes or no in the list of payment methods. You can do this separately for Shop and Booking.
# Setting up Payrexx
- To add Payrexx as your payment method, you will need to choose the Payment method name and fill out the following page:
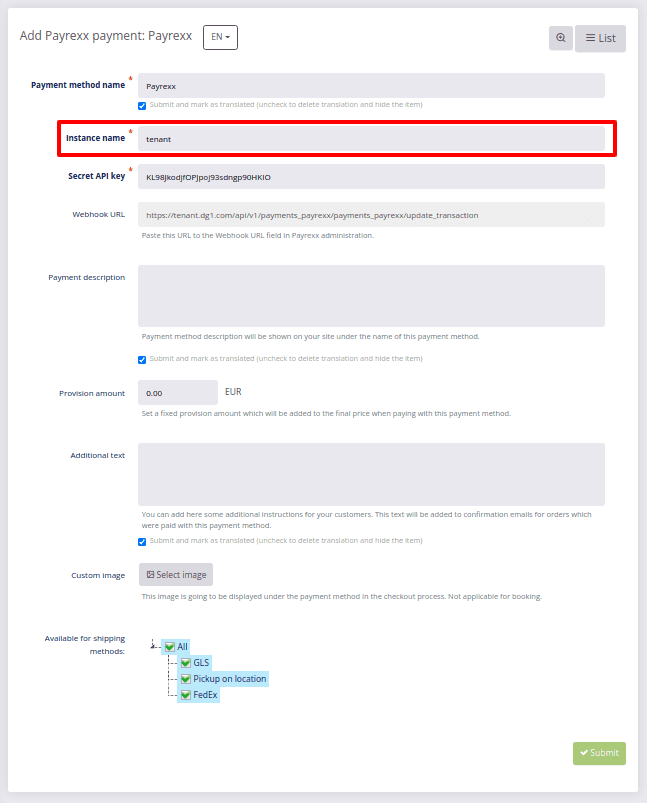
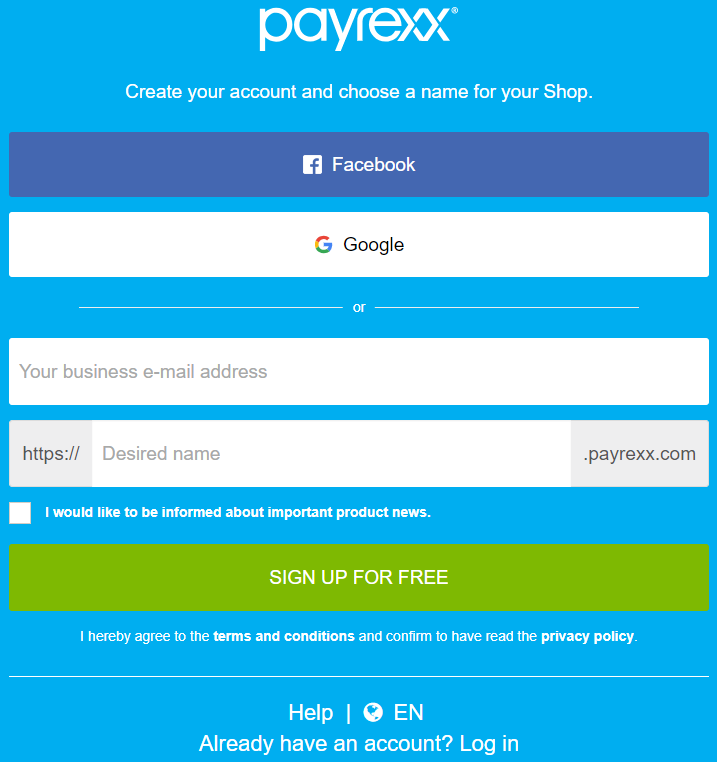
To get the needed data for Instance name and Secret API key, visit the Payrexx site in a new tab to register. You will be prompted by Payrexx (image below) to provide your email address and enter a Desired name, which you should copy and paste in the Instance name field in the above payment configuration page on DG1.
Once you’ve created your Payrexx account, go to API & Integrations page to obtain the API key, which you should copy and paste into the configuration page in DG1.

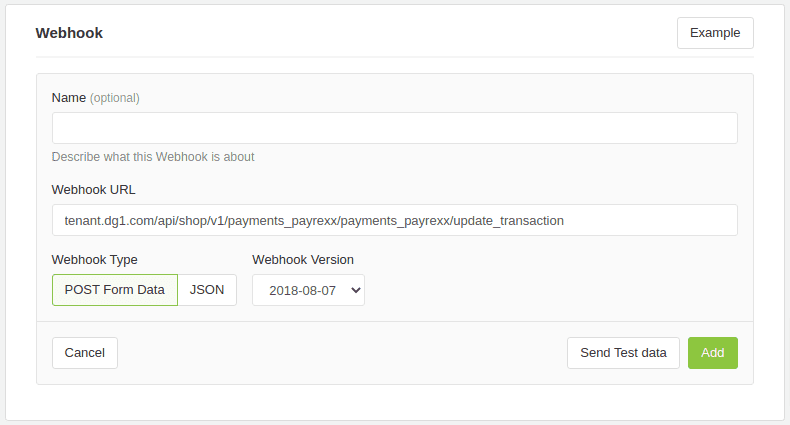
Next you should add your Webhook URL from DG1 to Payrexx. To add a webhook, simply copy the Webhook URL from DG1 and paste in the corresponding field in Payrexx and make sure the Webhook Type is set to Normal (PHP-Post) and Webhook Version is set to 2018-08-07.

Example of a Webhook URL:
tenant.dg1.com/api/shop/v1/payments_payrexx/payments_payrexx/update_transaction
- Add any additional settings to the payment method and click Submit .
On the Payment methods page you can Edit ![]() details about all your payment methods and confirm any changes you’ve made by clicking Submit
details about all your payment methods and confirm any changes you’ve made by clicking Submit ![]() .
.
This is where you can also disable/enable the payment method by clicking yes or no in the list of payment methods. You can do this separately for Shop and Booking.
# Troubleshooting Payrexx payment confirmation issues
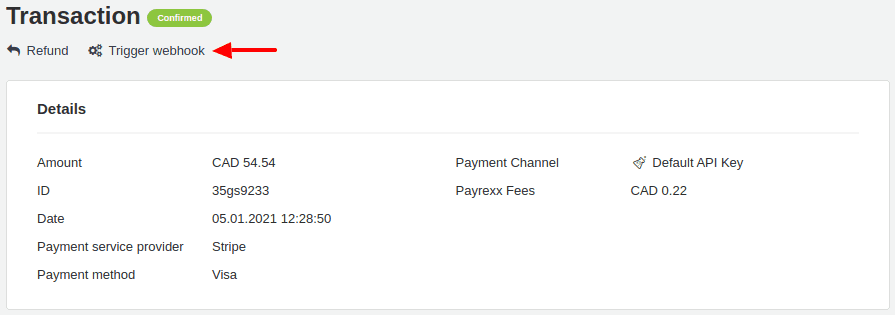
In case a customer calls and tells you they have not received a payment confirmation, you can go to Payrexx and use the Trigger webhook function.
Go to Payments and select Transactions.
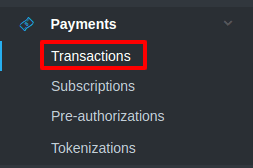
Find the transaction and click Trigger webhook.
# Setting up Coinbase
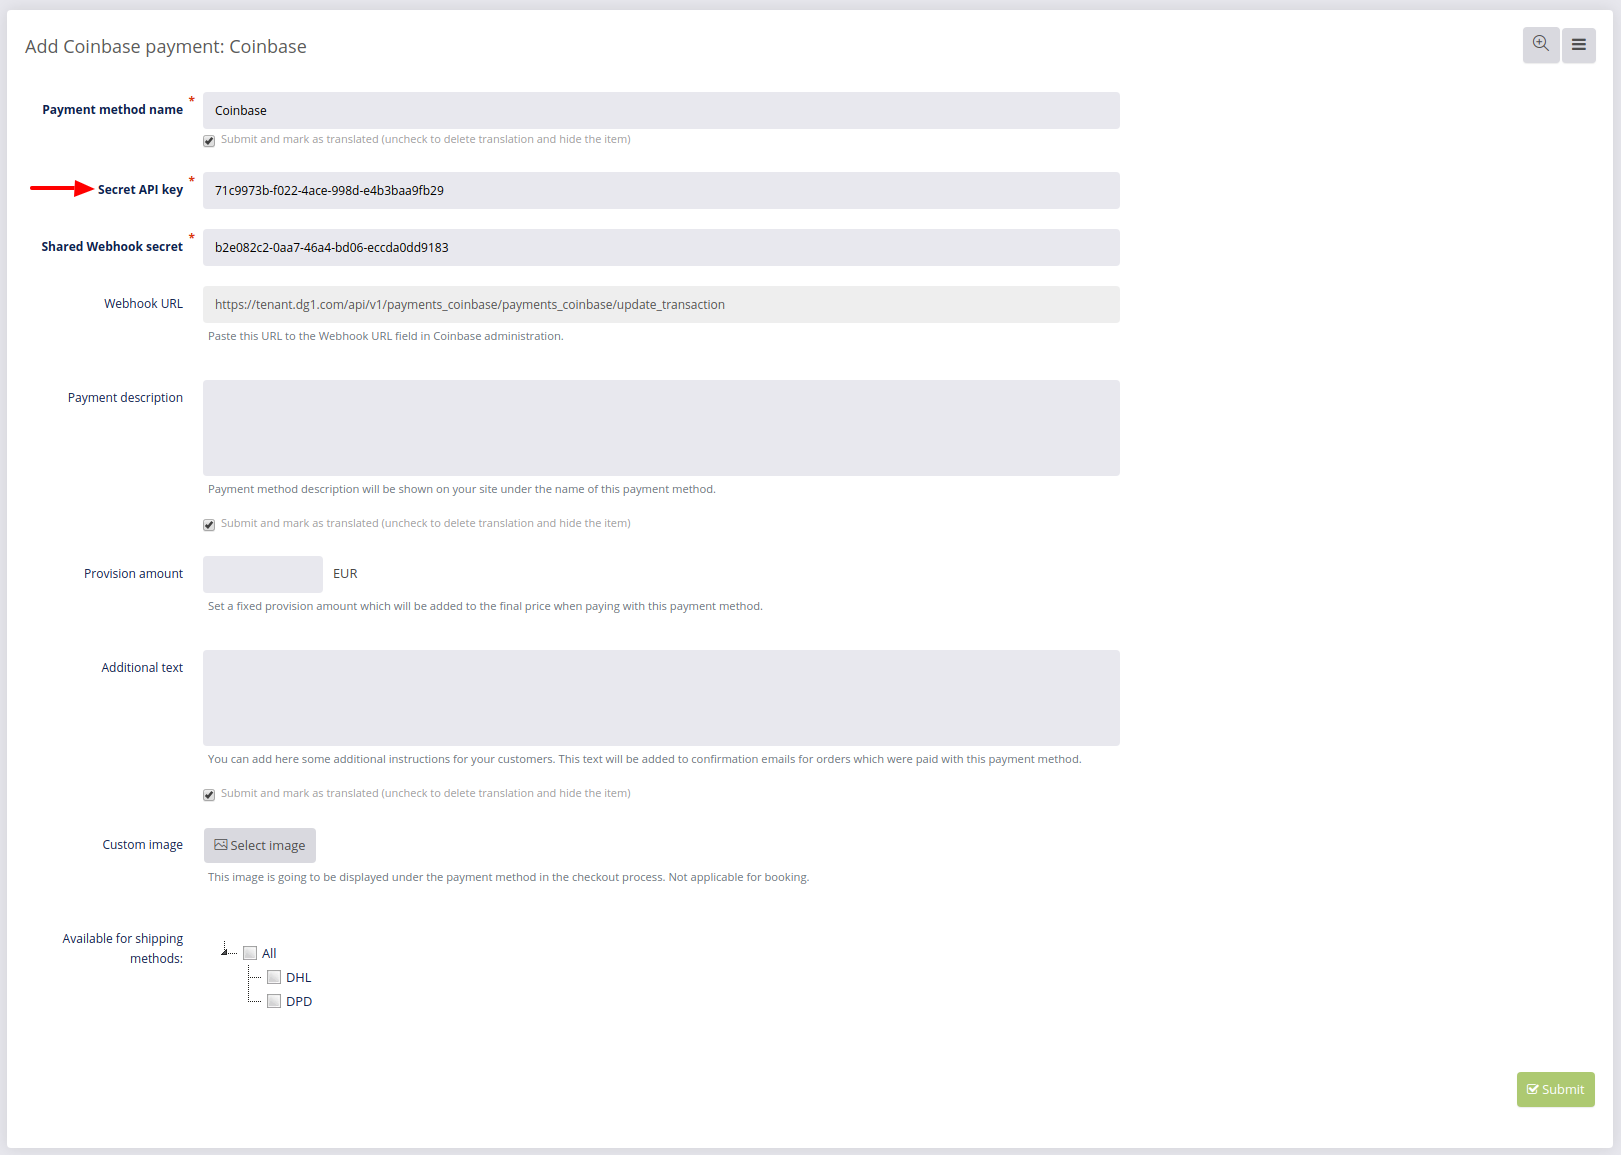
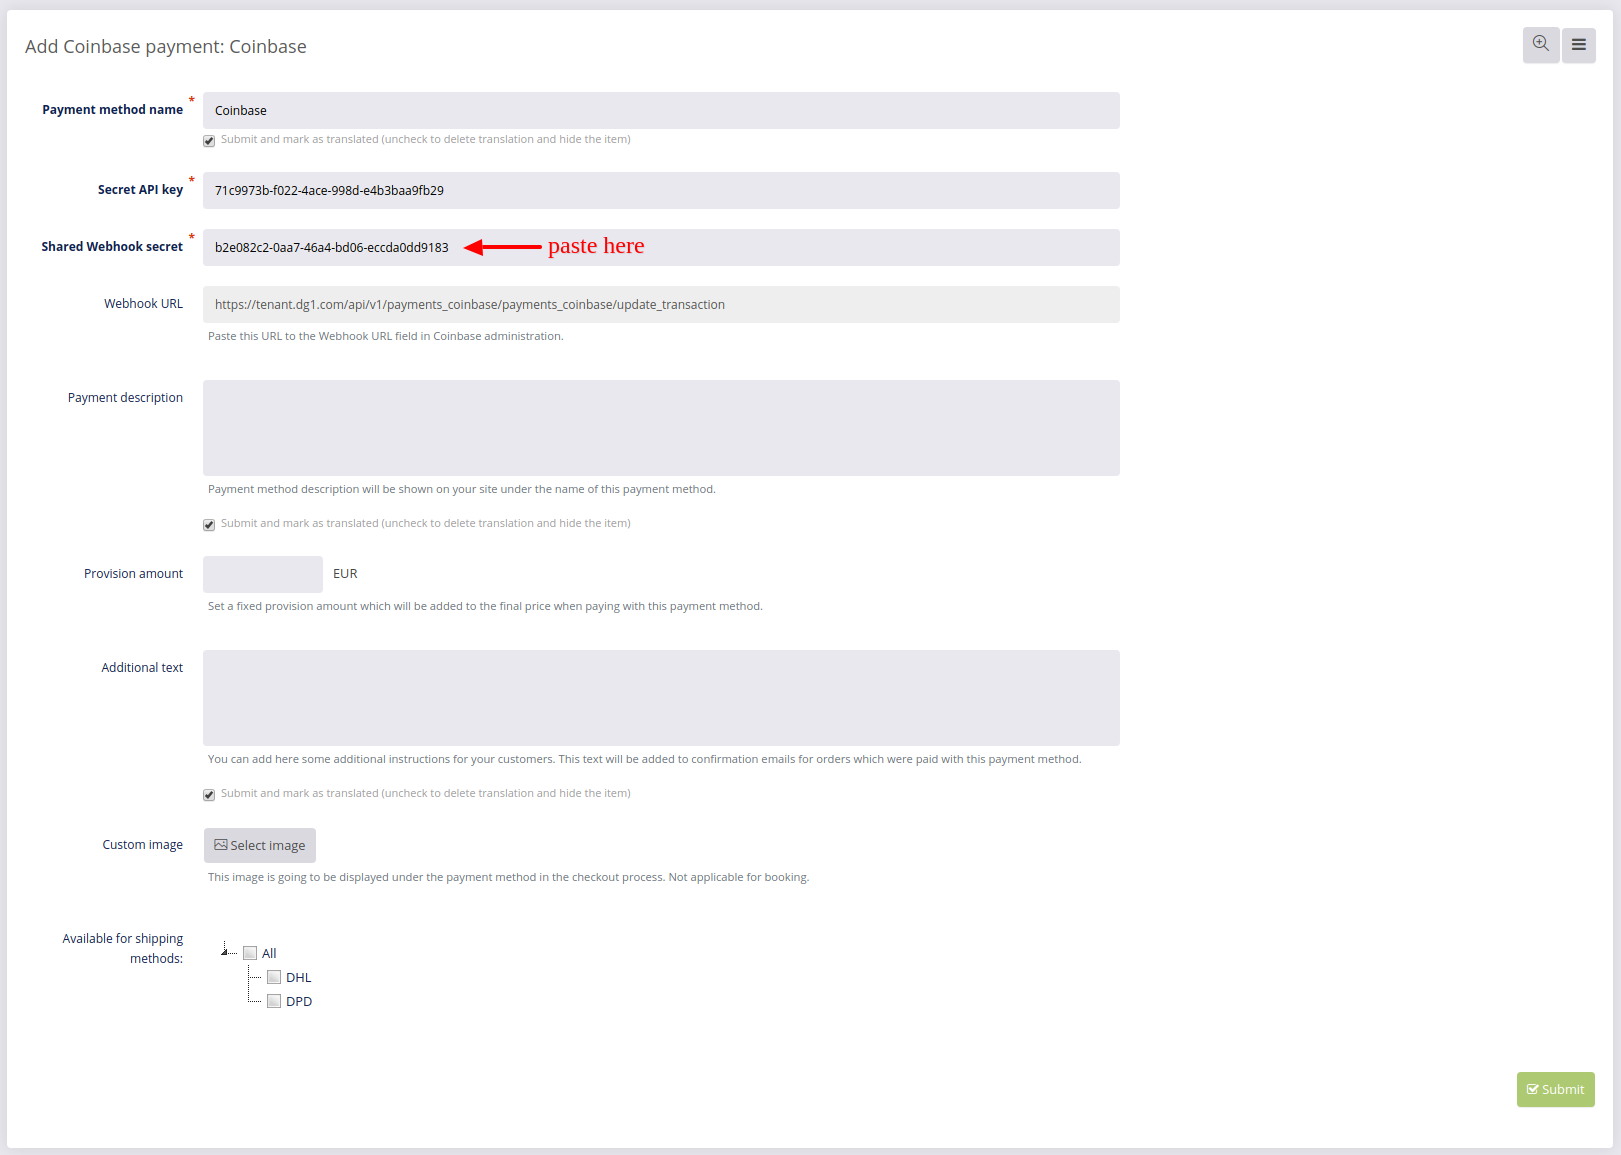
- To add Coinbase as your payment method, you will need to choose the Payment method name and fill out the following page:
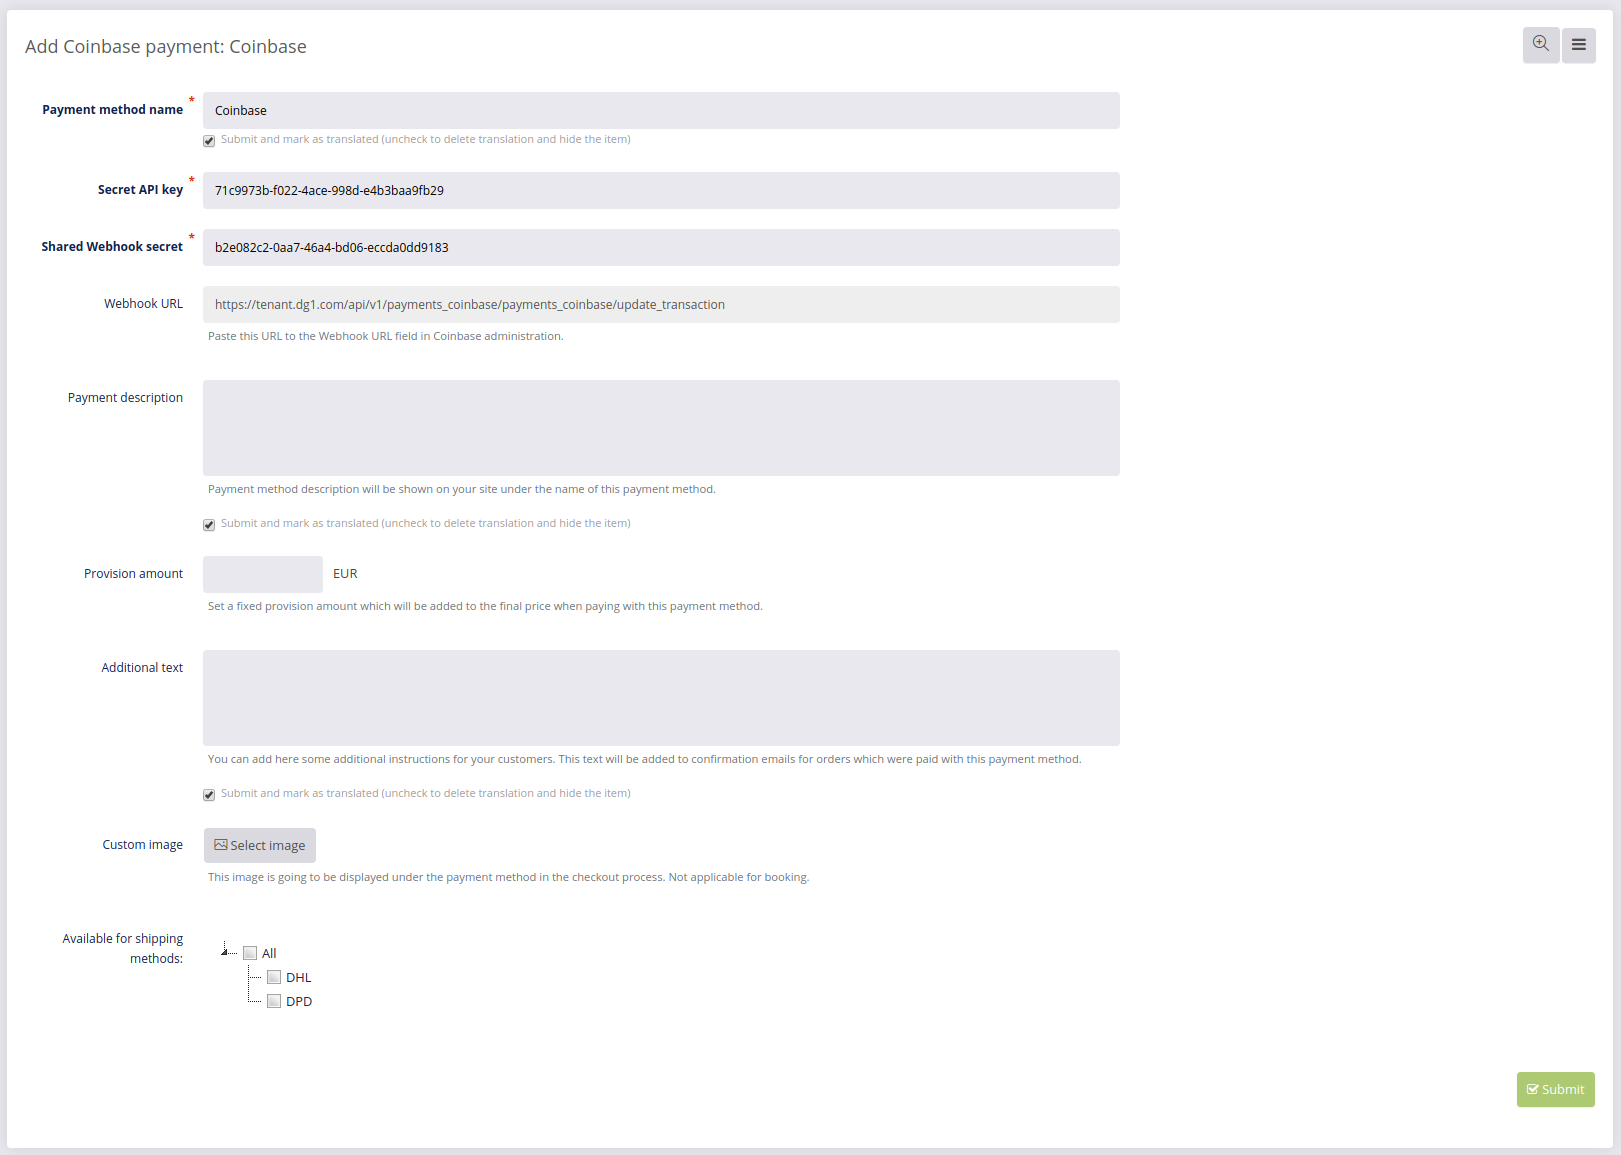
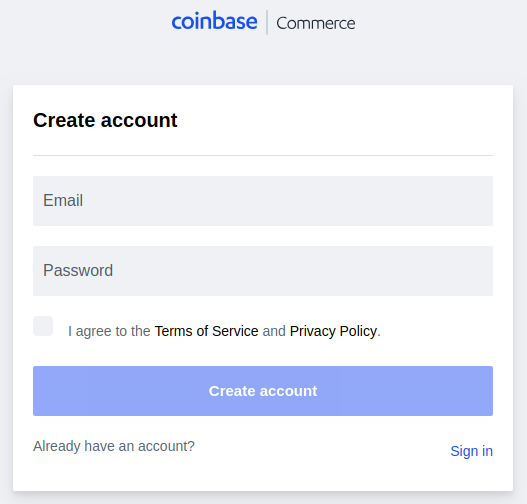
To obtain the Secret API key and Shared webhook secret, open commerce.coinbase.com (opens new window) in a new tab and register with Coinbase.
Coinbase registration
Once you’ve signed into Coinbase, go to Settings and find API keys.
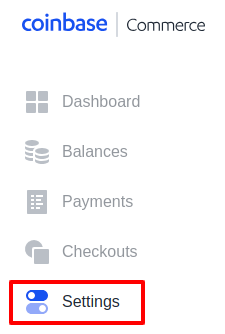
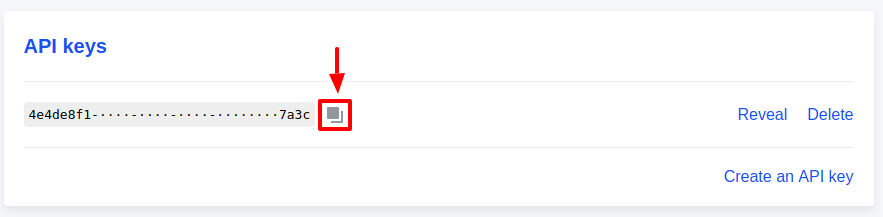
Click Create an API key.

Once the key is created, click copy  and paste it to your DG1 payment configuration page in the Secret API key field.
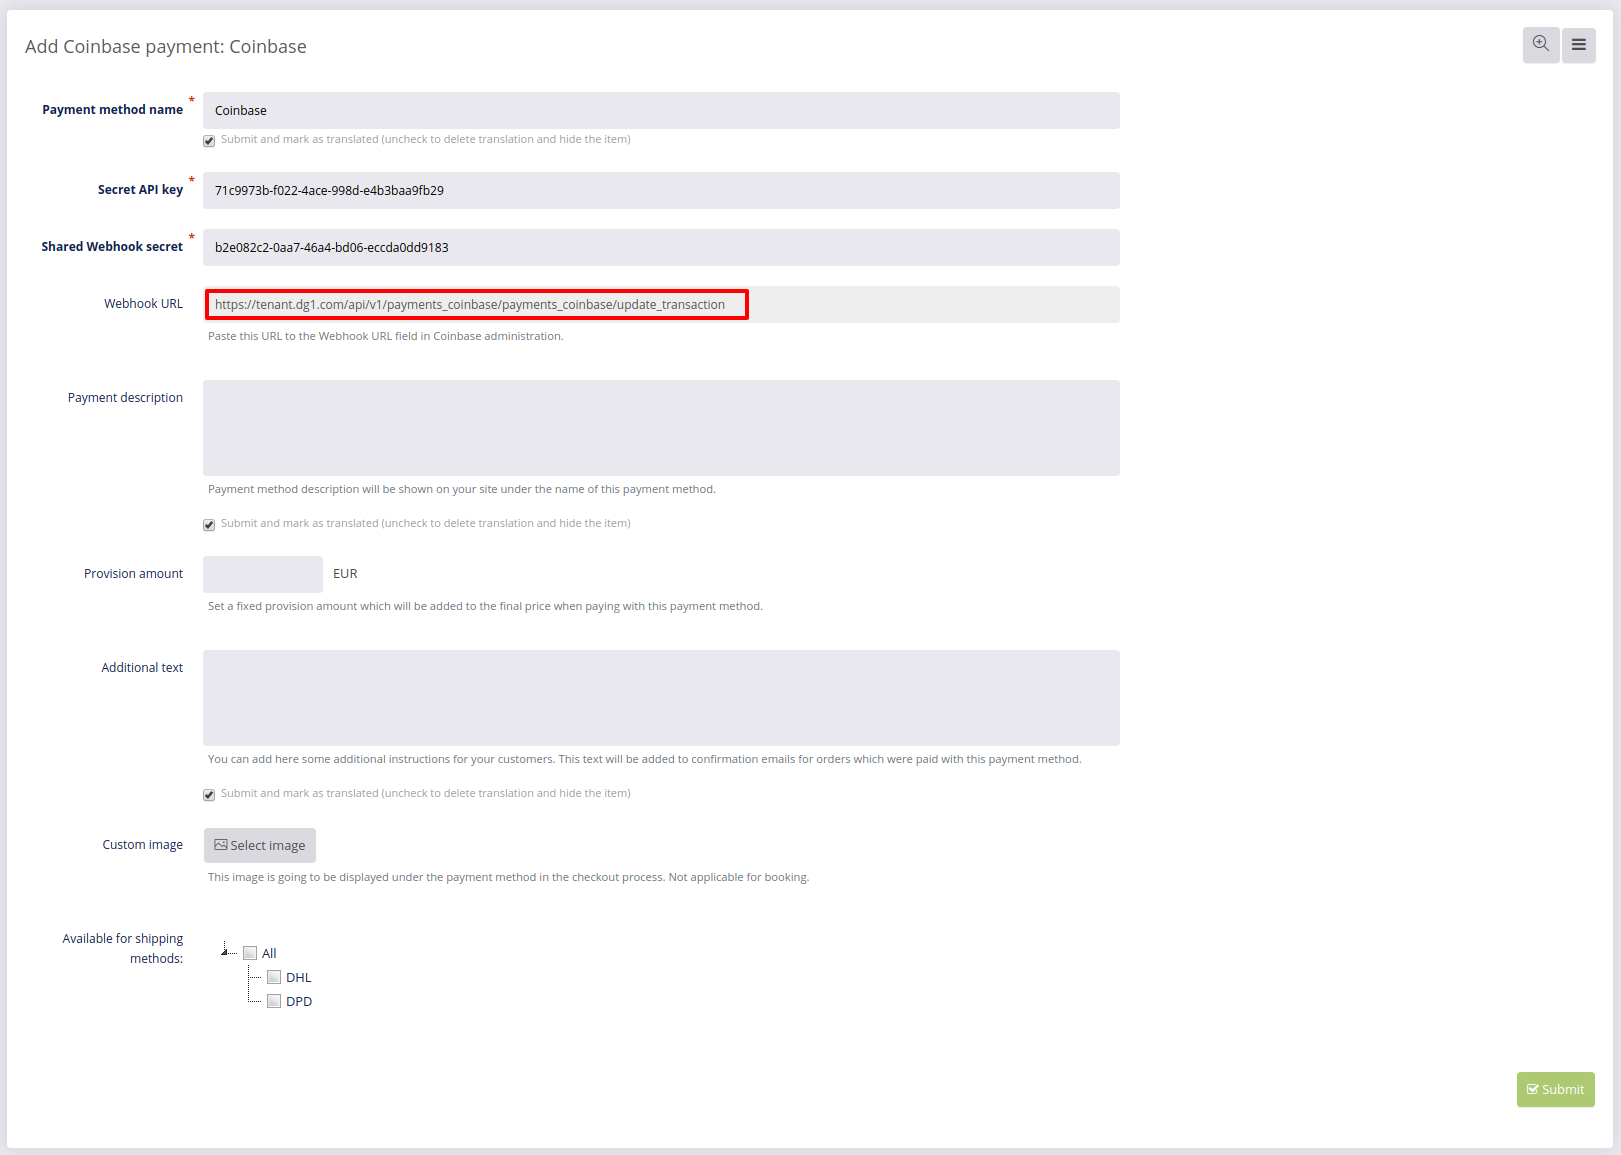
After that copy the Webhook URL from your DG1 configuration page.
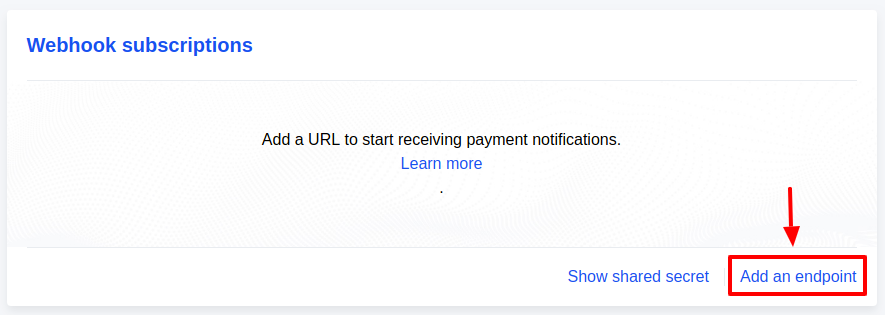
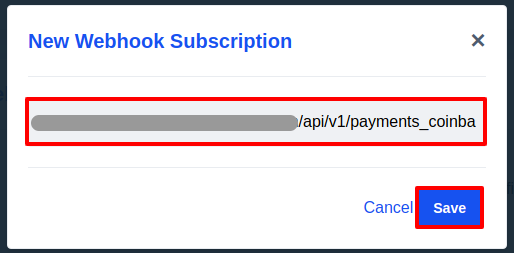
Go to Webhook subscriptions in Coinbase settings and click Add an endpoint.
Paste the URL and click Save  .
.
After that click Show shared secret.
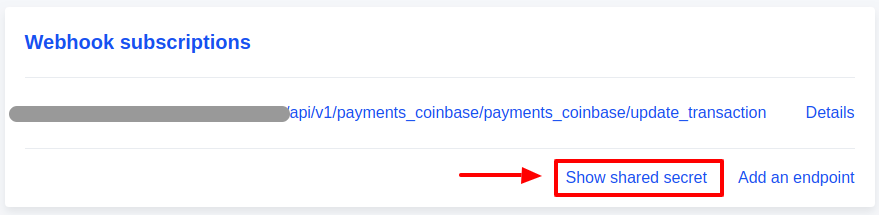
A key will appear.
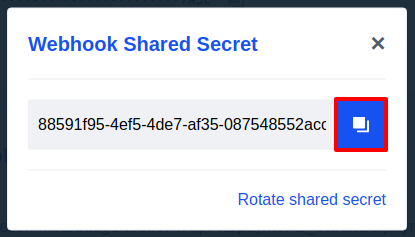
Click copy  and paste it to the Shared webhook secret in your DG1 configuration page.
- Add any additional settings to the payment method and click Submit .
On the Payment methods page you can Edit ![]() details about all your payment methods and confirm any changes you’ve made by clicking Submit
details about all your payment methods and confirm any changes you’ve made by clicking Submit ![]() .
.
This is where you can also disable/enable the payment method by clicking yes or no in the list of payment methods. You can do this separately for Shop and Booking.
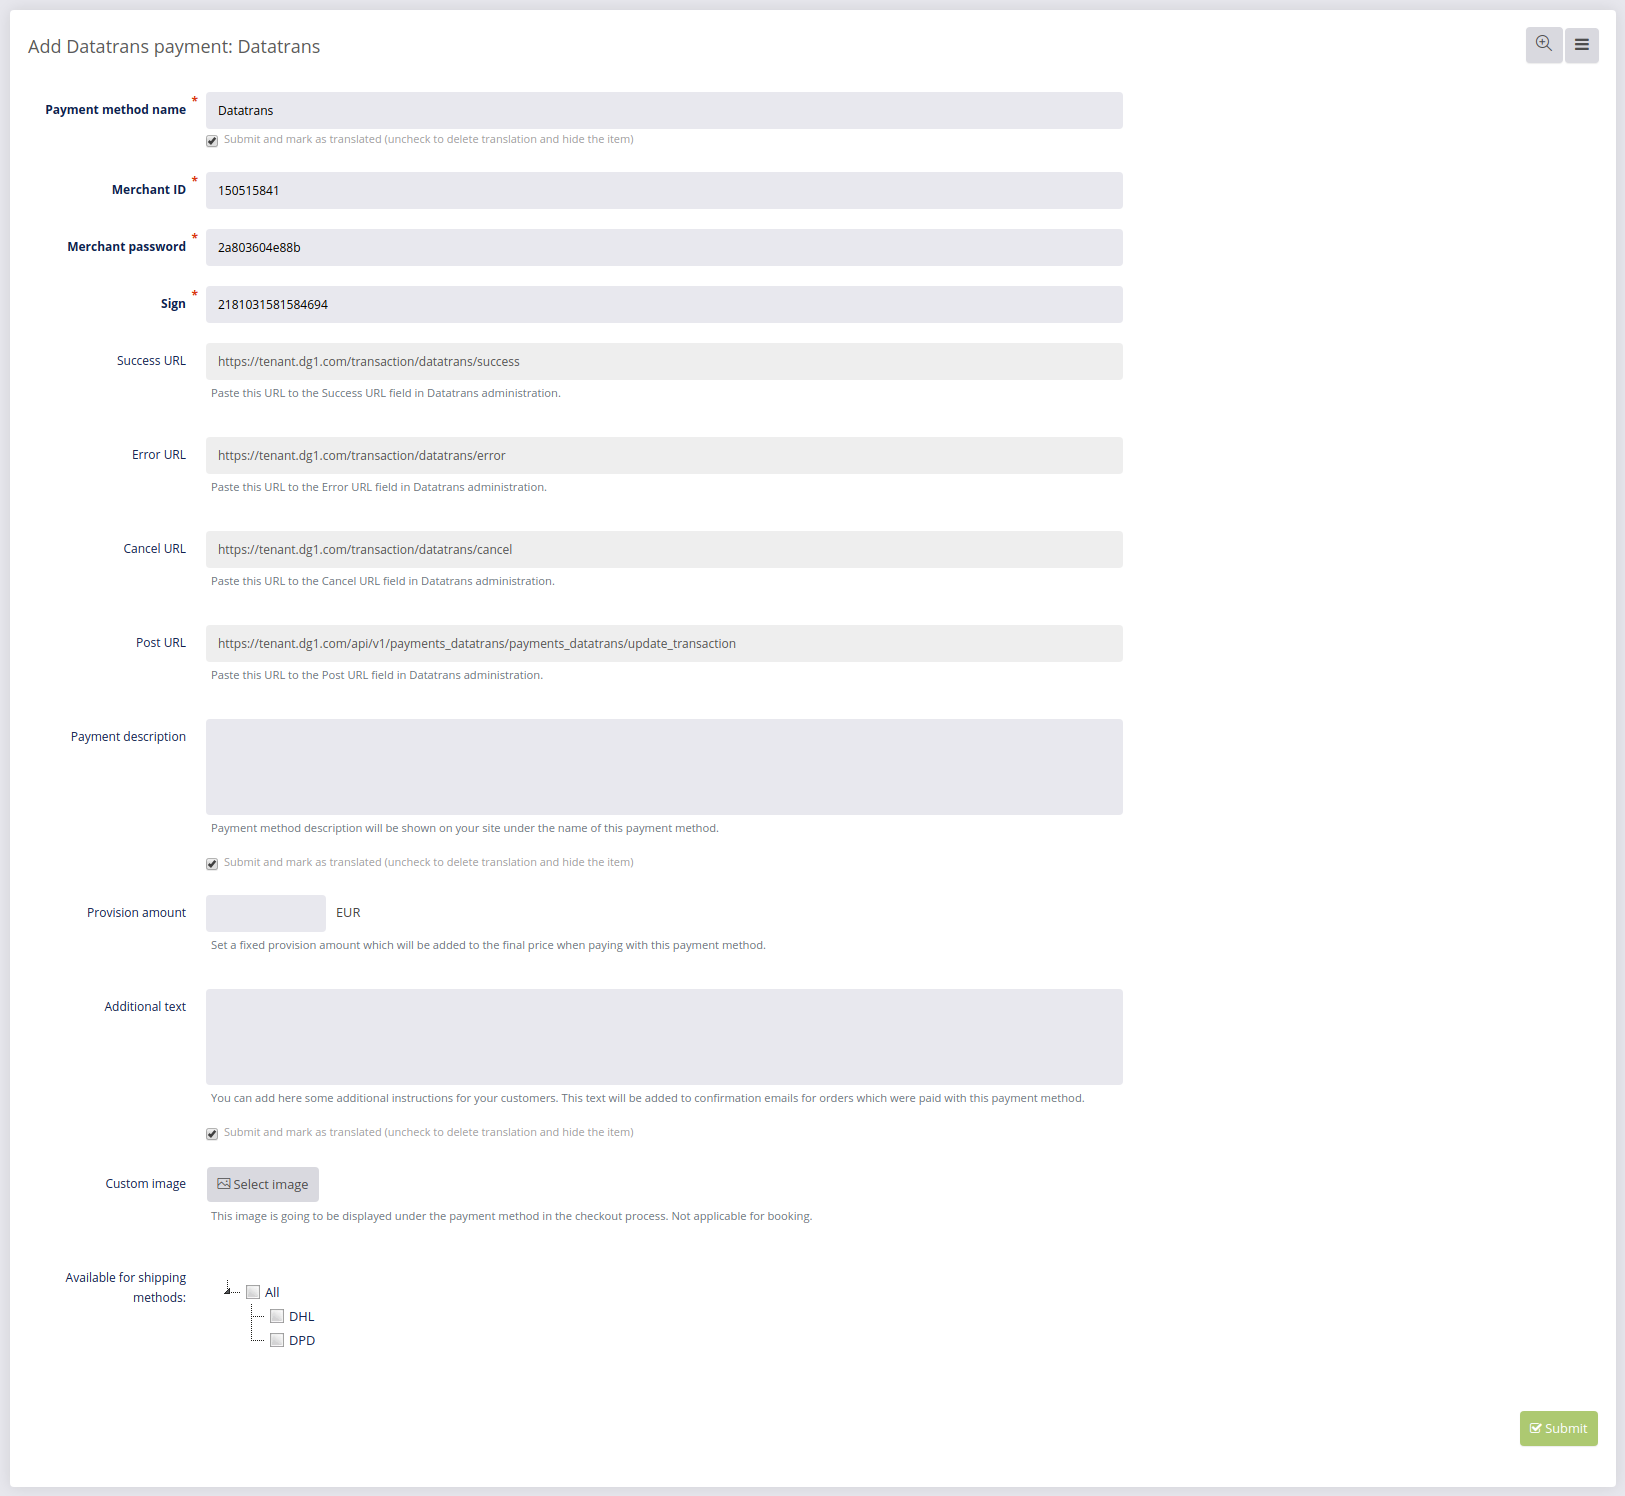
# Setting up Datatrans
- To add Datatrans as your payment method, you will need to choose the Payment method name and fill out the following page:
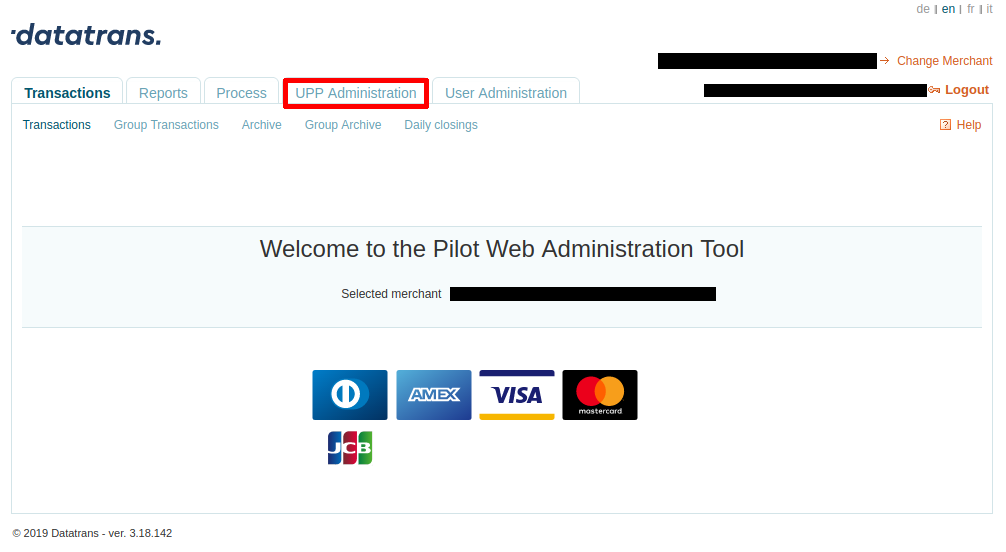
To obtain the required data, open www.datatrans.ch (opens new window) in a new tab and register with Datatrans. After registering or signing in, go to UPP Administration.
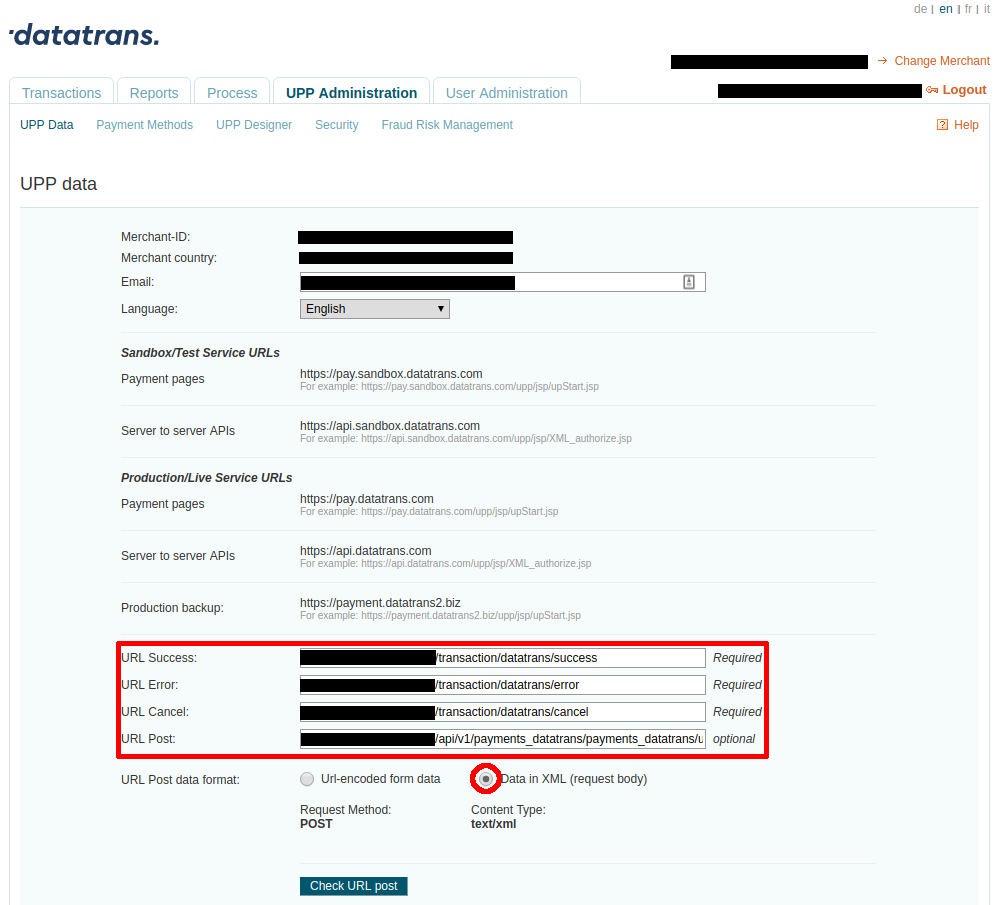
Copy all the URLs for Success, Error, Cancel and Post and paste them to matching fields in your DG1 platform.
Important
Make sure the Data in XML is selected under URL Post data format.
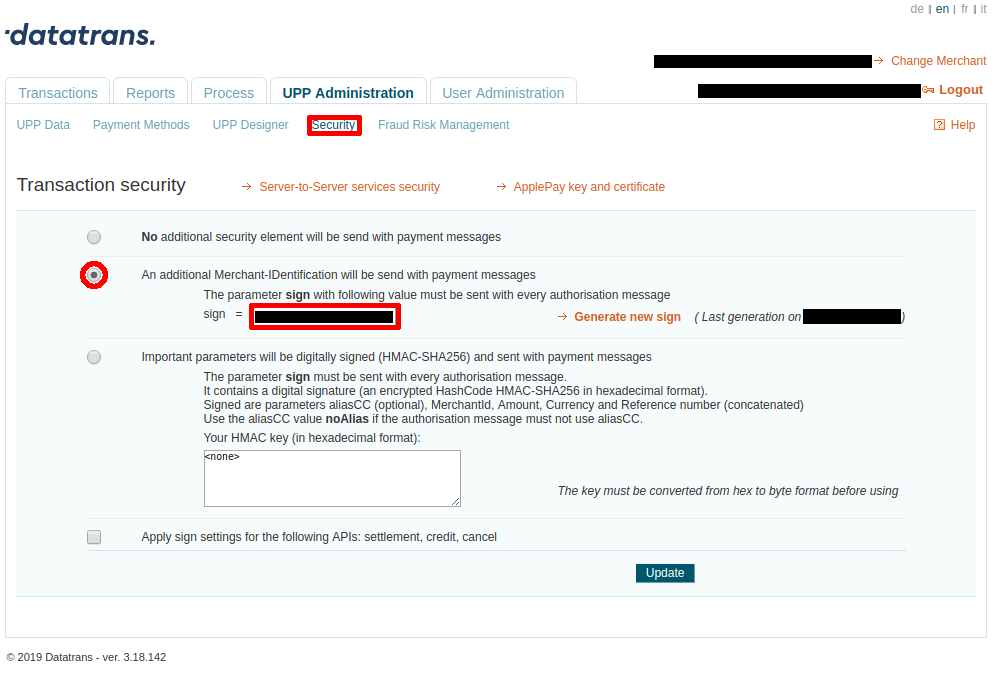
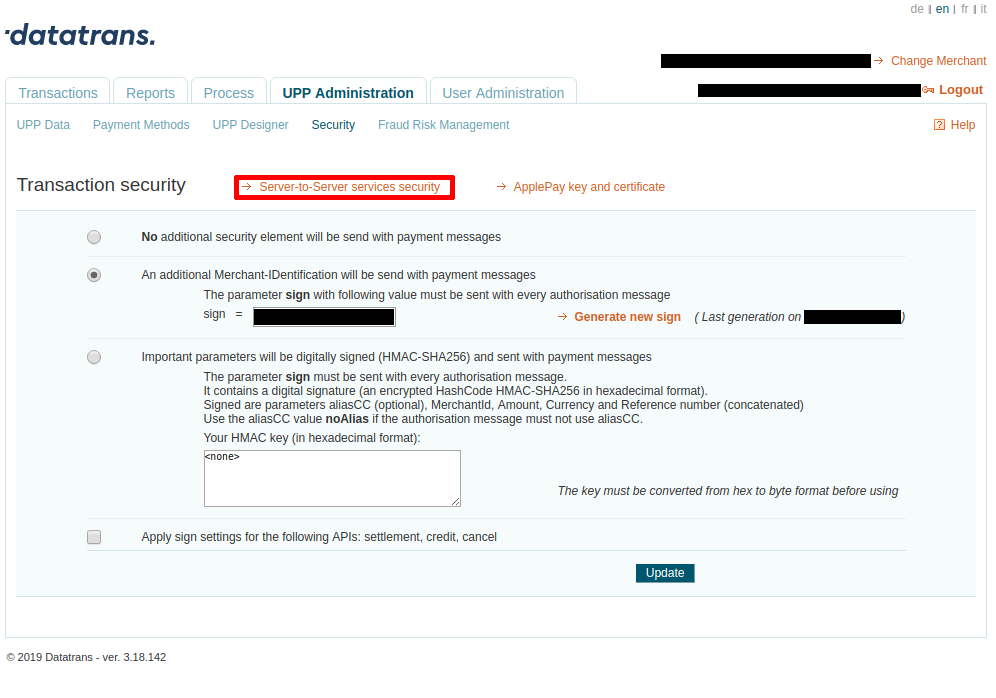
Navigate to Security and copy the Sign.
Paste it to the matching field on your configuration page in DG1.
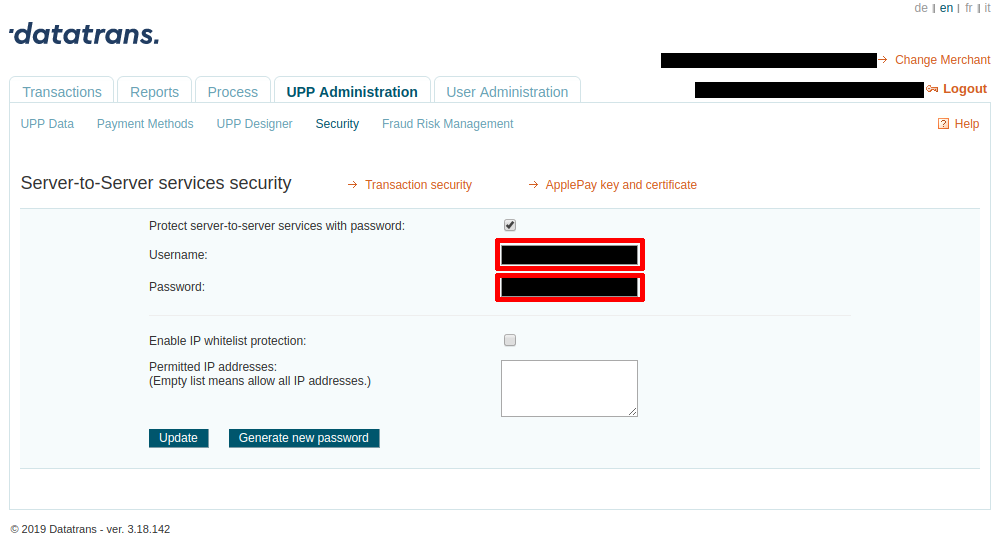
Click the Server-to-Server services security.
Copy the Username and paste it to the Merchant ID field on your configuration page in DG1.
Copy the password and paste it to the Merchant password field.
- Add any additional settings to the payment method and click Submit .
On the Payment methods page you can Edit ![]() details about all your payment methods and confirm any changes you’ve made by clicking Submit
details about all your payment methods and confirm any changes you’ve made by clicking Submit ![]() .
.
This is where you can also disable/enable the payment method by clicking yes or no in the list of payment methods. You can do this separately for Shop and Booking.
# Setting up On delivery
- To add On delivery as your payment method, you only need to choose the Payment method name – all the other information is optional.
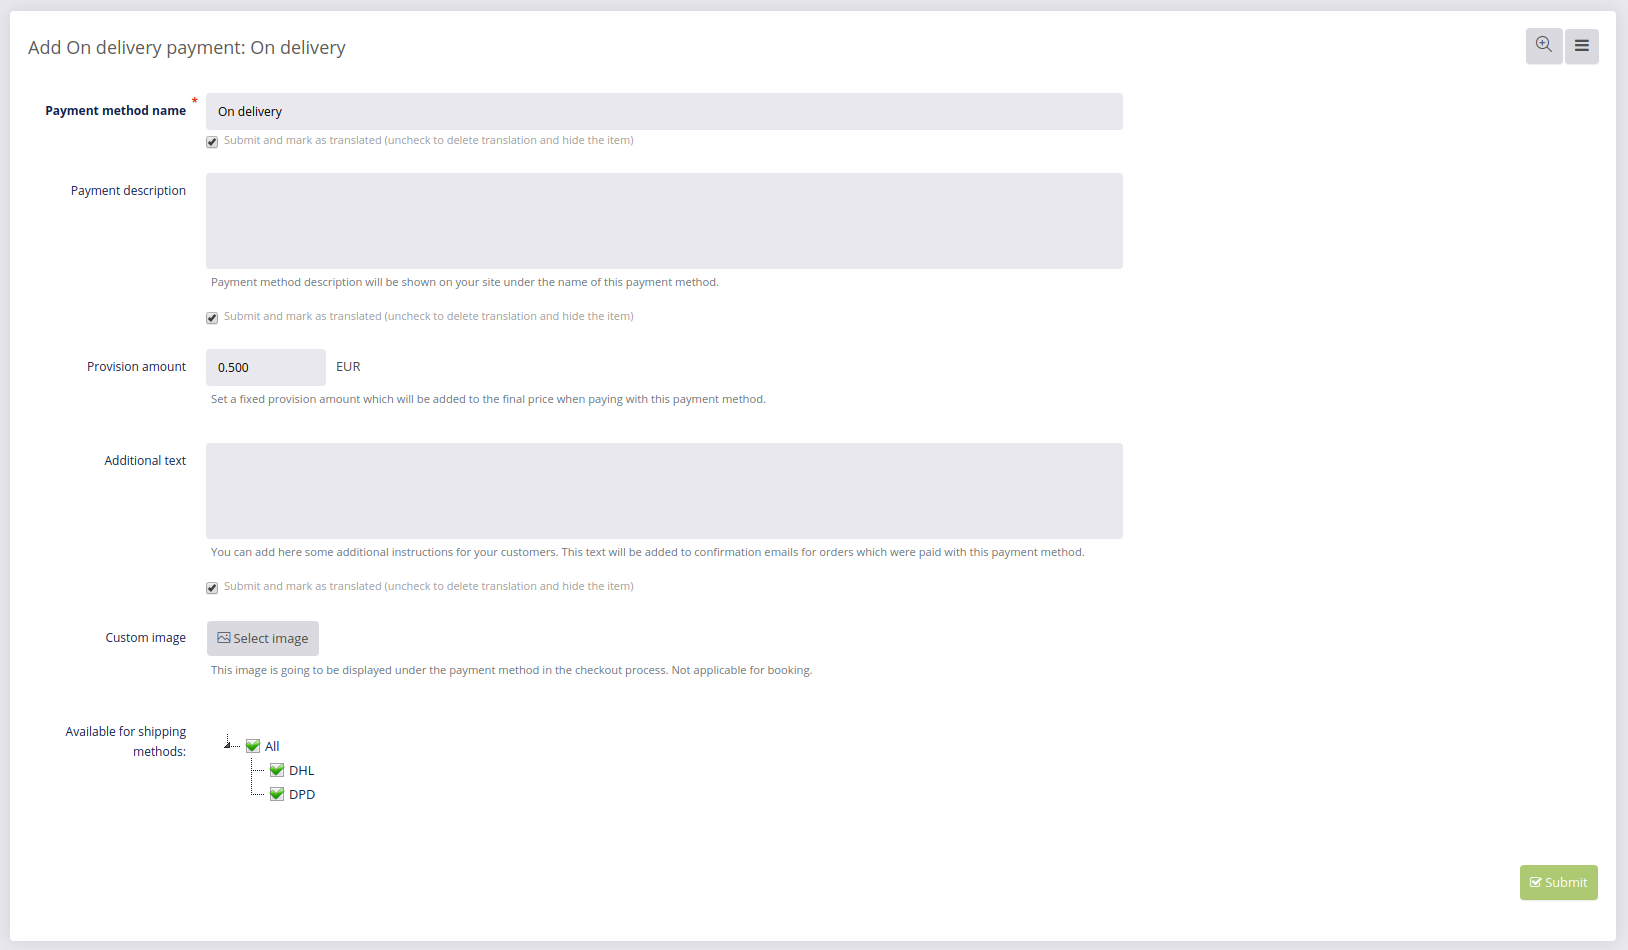
- Once you’ve selected the name and added any additional settings to this payment method, click Submit .
On the Payment methods page you can Edit ![]() details about all your payment methods and confirm any changes you’ve made by clicking Submit
details about all your payment methods and confirm any changes you’ve made by clicking Submit ![]() .
.
This is where you can also disable/enable the payment method by clicking yes or no in the list of payment methods. You can do this separately for Shop and Booking.
# Setting up VNPAY
- To add VNPAY as your payment method, you will need to choose the Payment method name and fill out the following form:
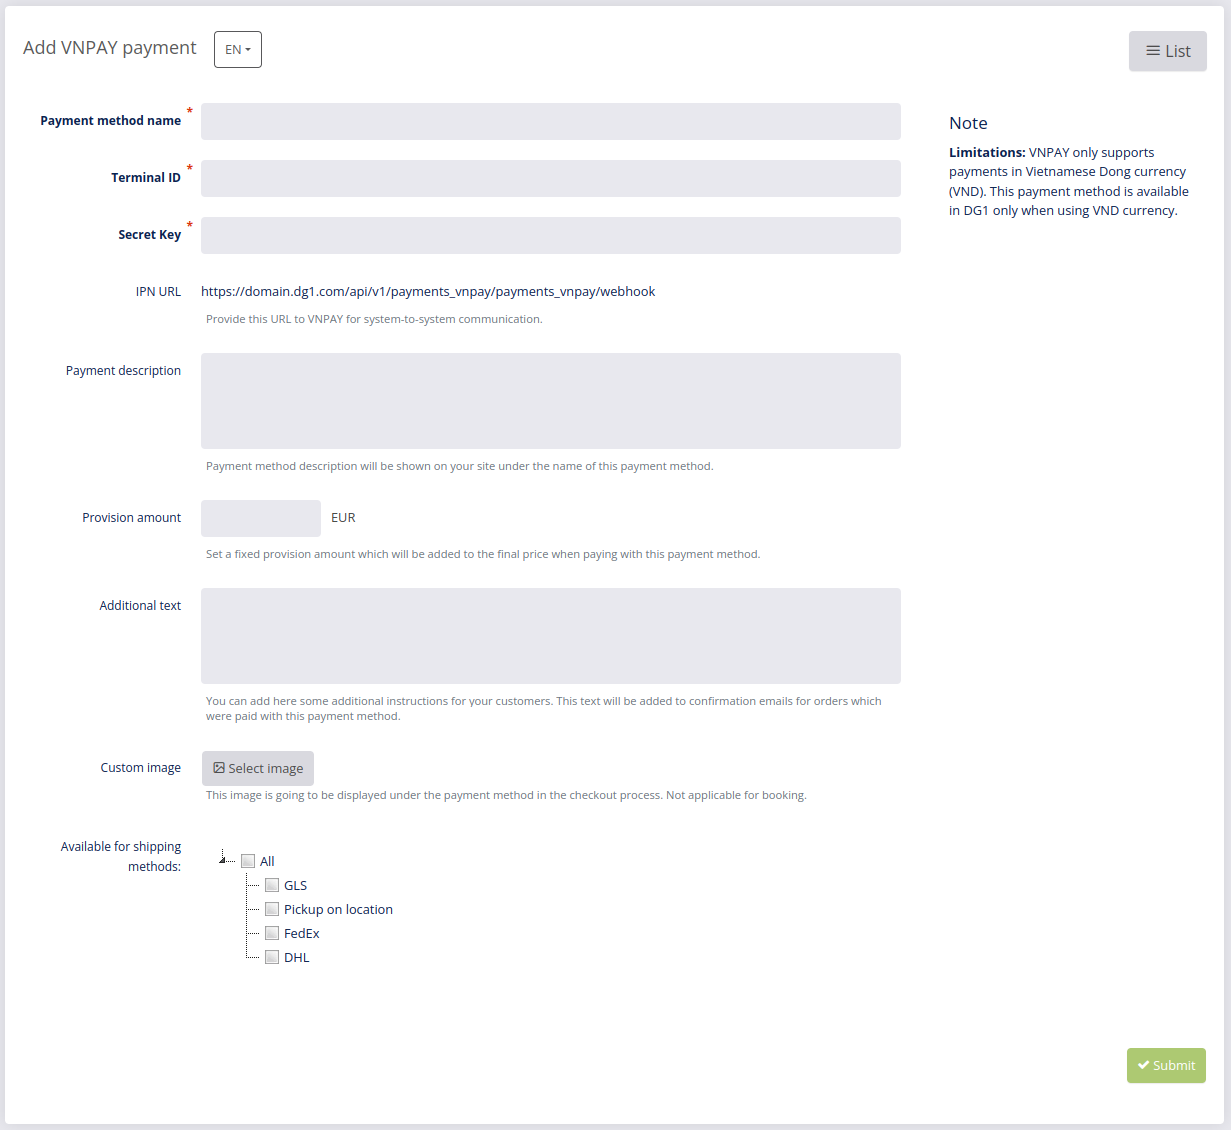
Once you have your VNPAY account, you must copy/paste the following information into the above form:
- Terminal ID
- Secret Key
VNPAY Payment Guide in vietnamese: HƯỚNG DẪN THANH TOÁN VNPAY
Optionally, you can also provide the following information:
- Payment description: If you want, you can add a short payment method description, which will be shown on the front end under the name of your VNPAY payment method.
- You can also set the Provision amount, which will be added to the total price, for example 30 cents.
- Add any additional settings to the payment method and click Submit .
On the Payment methods page you can Edit ![]() details about all your payment methods and confirm any changes you’ve made by clicking Submit
details about all your payment methods and confirm any changes you’ve made by clicking Submit ![]() .
.
This is where you can also disable/enable the payment method by clicking yes or no in the list of payment methods. You can do this separately for Shop and Booking.