# Odoo integration
Odoo integration enables automatic synchronisation between your DG1 and Odoo platforms. his includes order transfers from DG1 to Odoo and daily stock synchronization from Odoo to DG1. You only need an Odoo account—DG1 handles the rest based on your configuration.
- Automatic synchronisation of your orders
- Automatic synchronisation of your stock
# On this page
# Set up the database in Odoo
To connect Odoo with DG1, begin by setting up a database in Odoo and configure the necessary tax settings and API key, then follow the steps below to complete the setup:
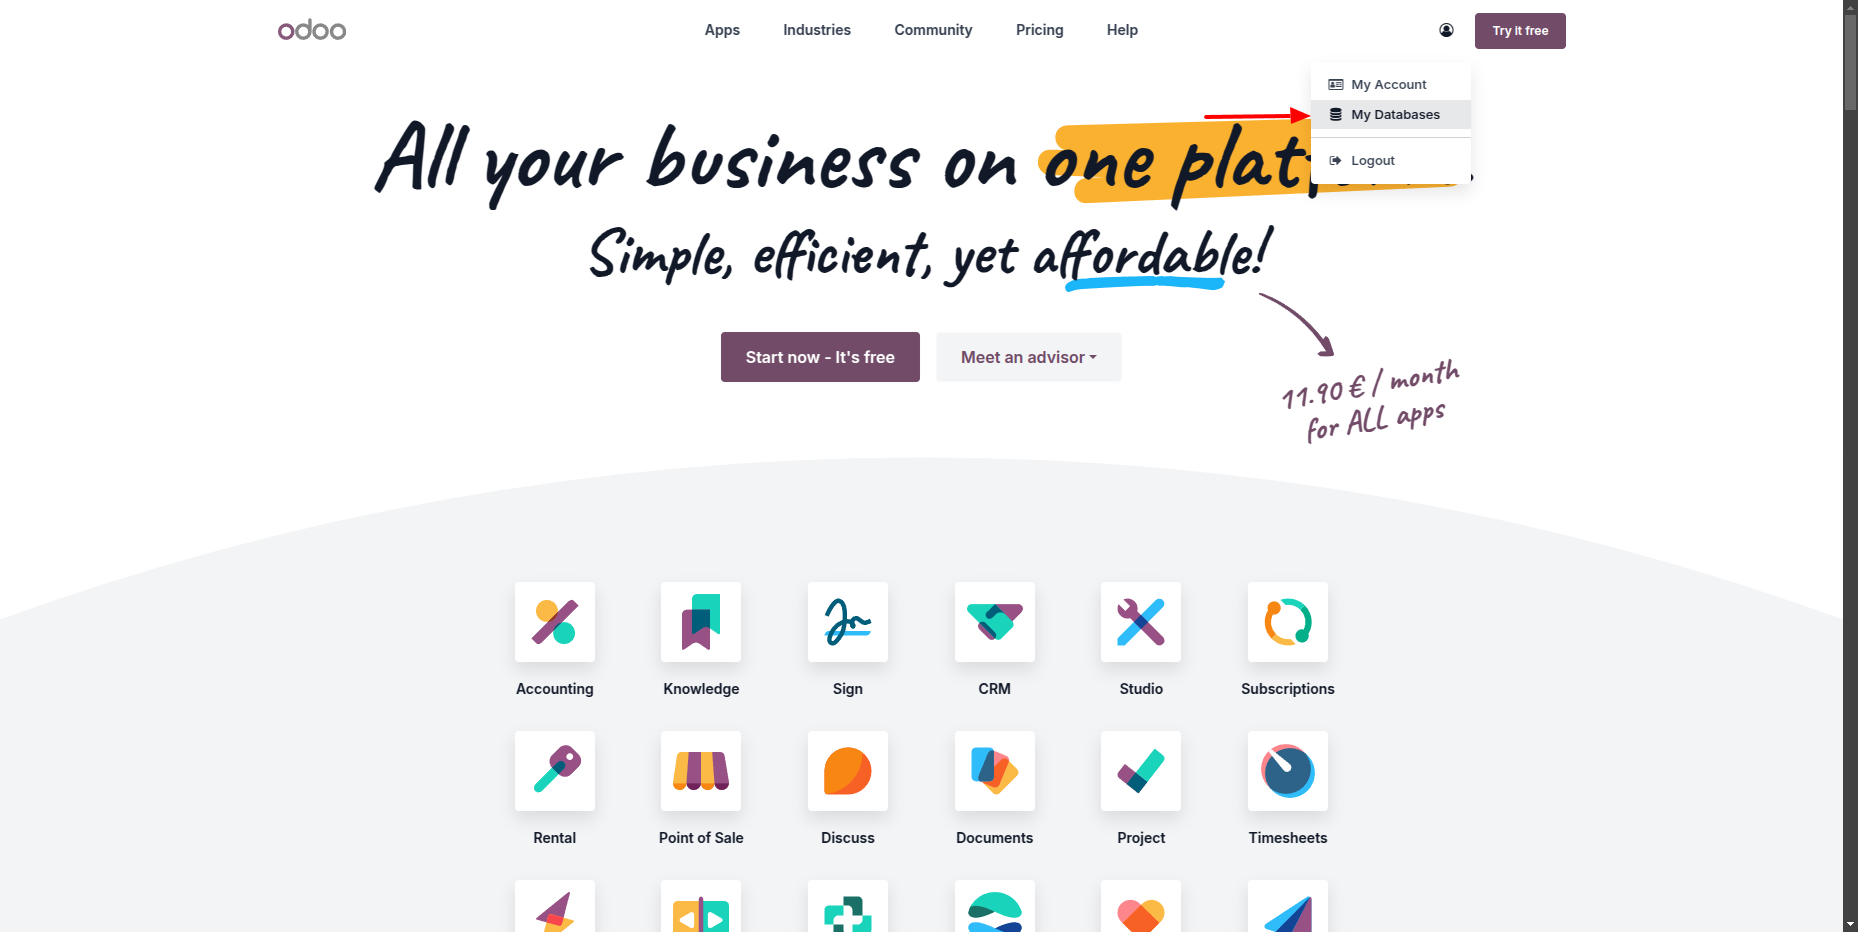
Visit www.odoo.com, click the user icon and select My Databases.
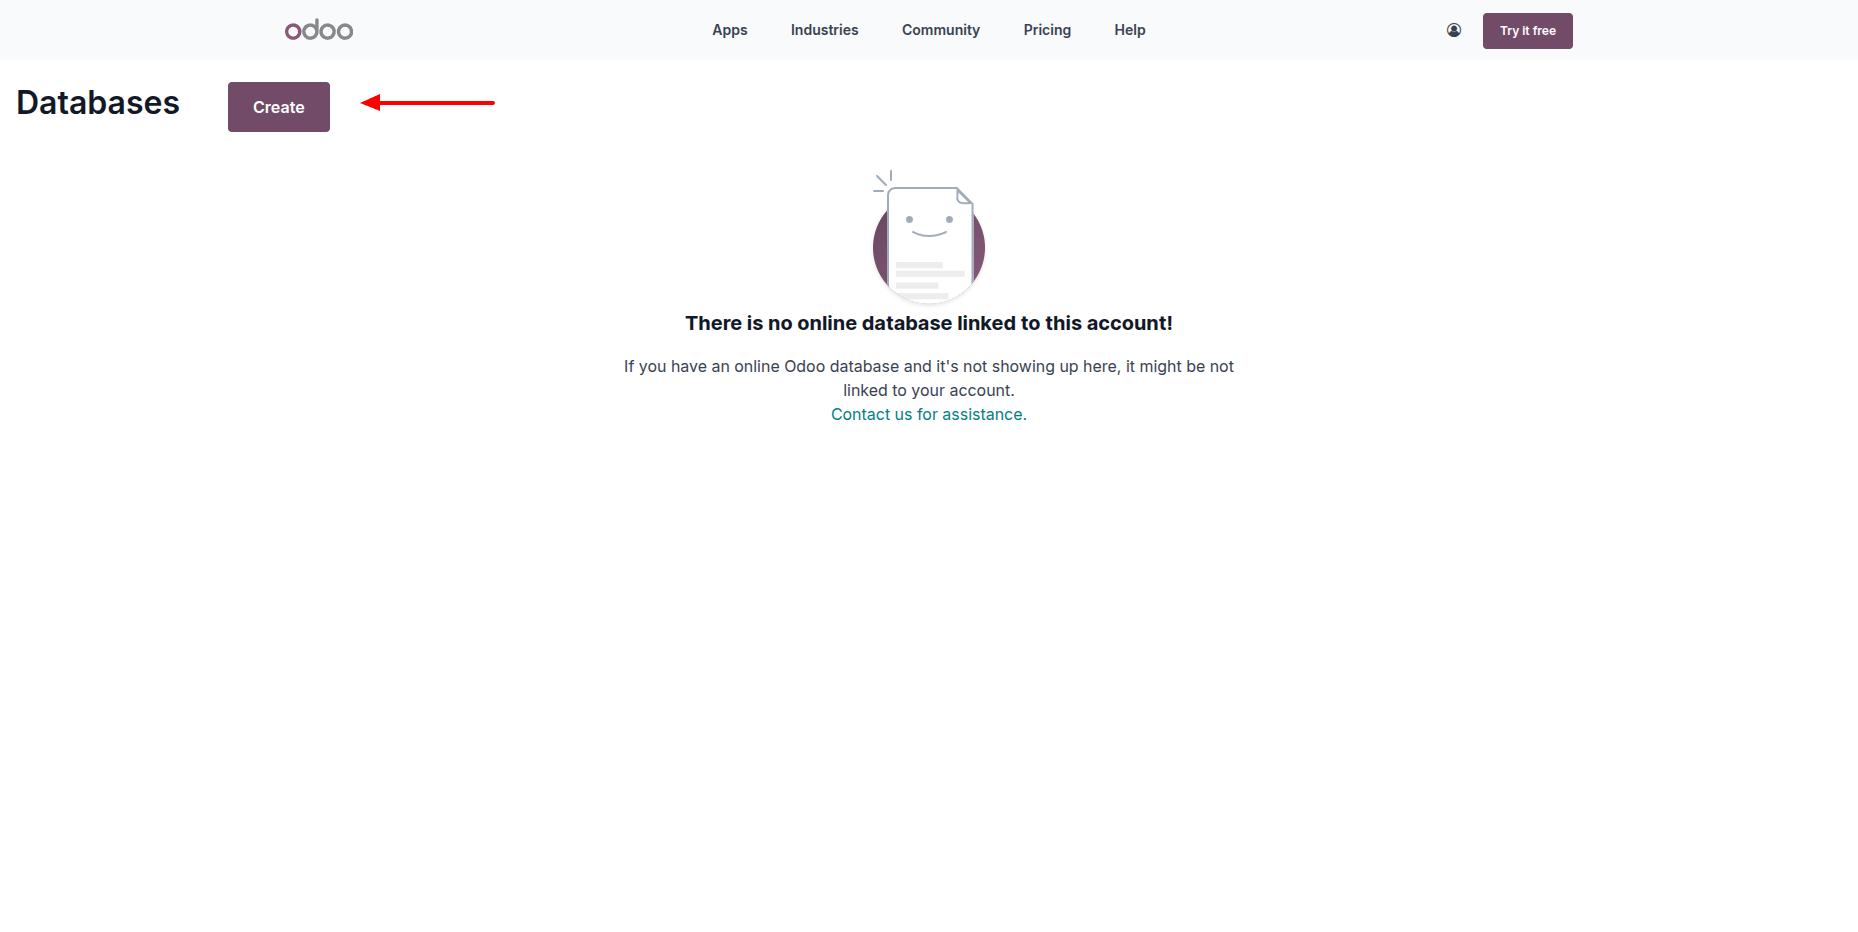
Click Create to start the database creation process.
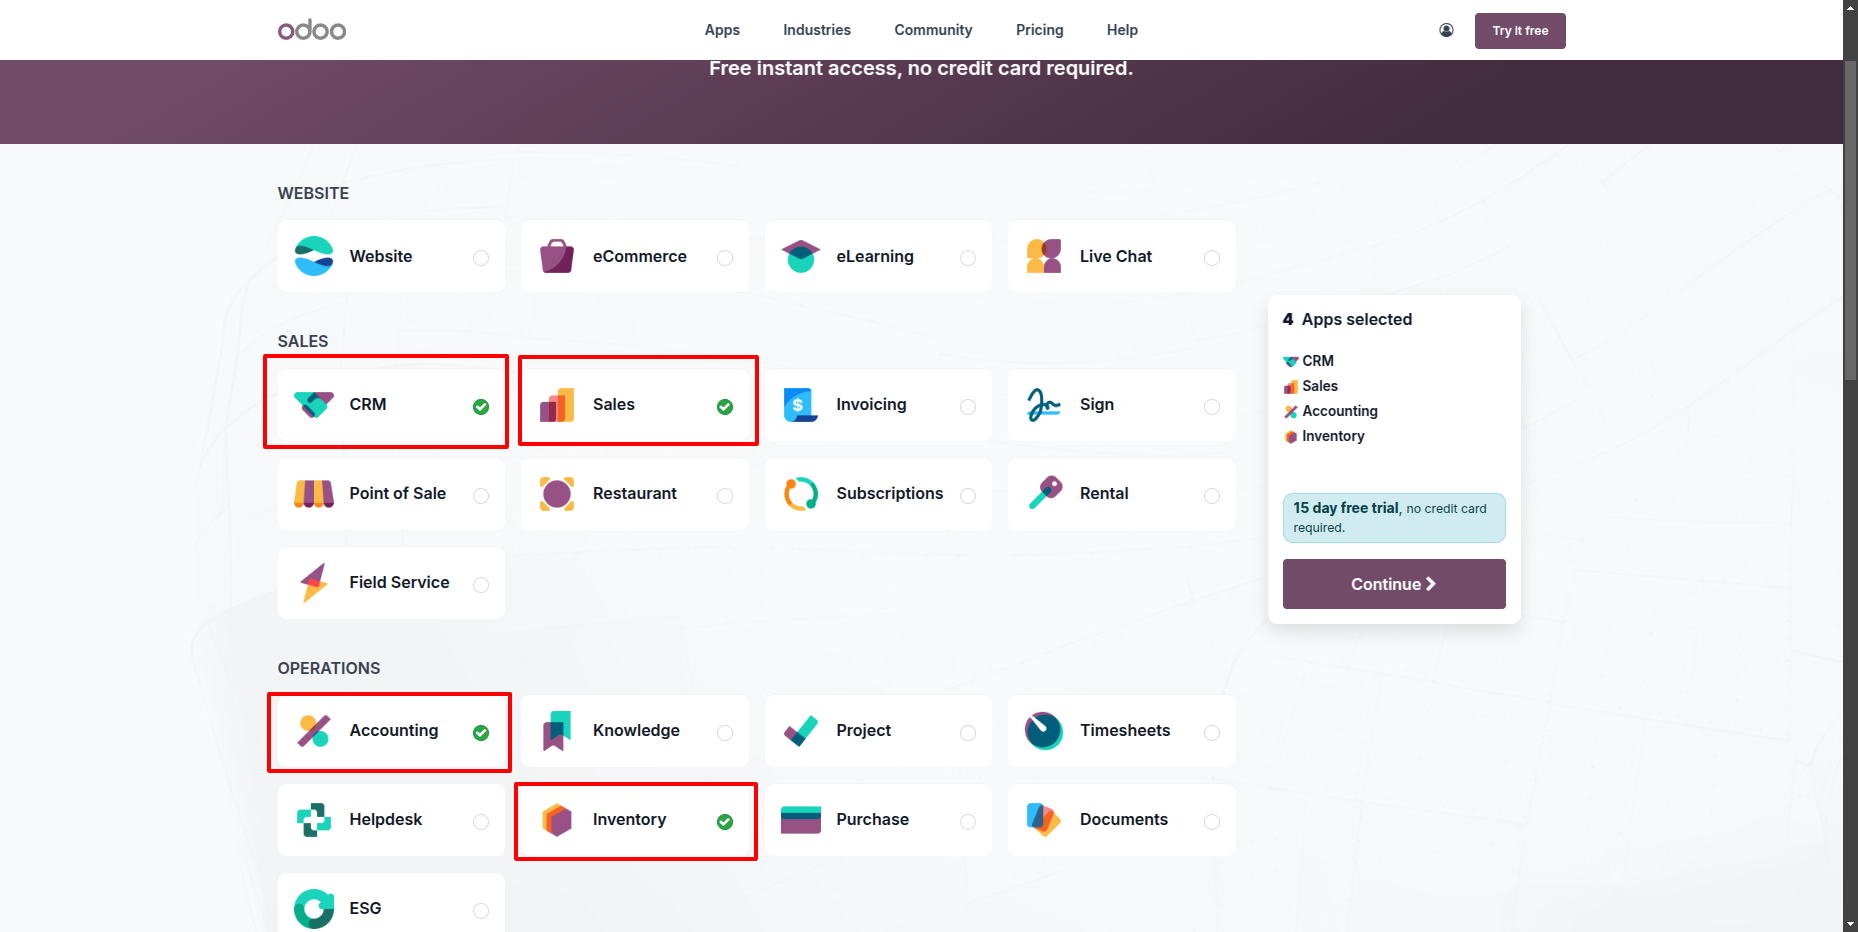
Select the following apps: CRM, Sales, Accounting and Inventory. Then click Continue.
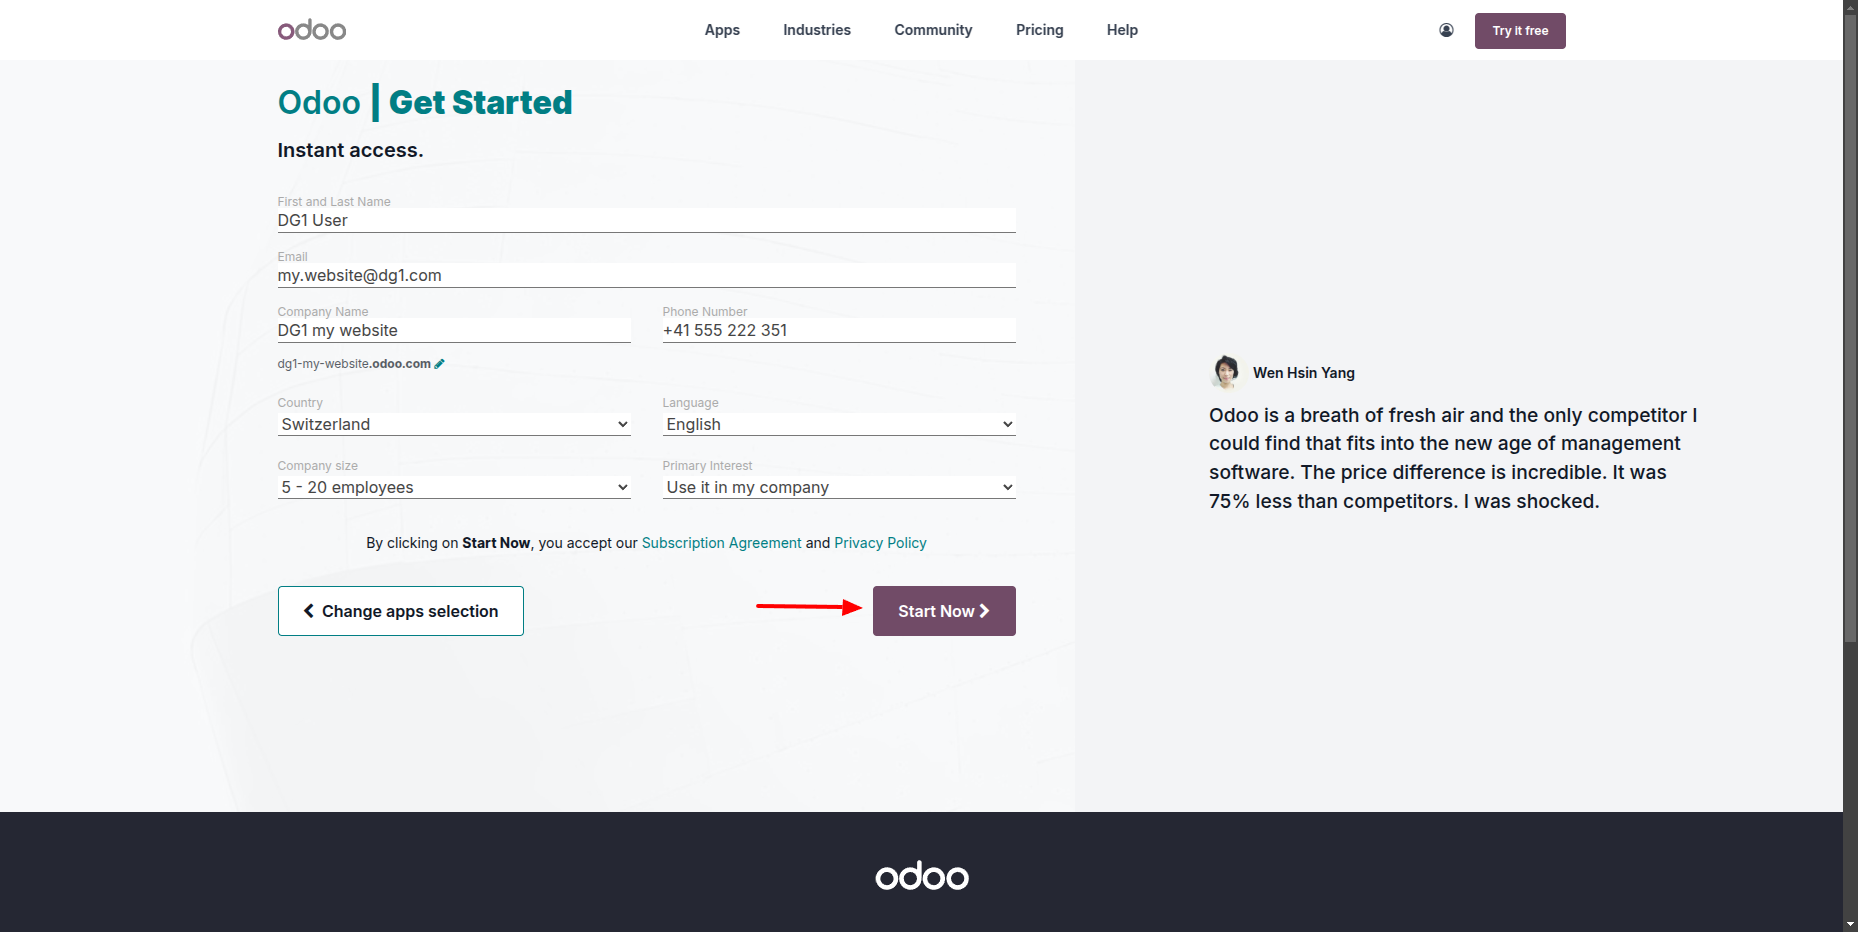
Fill in your details:
- Set the Database Name (this becomes part of your database URL).
- Click Start Now to begin provisioning.
Once provisioning is complete, confirm the setup via the confirmation email you receive.
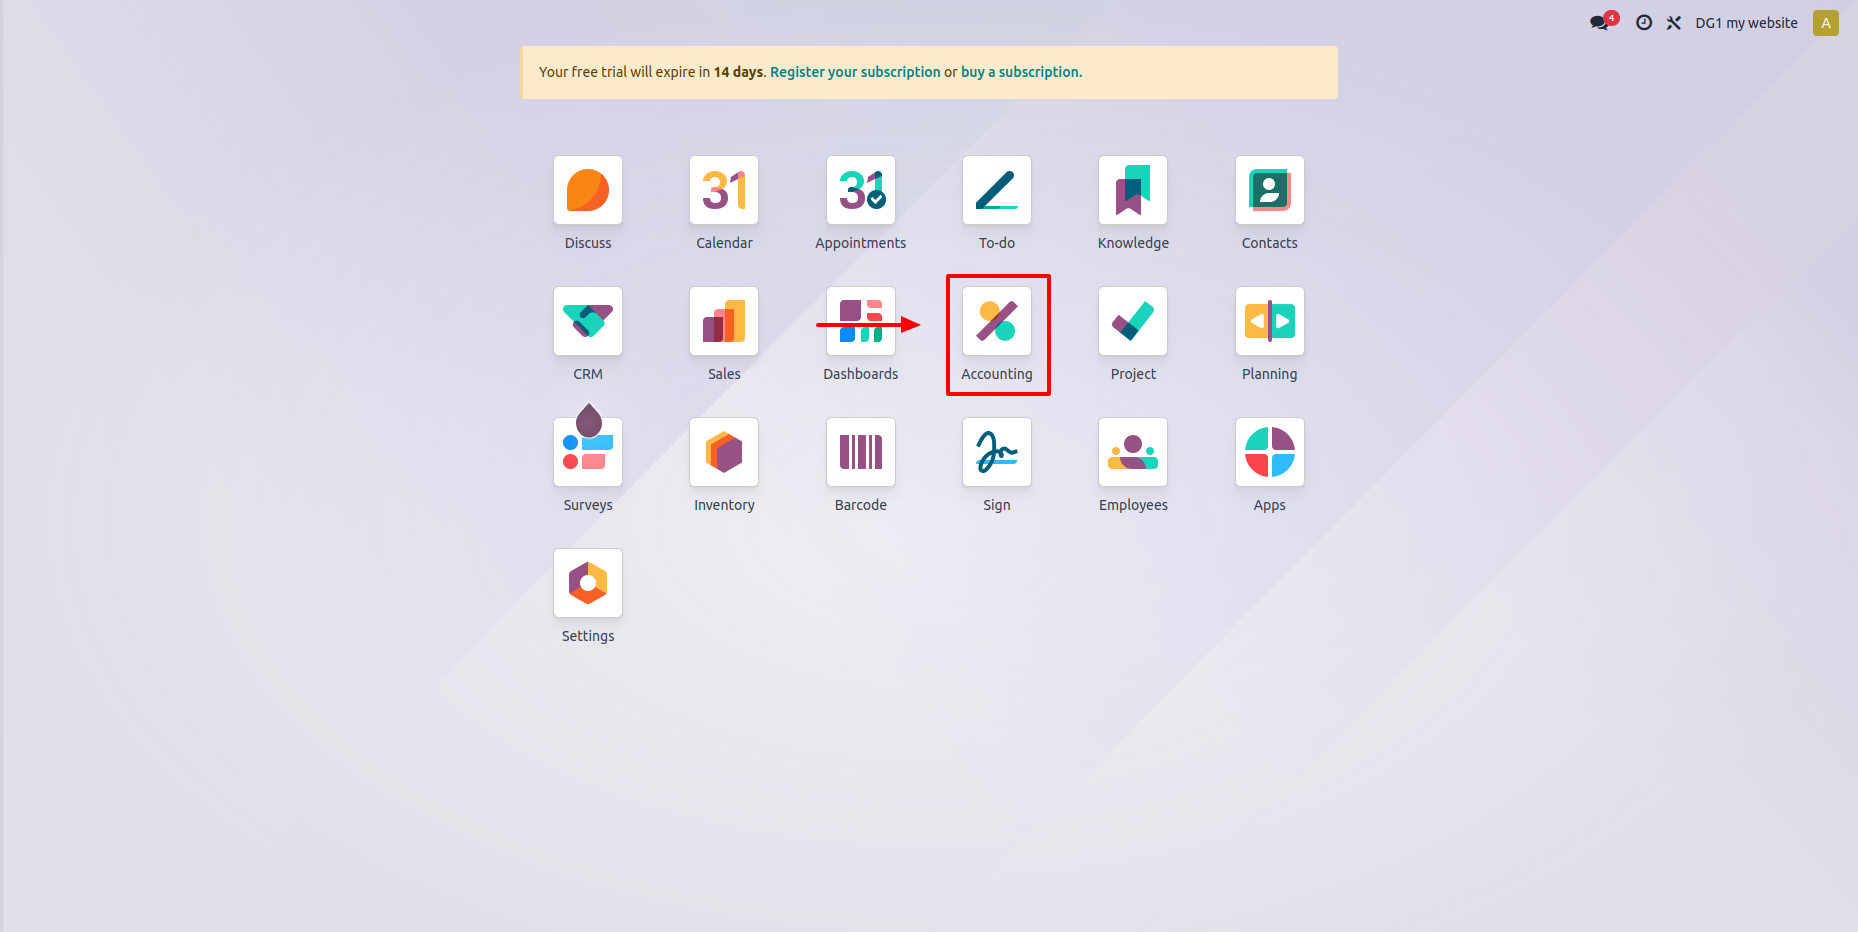
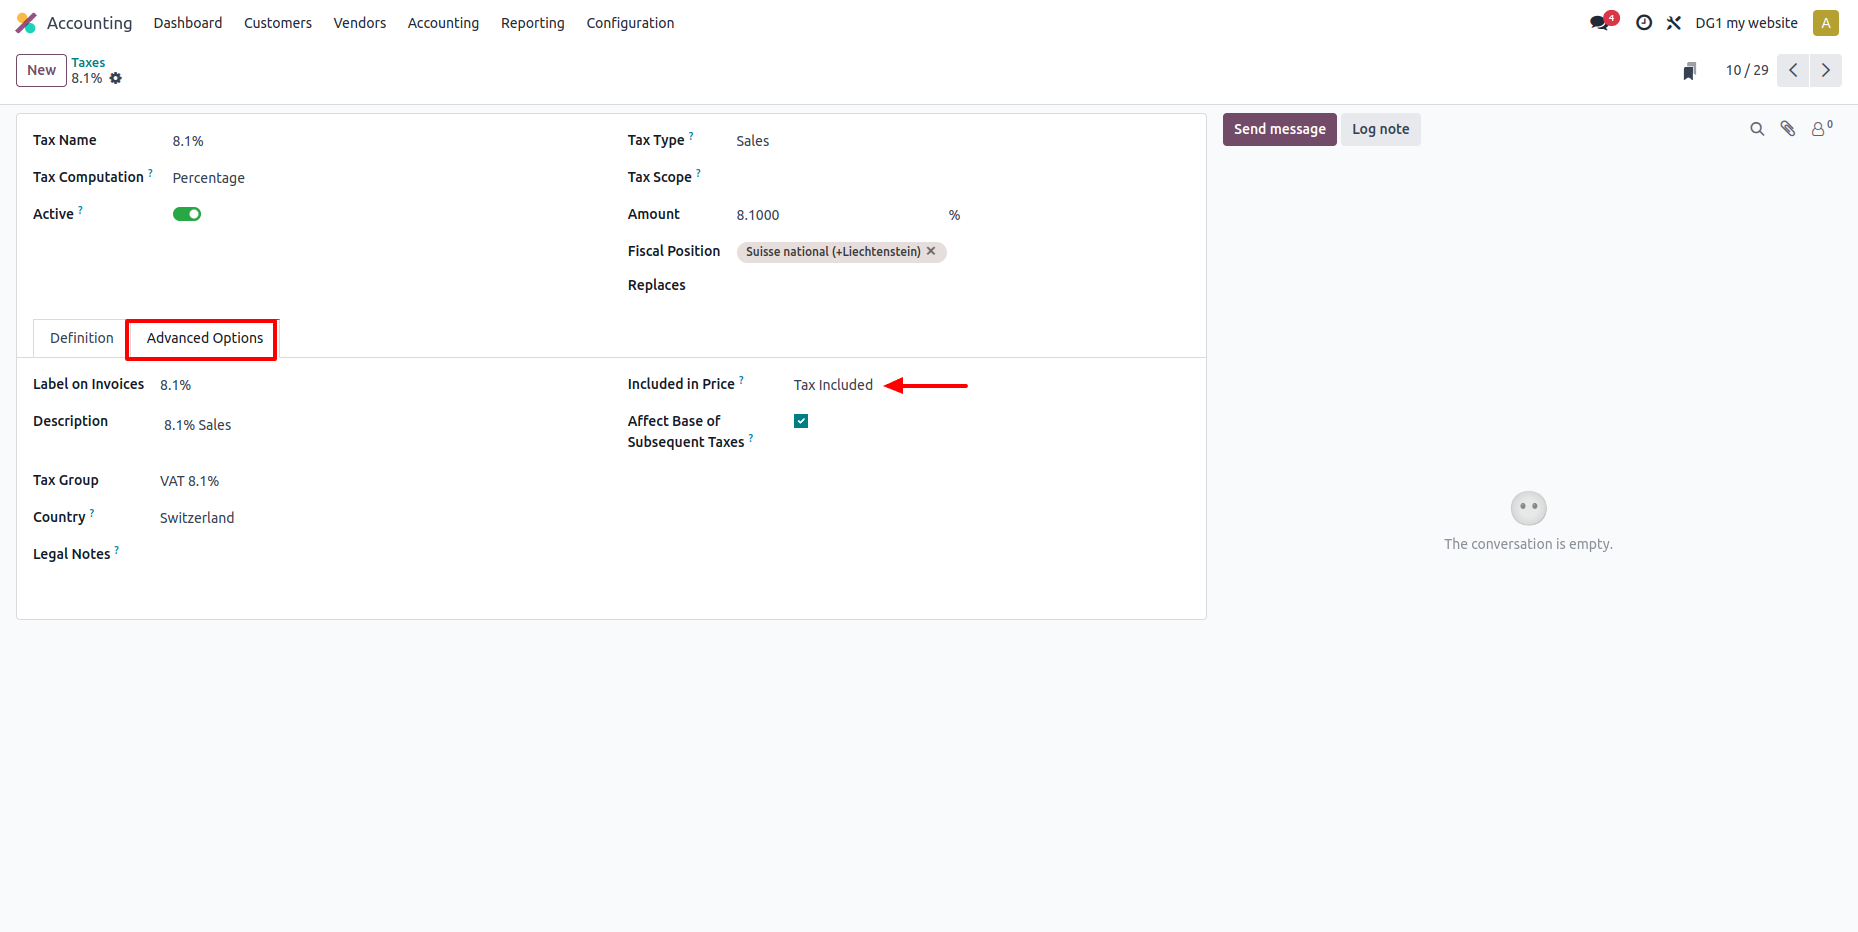
After confirming the database, you will need to configure tax settings to include relevant taxes in your prices. To do this, open the Accounting app.
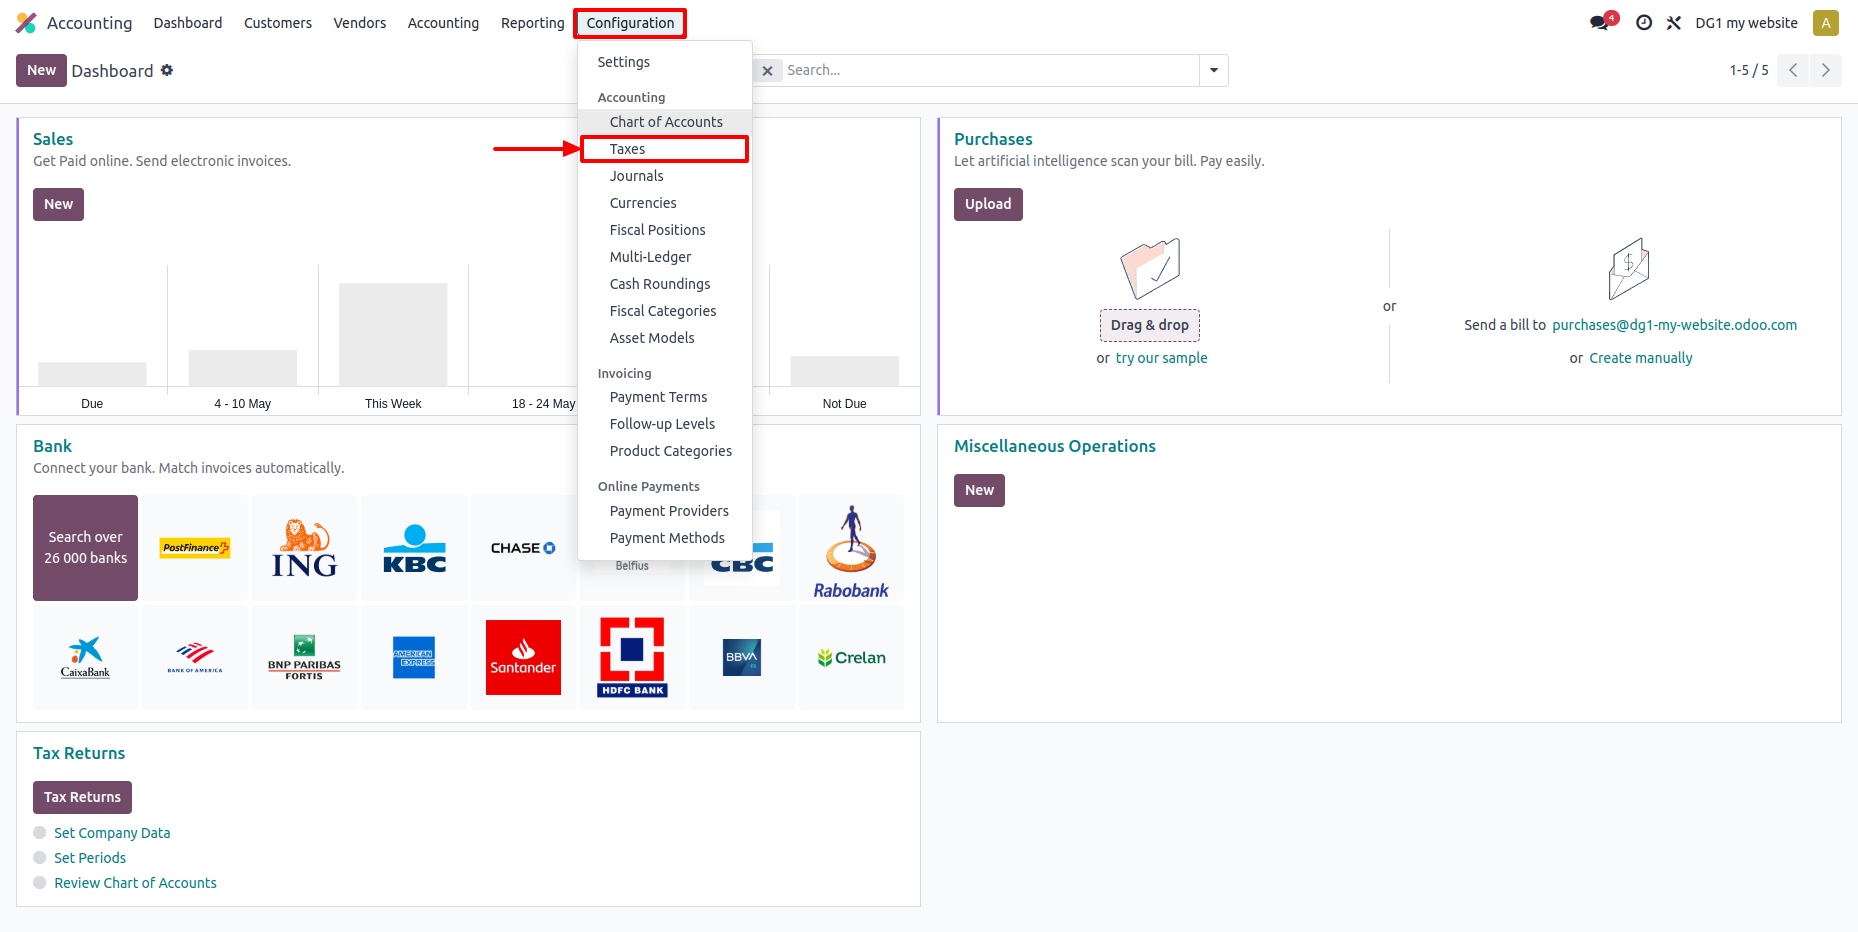
Navigate to Configuration and select Taxes.
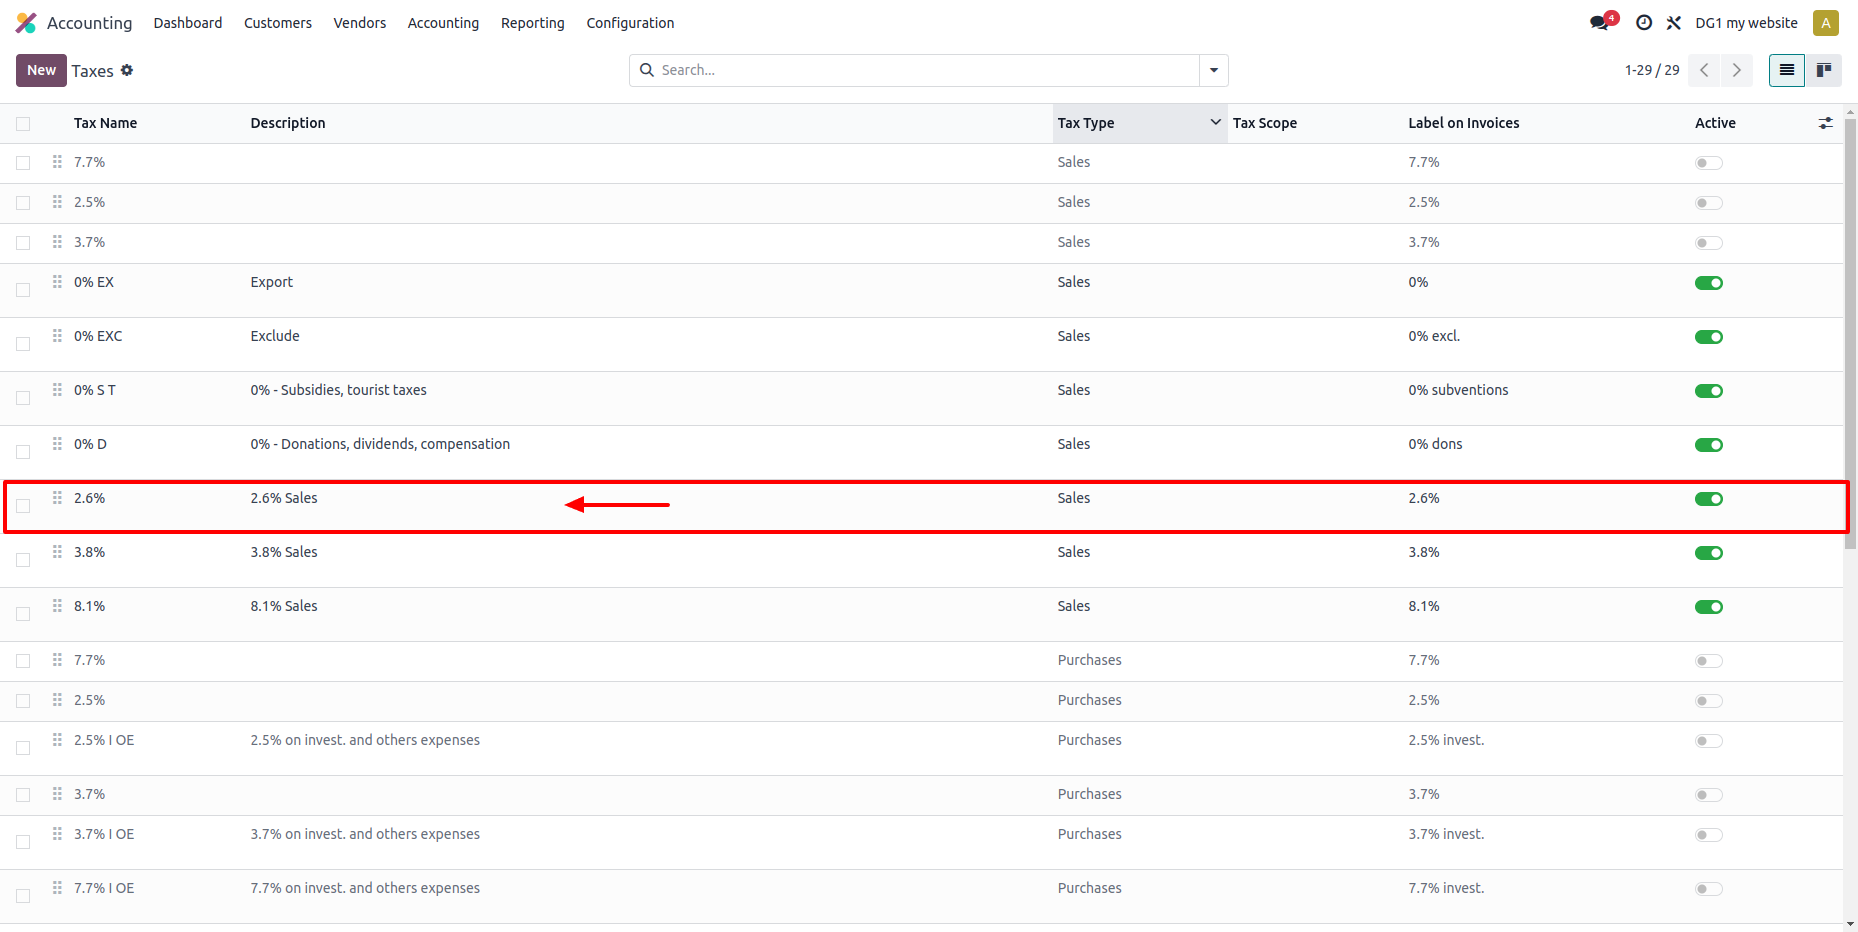
Select the tax rate you want to change.
Go to the Advanced Options tab and set Include in Price to Tax included.
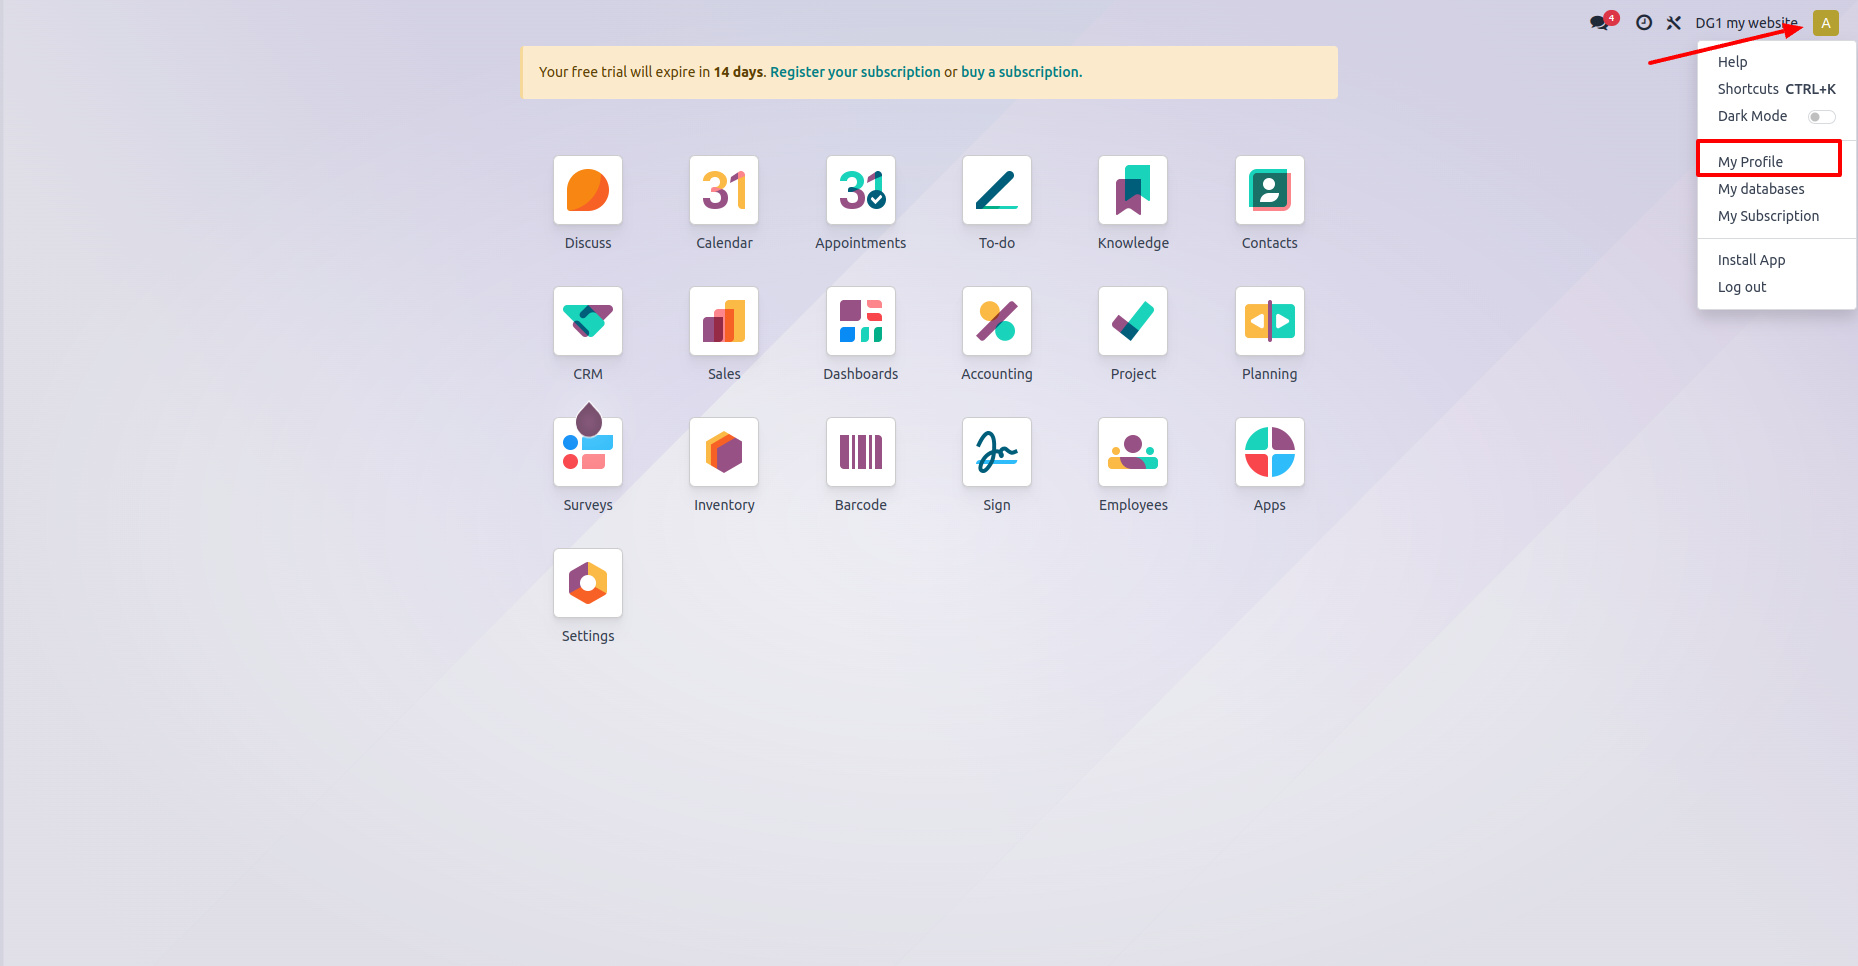
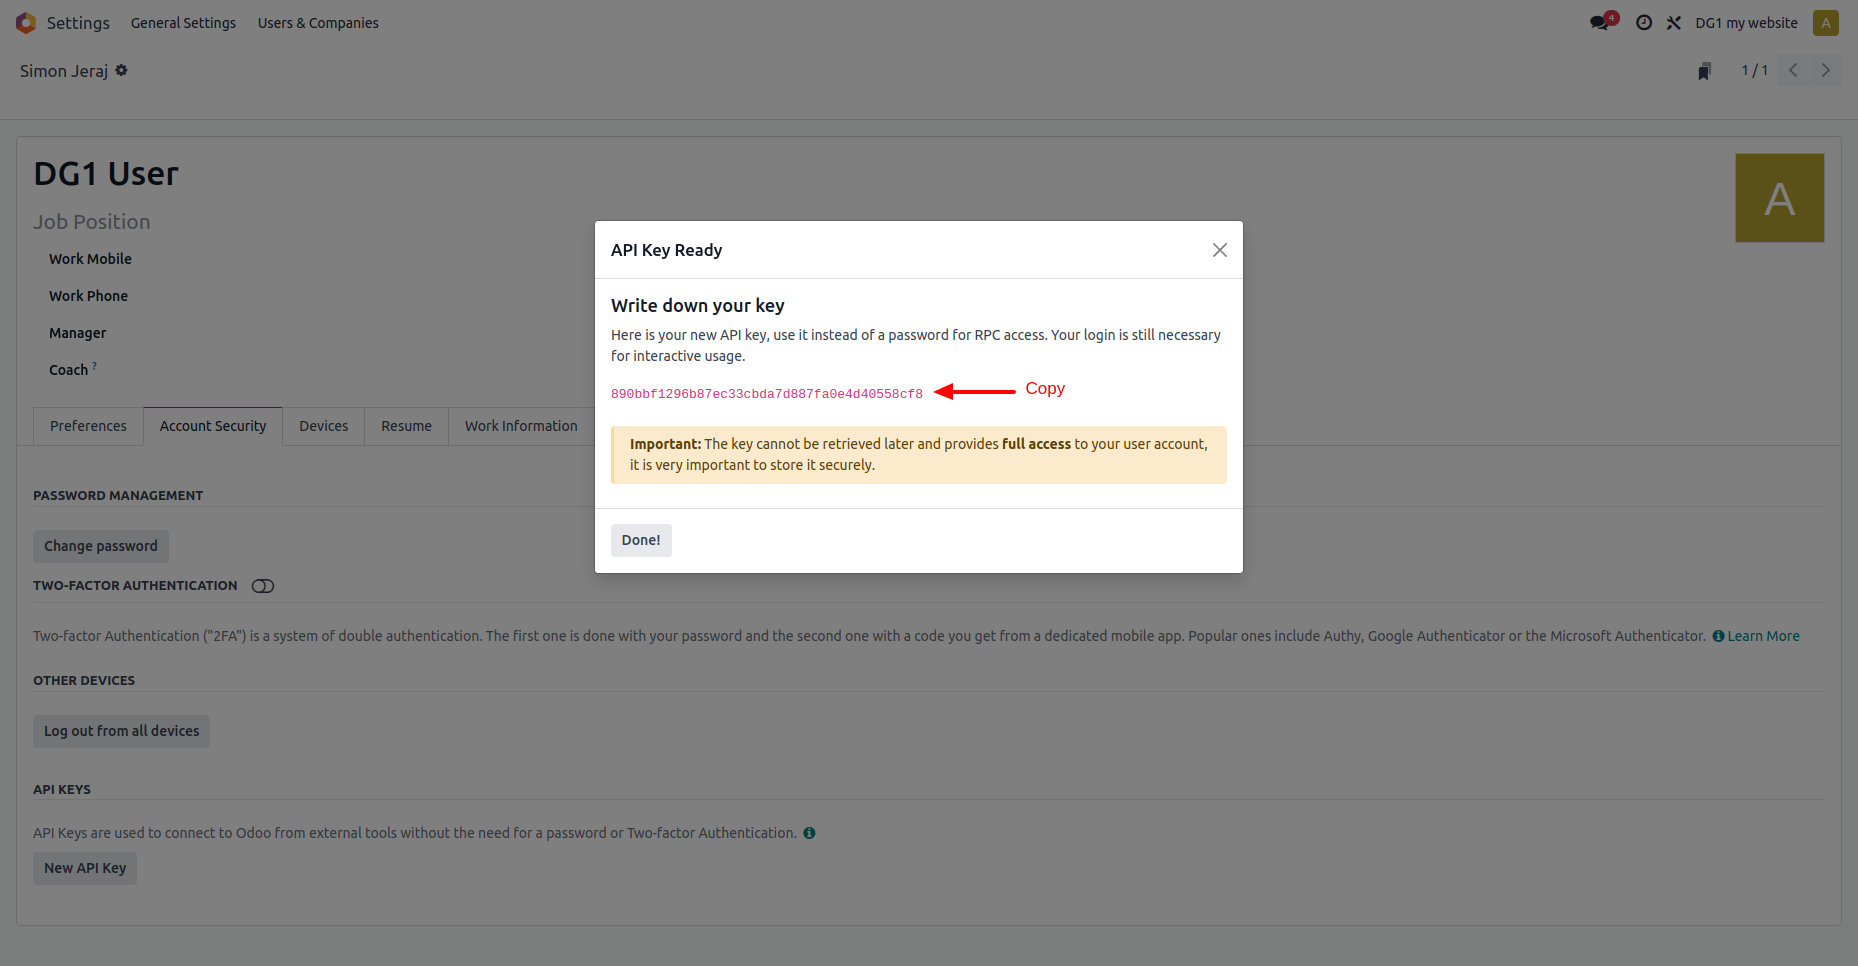
Next, you need to generate your API key. Go back to the Dashboard in Odoo, click the user icon, and select My Profile.
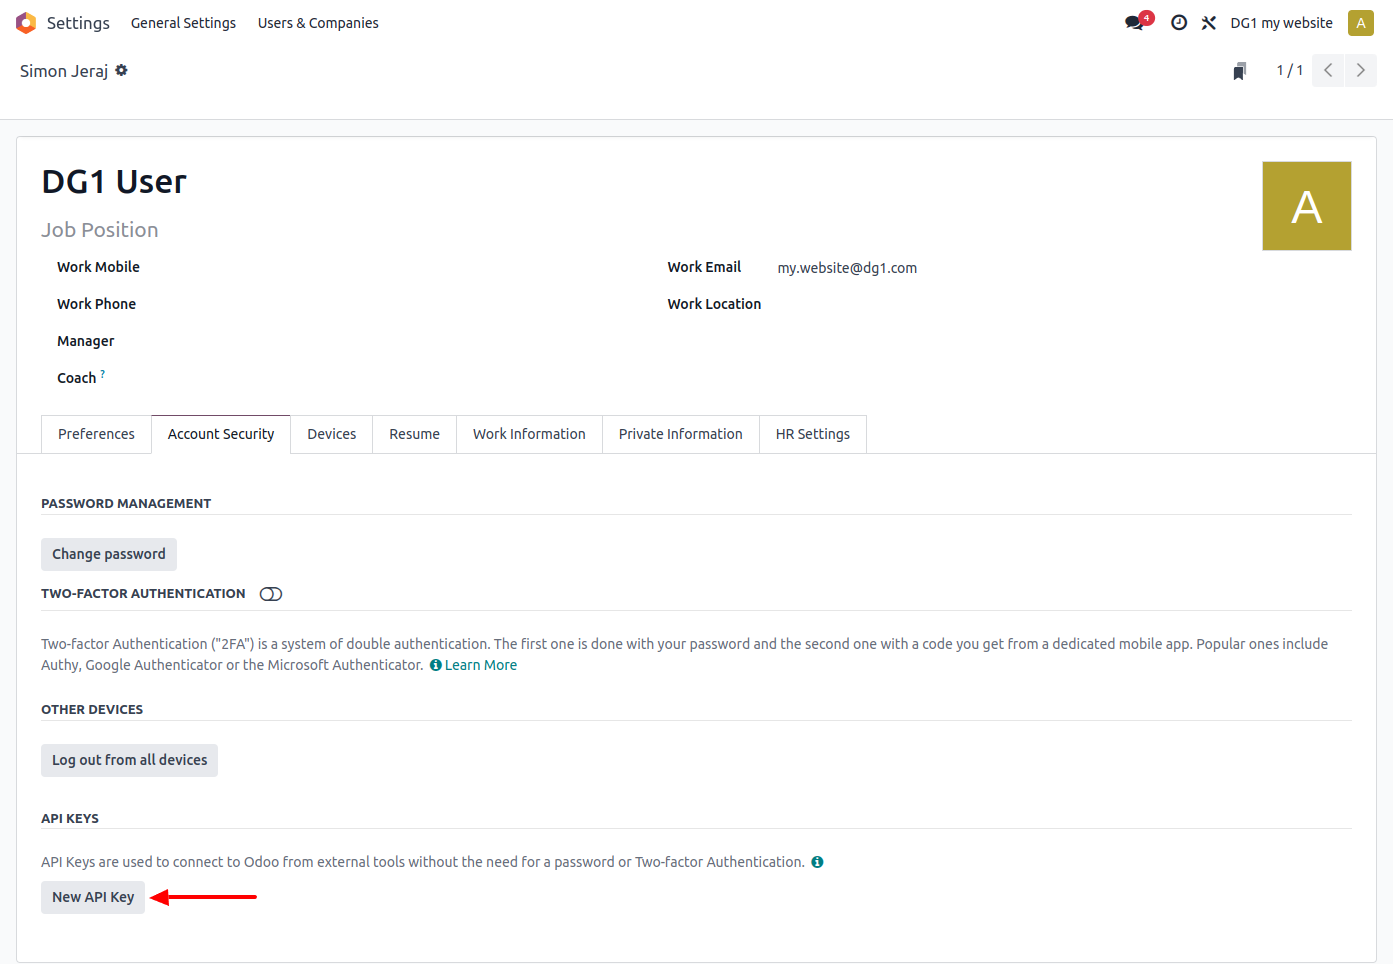
Open Account Security tab and click New API Key.
In the pop-up, choose Persistent Key and click Generate.
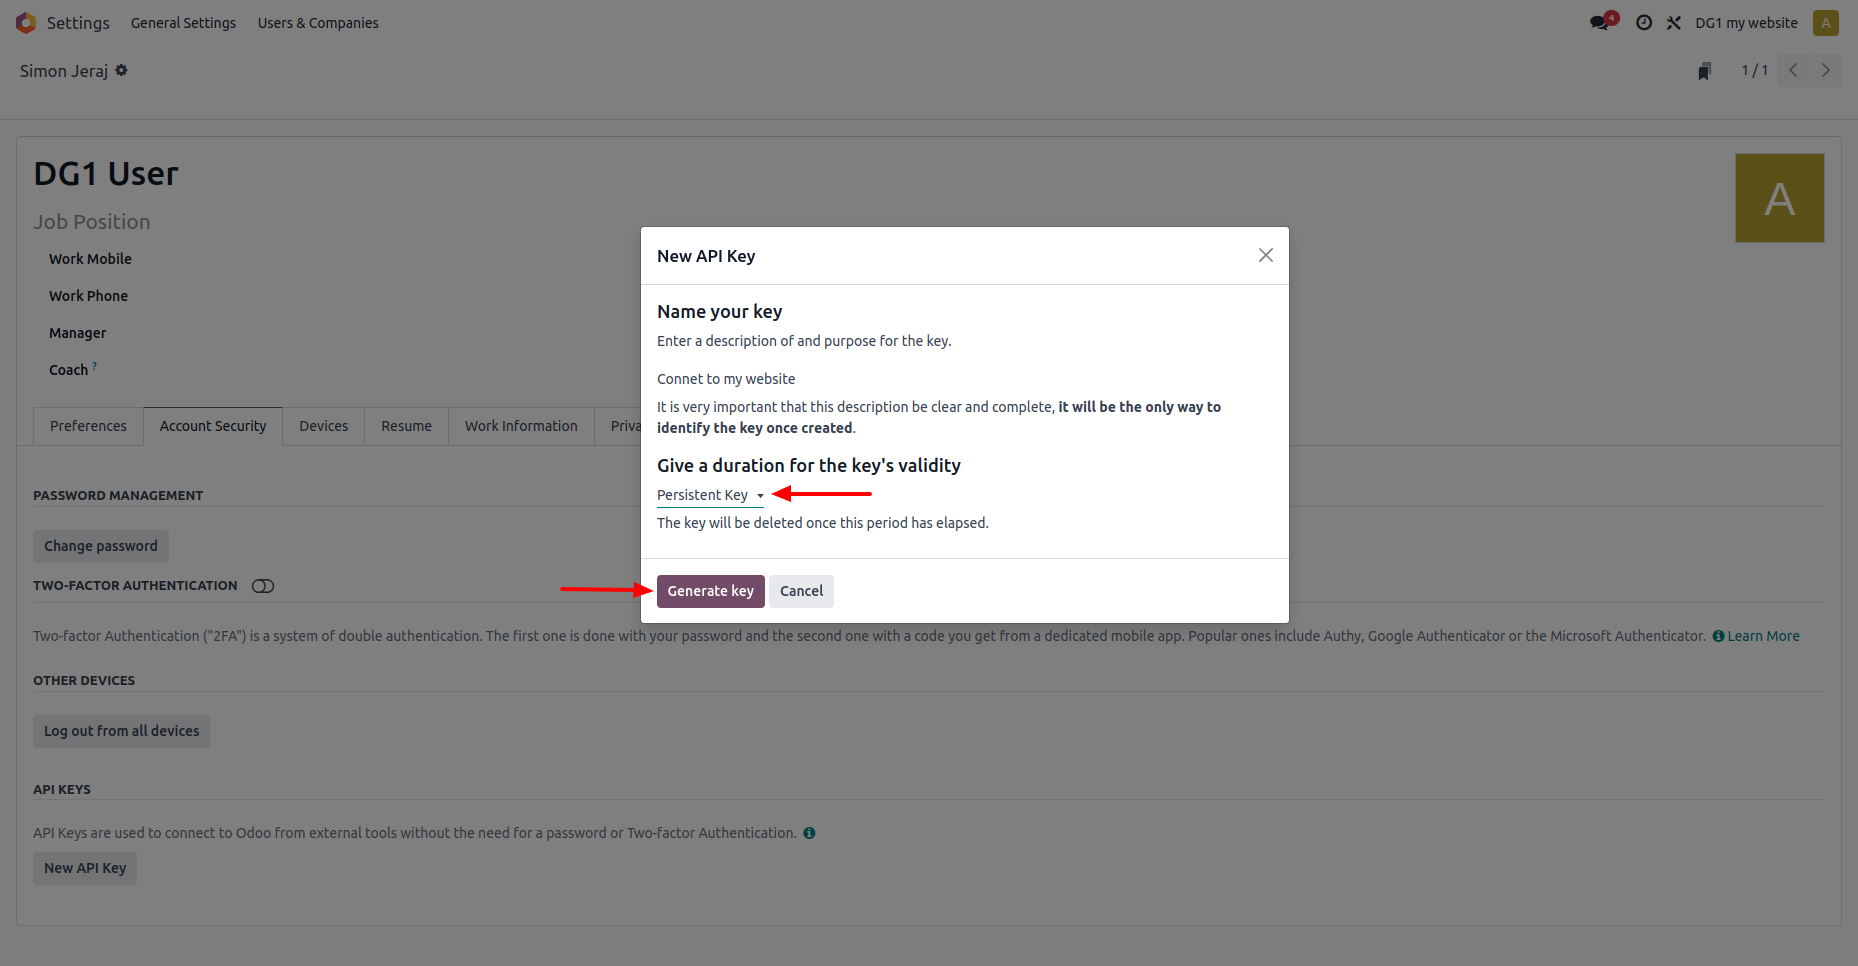
Copy and save the API Key – you’ll need it for DG1 integration.
Your Odoo setup is now complete. Proceed to DG1 to finish the integration.
# Settings
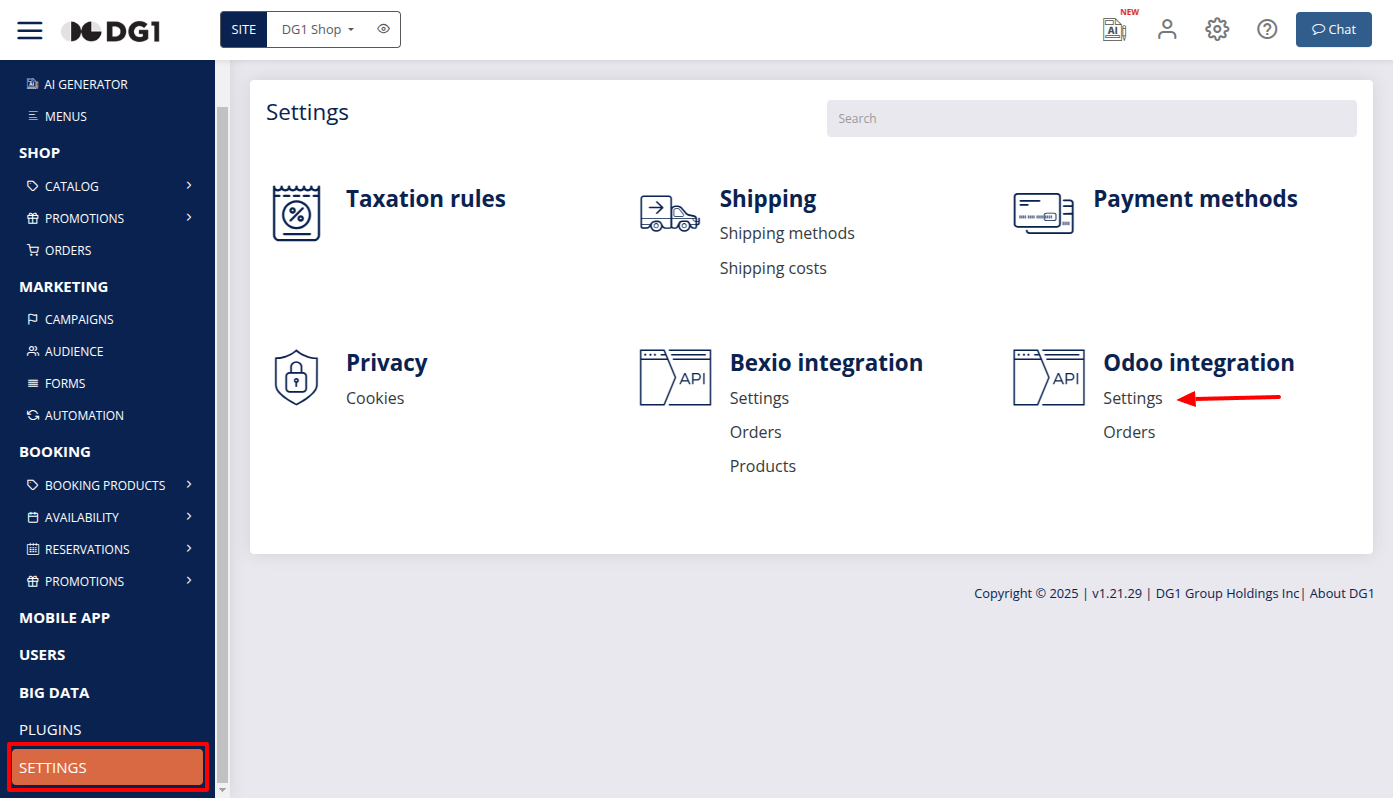
To connect your Odoo account to your DG1 platform, go to Settings in your DG1 admin panel and follow these steps:
Log in to your DG1 Admin panel.
Go to Settings → Odoo Integration → Settings.
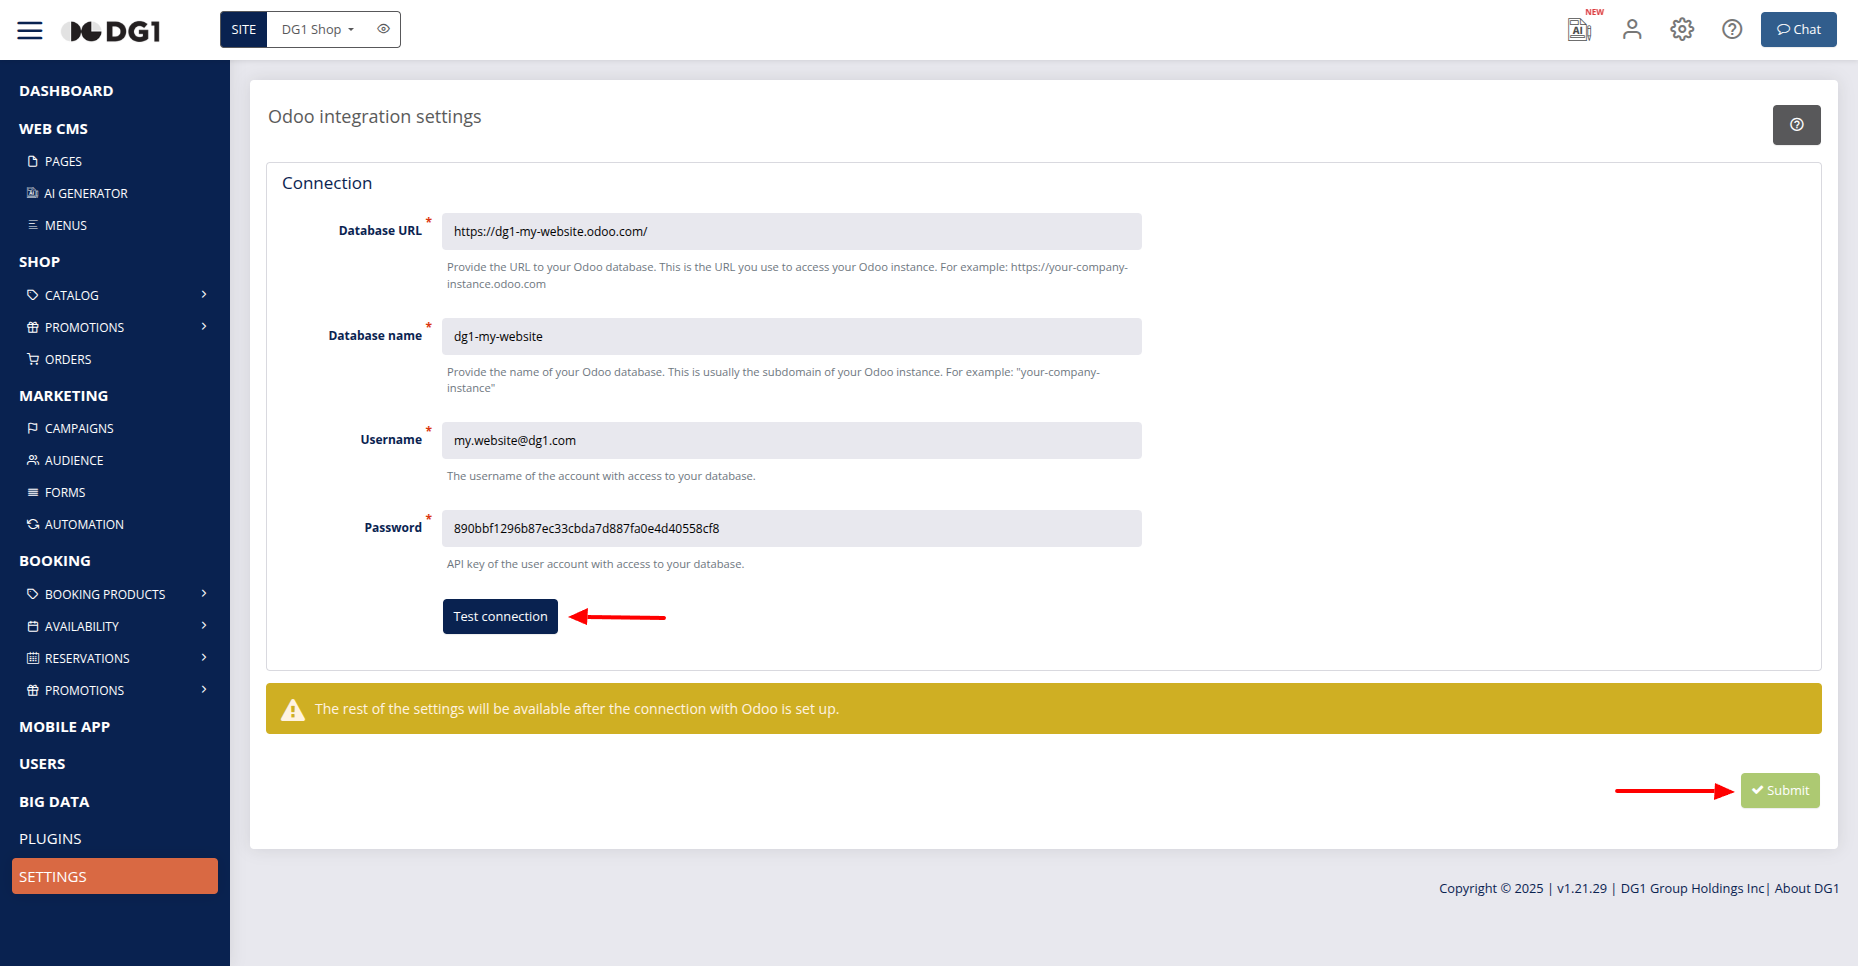
Enter the following details:
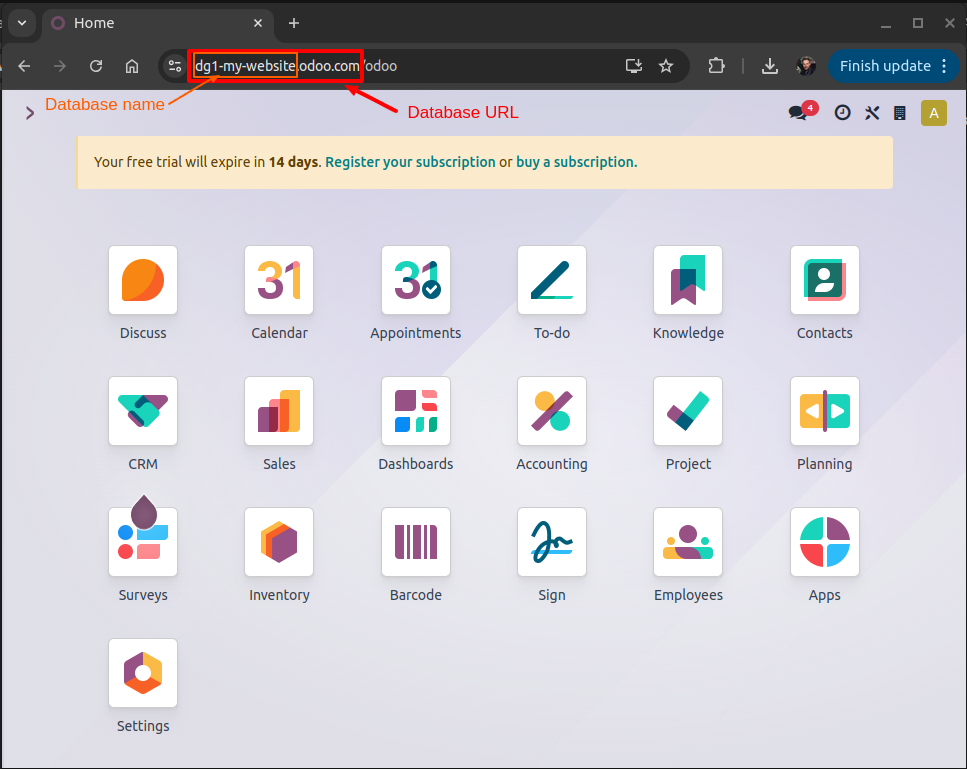
- Database URL: Your full Odoo database URL.
- Database Name: The part before .odoo.com in the URL.
- Username: Your Odoo username.
- Password: Your generated API Key.
Once you’ve entered all your details, click Test Connection. If successful, click Submit
 to save the configuration of your Odoo settings.
In Settings set additional connection settings:
- Enable Odoo integration (mark the checkbox to enable Odoo integration).
- Enable Product stock sync
- Enable automatic Orders sync
- Set Taxes mapping

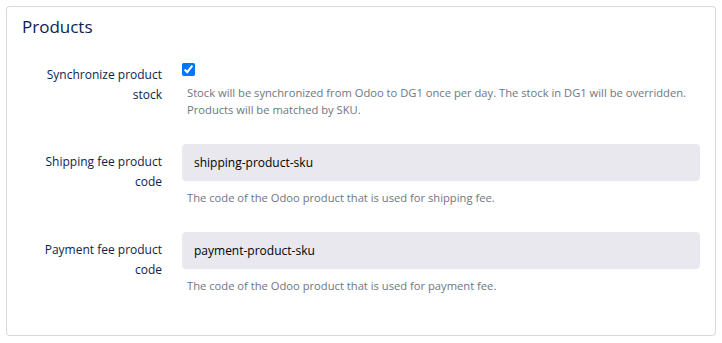
# Products sync
Synchronize products stock: Stock from Odoo will be synced daily to DG1. The stock in DG1 will be overridden. Products will be matched by SKU. In Odoo the Reference in the product is SKU.
Shipping fee product code: Since Odoo doesn't natively support shipping fees, create a product in Odoo to represent it. Use its Reference as the code.
Payment fee product code: Similarly, create a product to represent payment fees. Use its Reference for the code.
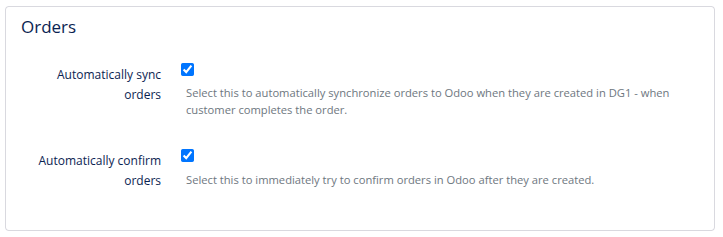
# Orders sync
Automatically sync orders: Select this to automatically synchronize orders created in DG1 with Odoo, when a customer completes the order in DG1. Orders from DG1 are transferred to Odoo.
Automatically confirm orders: Select this to confirm orders in Odoo right after they are created.
# Taxes mapping
Proper tax alignment is critical. Ensure identical rates exist in both DG1 and Odoo.
Shipping tax rate: Select the Odoo tax rate for shipping.
Payment fee tax rate: Select the Odoo tax rate for payment fees.
Tax mapping: Match tax rates from DG1 to Odoo. Example:
- DG1 tax rate: 8,10%
- Odoo tax rate: 8,10%
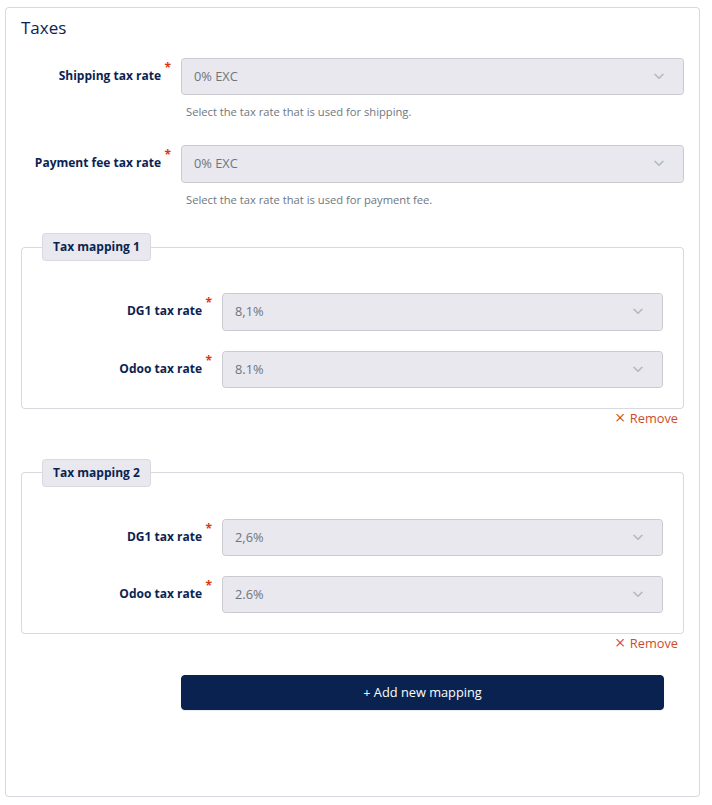
- Click the Submit button to save settings.