# Booking personnel
Numerous industries are driven towards personalization of their products and services. When it comes to booking services, many businesses also like to expose staff members as part of their offer (Examples: consulting companies, massage, nail, cosmetic and hair salons, language schools etc.). In this chapter we will show you how to add and manage booking products with staff members. In DG1 we refer to staff as Personnel.
Personnel can only be added to booking products within Custom time booking groups, so here’s a quick recap of the process for adding a booking group with Custom time to your booking section:
Navigate to the Booking section of your DG1 admin panel.
Select Booking groups in the top right corner of the Booking products page.
Click Add
 and confirm with Add new
  in the pop-up window.
Enter the Name of your booking group.
Set the Booking type to “Custom time”.
Note
Only Custom time allows you to add personnel to your booking products.
Pick the type of Duration.
Choose the Payment option.
To Show booking product price, choose Yes.
Click Submit
 .
.
Once you have created the Custom time Booking group, add the products that you would like to associate with personnel and follow these steps for adding personnel to booking products:
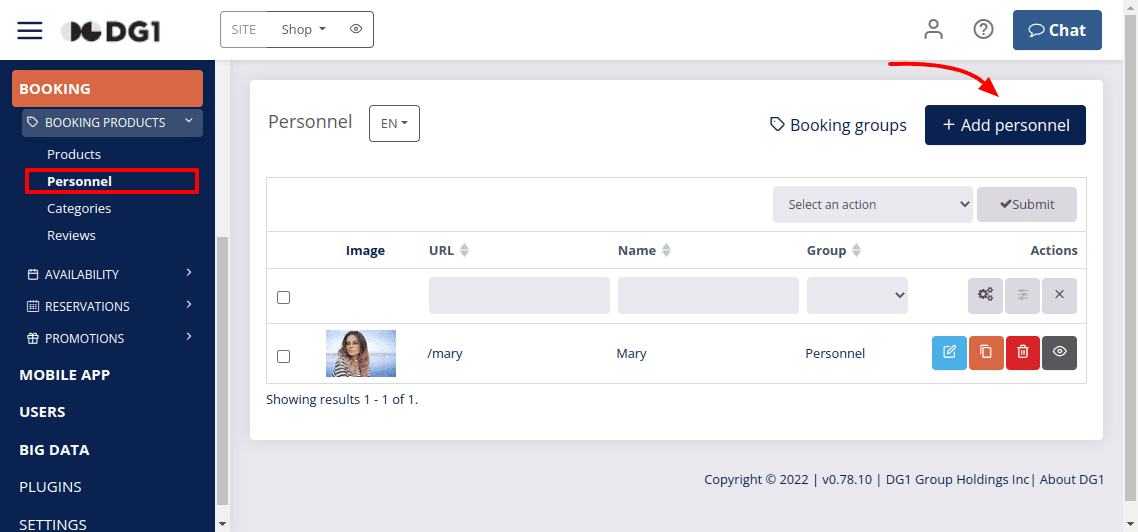
- Navigate to Booking products -> Personnel and click +Add personnel
 .
.

- Enter the following details in the Product info tab:
General
- Enter the Name of the staff member. The URL is generated automatically when you type in the name.
- Add a short description
Additional price with tax – you can set an additional price for choosing a specific staff member, for instance based on their level of experience or type of service they provide.
Note
This price will be added to the price of the booking product and that will then form the final price.
Choose the appropriate Tax rate.
Show price – By default the price will be inherited from the product group you selected for your booking product, but you can also decide to Show the price or Hide the price of each staff member.
Note
Name and Tax rate are the only two mandatory fields when adding a new bookable staff member. All other details can be provided later.
- Additional settings
- Add a Custom person ID for this staff member, for instance from another system that you are using.
- External URL - The user will be redirected to the URL instead of opening the product page.
- Custom email recipient – type the email address to which the order confirmation of this specific booking product will also be sent to.
- Include search words – you can define search words that will help the internal search engine find the product/person.
- Restrictions
- Use the Deactivated from/to fields to specify the period when the staff member is unavailable, for instance due to vacation or training, or even for maternity leave.
- SEO
- SEO Description is a short description for external search engines.
- SEO keywords are searched words used by external search engines. You can use words or phrases, but make sure you always separate them with commas.
- SEO image – you can choose an image to enable Google search by image.
- Additional settings
To help your customers put a face to the name, follow the below instructions for uploading photos and videos of your personnel in the Images & videos tab:
- How to add an image:
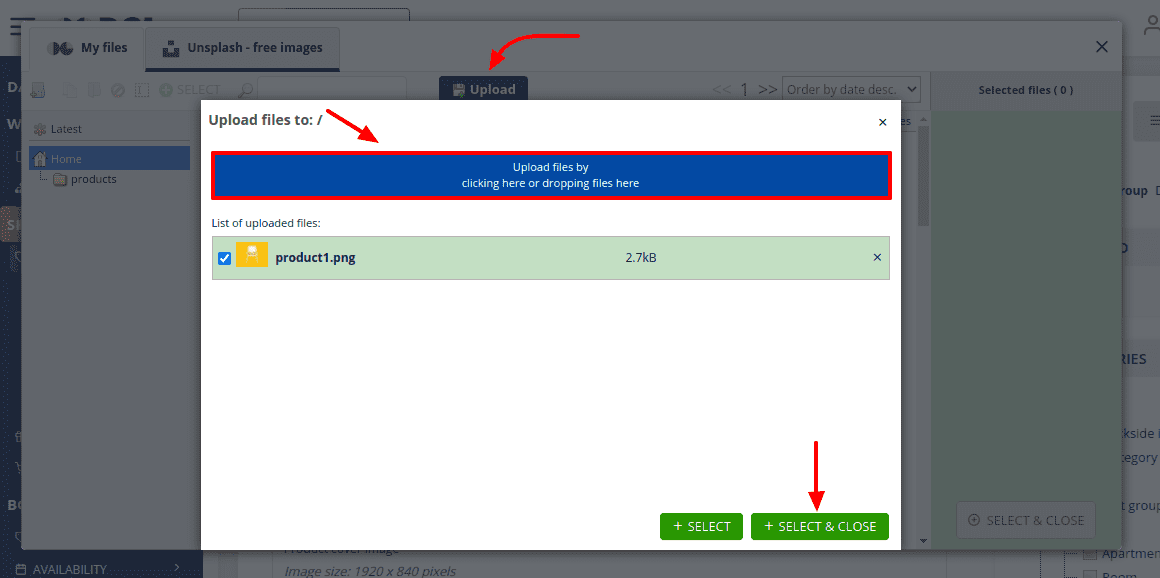
- Click Select files and then Upload.
- Click Upload files by and a new window will open.
- When you have selected a picture, click SELECT and then SELECT & CLOSE.
- How to add an image:

You can add multiple pictures into your gallery.
Note
Once a picture is uploaded it will stay in the File system database, until you manually delete it!
- How to add videos:
- Click Add a video.
- Paste a video URL from either Youtube, Vimeo or any other video sharing site. You can add up to three video links per product.
- Click Submit
 .
.
- How to add videos:

Note
You cannot upload a video from your computer.
The Attributes tab allows you to describe characteristics or qualities of your Booking products. For more information and instructions on how to set up the attributes that you need, please refer to Attributes.
- Once you’ve added all the necessary info about your staff member, click Submit
 .
.
You have successfully added a personnel member to your system. For adding booking products with personnel members, see Add new booking product and follow the instructions.