# Marketing Campaigns Wizard
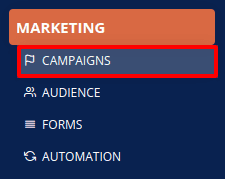
To prepare a marketing campaign, go to the MARKETING section of DG1 and click Campaigns.
To start a new campaign either click the Quick wizard campaign ![]() to create a quick campaign or click More
to create a quick campaign or click More ![]() and then Create advanced campaign
and then Create advanced campaign ![]() to create advanced campaign.
to create advanced campaign.
# STEP 1 - CAMPAIGN - Create a new campaign
First, add the most important elements for your campaign.
- Name - Write the name of the campaign.
- Key - the key is written automatically.
- Description - It is not obligatory. Add a description of your campaign for your internal use.
- Segments - Select a segment you wish to use for the campaign.
- Mailing lists - Obligatory. Select a mailing list. The default one is set automatically.
- Schedule processing - Not obligatory.
- Language - Obligatory. Set the language. By default, the English language is selected.
- Click Next

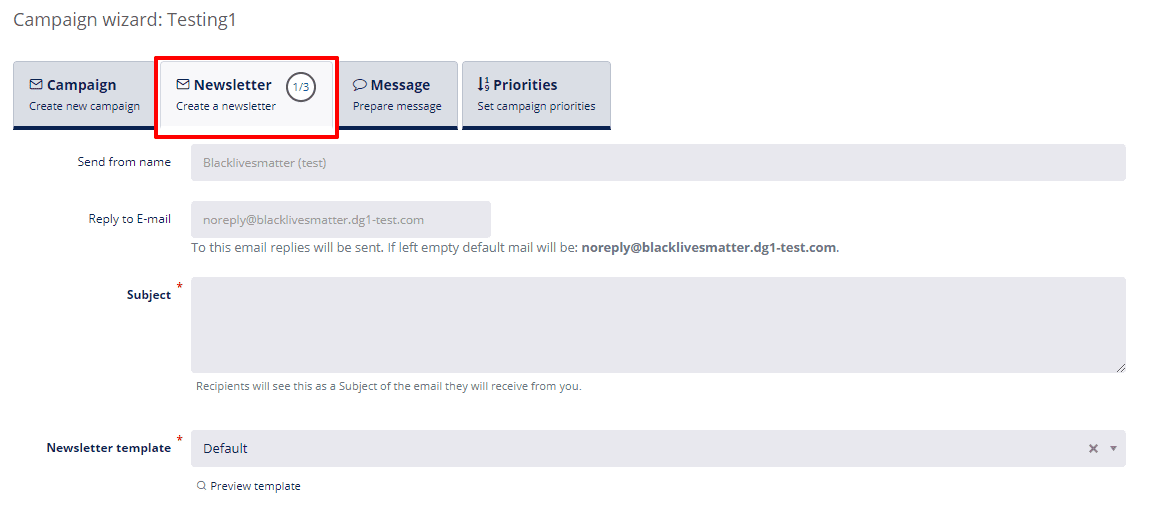
# STEP 2 - 1/3 -CONTENT - Create a newsletter
To avoid this step, simply click Skip ![]()
- Send from name - Not obligatory. By default, it will be your site’s name.
- Reply tp E-mail - Not obligatory. Is is set automatically to “noreply”.
- Subject - Obligatory. This will be the subject of your newsletter and will be the first thing your contacts read. Make sure it’s a powerful and well chosen subject.
- Newsletter template - Obligatory. It is set to default. You can select a different one and also preview the template.
- Click Next

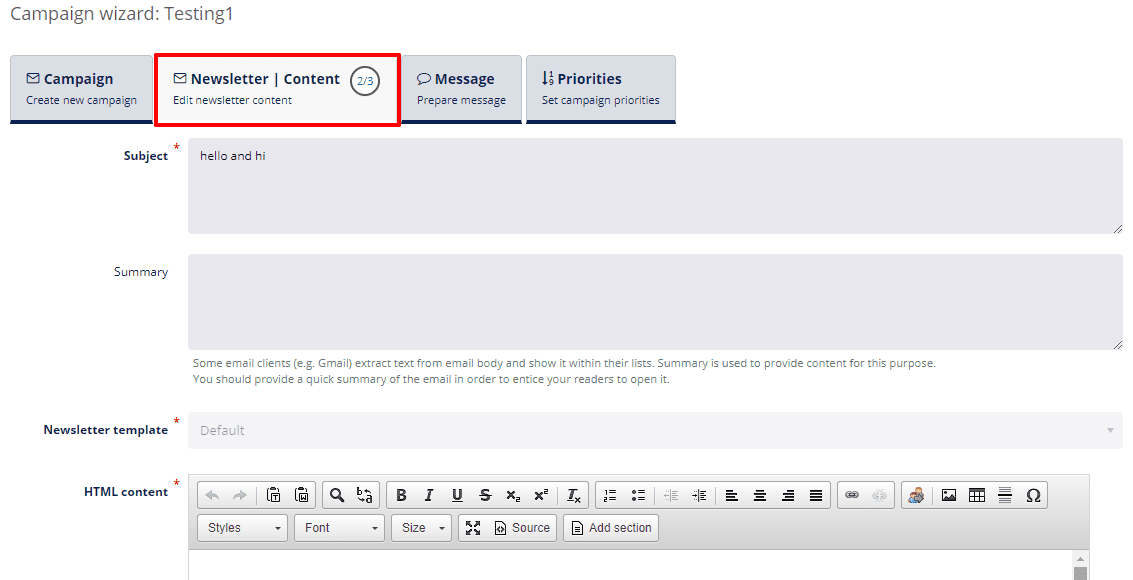
# STEP 2 - 2/3- CONTENT - Edit newsletter content
- Subject - change the Subject if you wish to.
- Summary - add a short summary of your newsletter for those who use extracted email views.
- HTML content - this is where you create your newsletter.
- Click Next

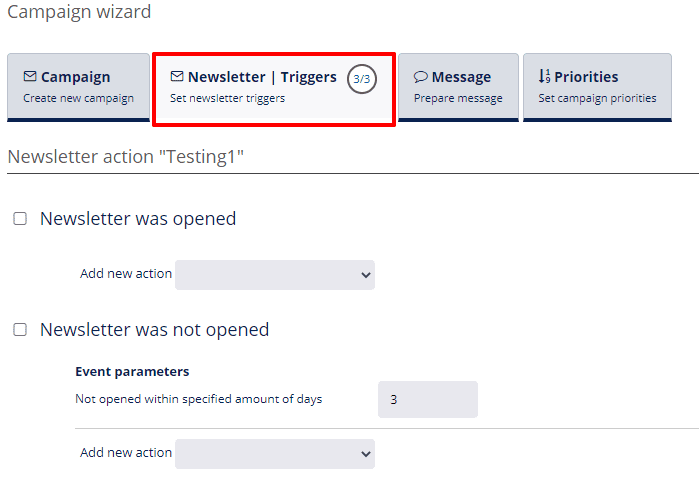
# STEP 2 - 3/3 - TRIGGERS - Set newsletter triggers
To avoid this step, simply click Skip ![]()
- Choose between triggers Newsletter was opened and Newsletter was not opened, Link was clicked and Form was clicked (if you added a link to the newsletter) or create automation for all four situations.
- Select the Autoresponder you wish to send and when should it be sent.
- You can send multiple Autoresponders by clicking Add new action.
- Click Next

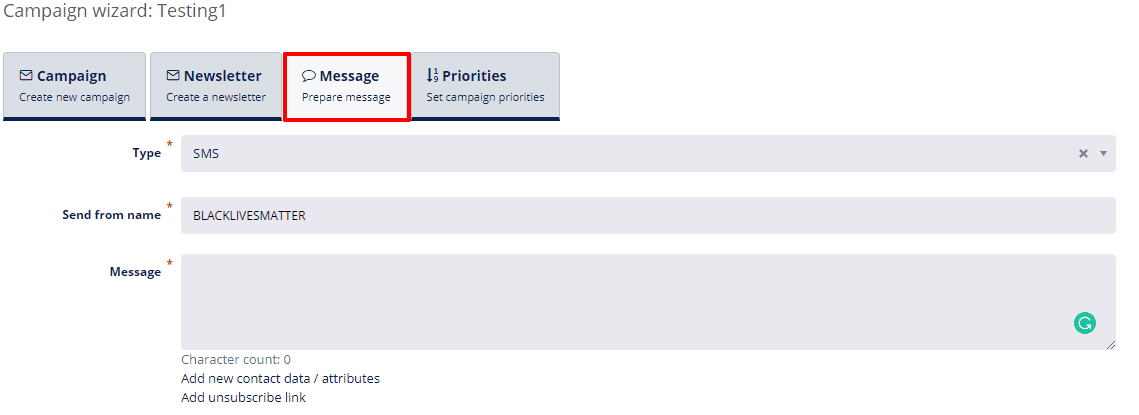
# STEP 3 - MESSAGE - Prepare message
To avoid this step, simply click Skip ![]()
- Type - SMS.
- Send from name - change it or leave it as it is. It is added automatically.
- Message - type your message. Be aware that you can and should use Contact data and attributes for personalized messages. When adding attributes and contact information, be careful how you form a text around them. Example: Dear [[contact:firstname]], because we know you like [[contact:attribute:favorite_dish]] we would like to tell you that our online shop offers all the ingredients so that you can prepare your favorite dish at home. Please visit www.organico.com and use this special promotional code 12345 for your discount.
- Click Next

# STEP 4 - PRIORITIES - Set campaign priorities
If you wish to avoid sending Newsletter and SMS to one contact at the same time, please select higher priority (1) to the communication channel you wish to use first. Make sure you add the lower priority (2) to the other communication channel. Should the prioritized communication channel fail for any reason (Example: wrong email, wrong number), the other channel will be used.
- Set priority for the newsletter. Select 1 if the newsletter is the channel you wish to use as a priority. Select 2 if Message will be your no. 1 priority.
- Set priority for the message: Select 2 if the SMS will be sent only in case the Newsletter will not be sent successfully. Select 1 if message is the prioritized channel.
- Select 1 for both if you wish to send your marketing campaign to both channels.
Note
Do not select 2 for both channels.
